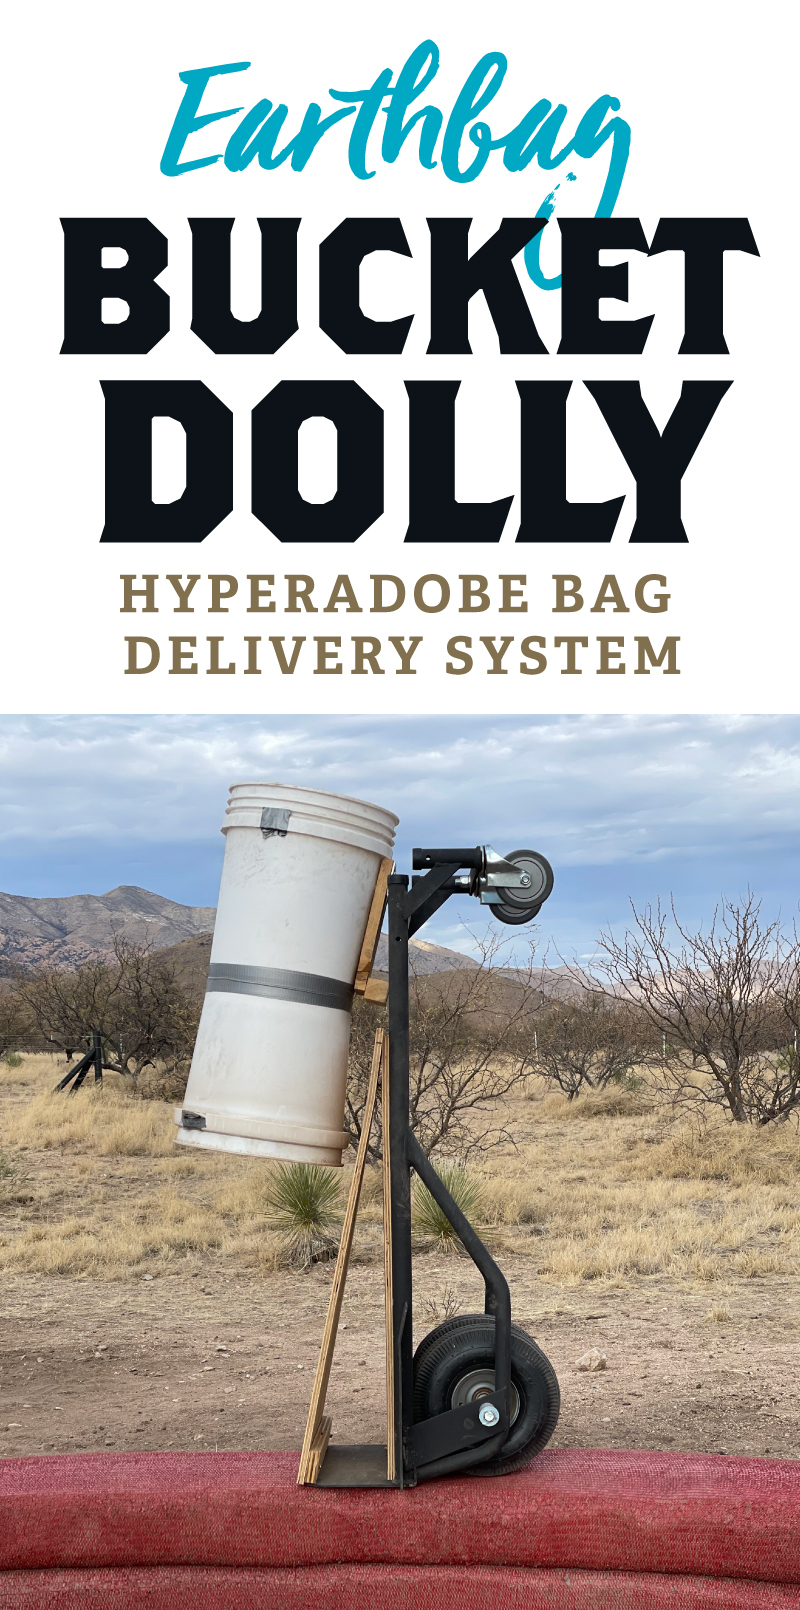
Hyperadobe Earthbag Dolly Bucket System + How We Lay Our Hyperadobe Bags
Let’s talk details about how we’re laying our hyperadobe earthbags and the systems we’ve implemented to make our build go as smoothly as possible. Hopefully this will help someone looking to build this way in the future. Let’s dig in, shall we?
Bucket Dolly Delivery System
Through our research, we’ve seen this bucket system more than once, but could never find information about how it was put together. We’d pause videos, zoom in as close as we could, and squint to try to make out exactly how it was built, until one day we were just like, screw it! So we built our own version - here’s how we did it:
Buckets + Brackets
For the bucket system you will need two five gallon buckets. Simply cut the bottom of one five gallon bucket, and on the second bucket, you’ll cut all around the side about 4 inches from the bottom of the bucket. The second bucket will slide over the first bucket creating one large bucket with the bottoms connected with duct tape.
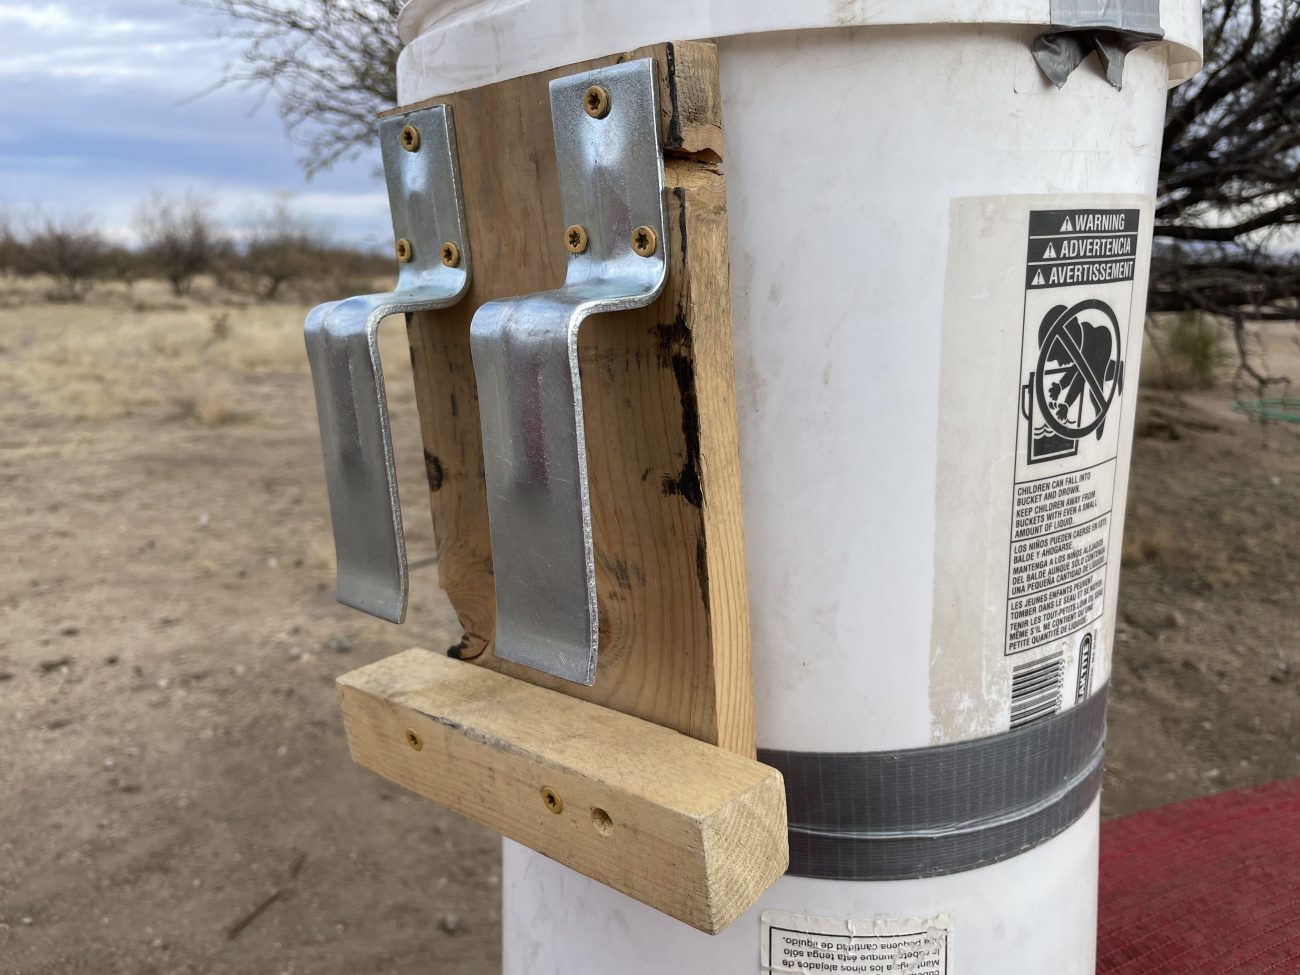
Now comes the hard part. With much trial and error we finally figured it out! We used scrap 1x6 and 2x2 pieces for this part along with 1-5/8” screws. We cut two pieces from the 1x6 scrap that measure 3x5 and 5x9 and a 2x2 piece that measures the width of your dolly. Ours is too short here and we’ll be replacing it very soon.
Screw the smaller 1x6 piece into the bucket from the inside while holding the larger piece on the outside. We added more screws going from the outside to the inside just for added security. Once your wood pieces are attached, add your 2x2 spacer to the bottom. This may take some trial and error to decide where it best fits your dolly. Next, grab these metal brackets that will allow your bucket to hook onto your dolly.
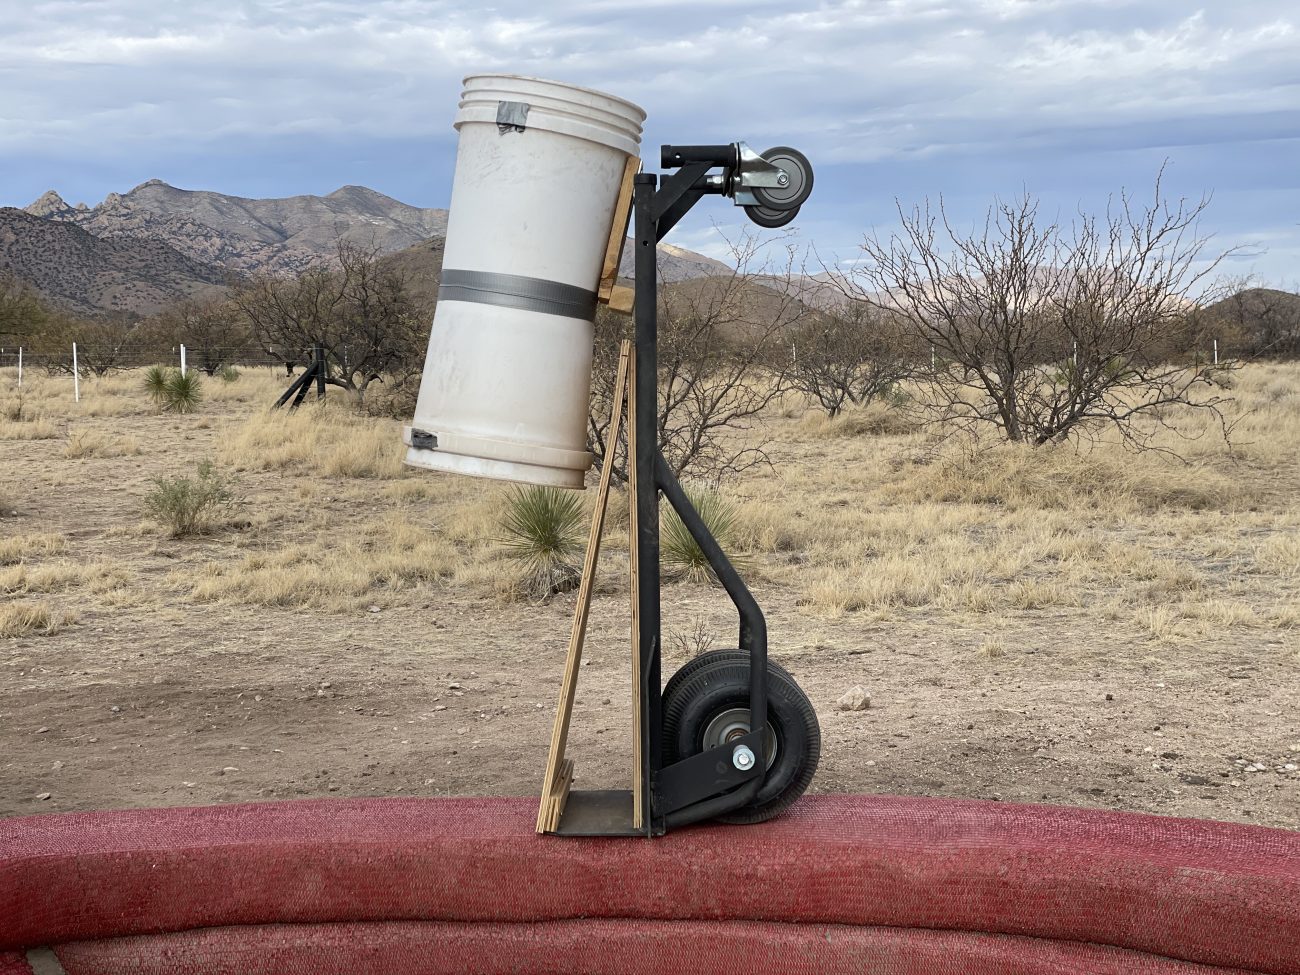
You should end up with something that looks similar to our bucket system here.
Dolly Wheels to the inside
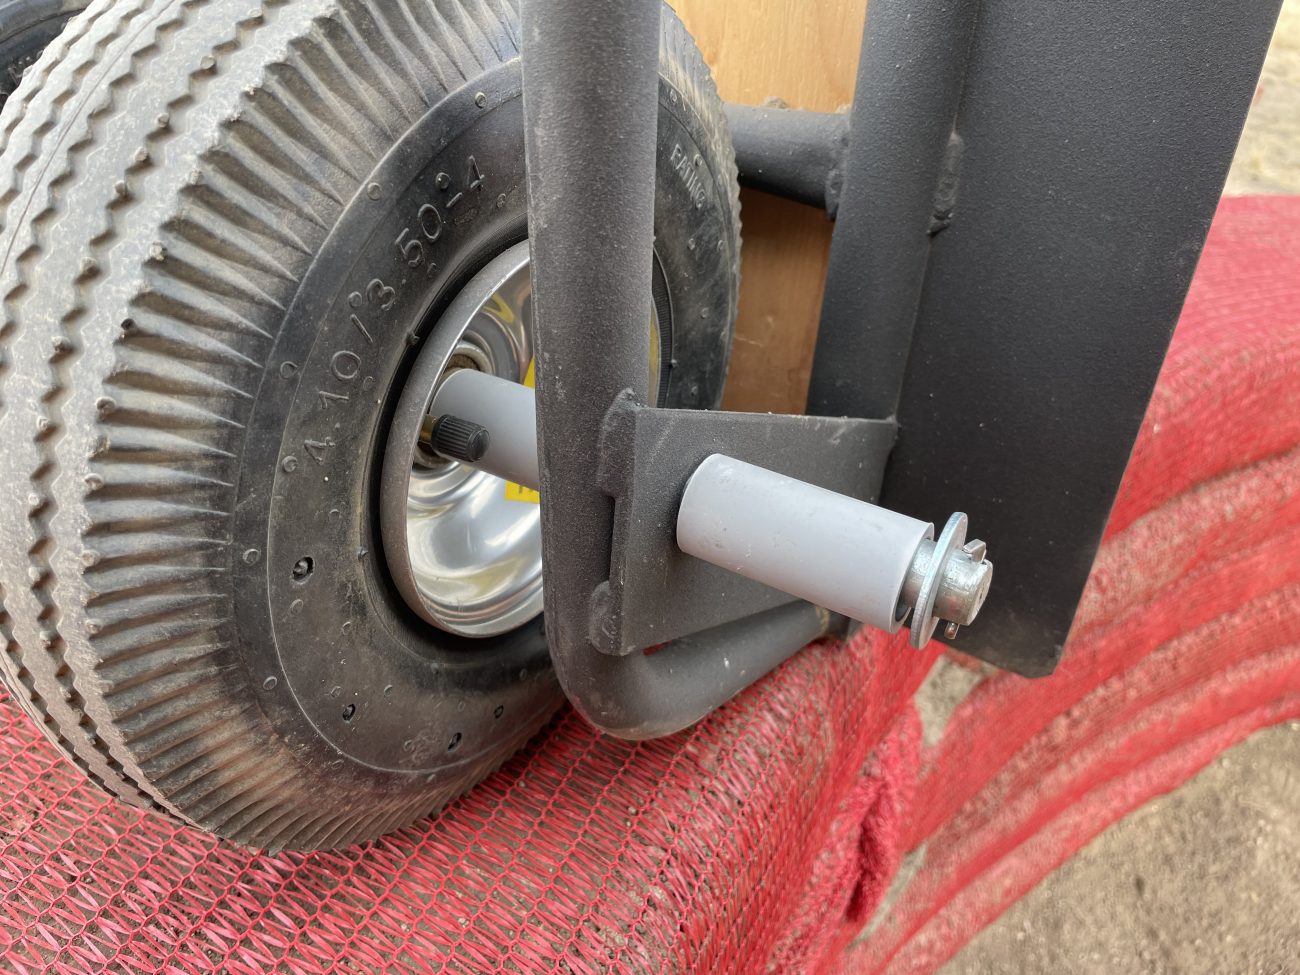
When picking out a dolly, you’ll want to BE SURE that the axel can be removed. Look for a dolly with cotter pins and an exposed axel so that you know you’ll be able to remove that axel. For this part, you’ll need conduit that will go over your axel, we ended up using 1” scrap that we had already. You’ll also need a way to cut the conduit.
Remove the cotter pins, wheels, and the axels. You’ll measure your conduit pieces so that you’ll end up with 5 pieces to space the wheels on the inside of the dolly. Your measurements will likely be different than ours, but make it to where the wheels are as far apart (on the inside of the dolly) as possible.
It should look something like this when you’re done.

Dolly Frame
The dolly (or handcart) we found has a metal bar the runs down the middle which made adding the triangular frame to it pretty simple. We just used 5/8” plywood that we had on hand and cut it to the width of the dolly and as high up as you think you’ll need. We could have gone up higher with ours though.
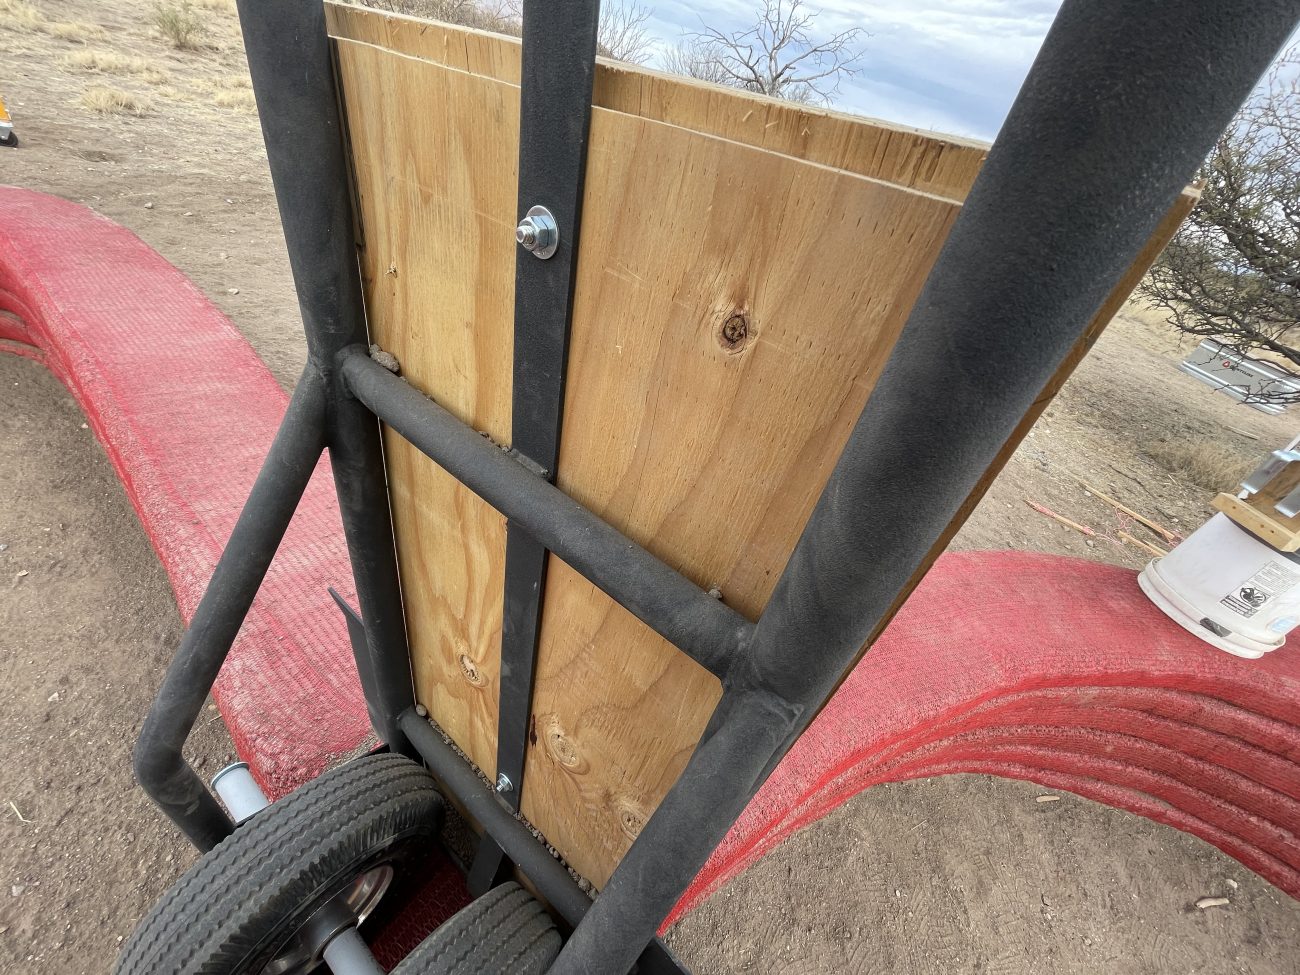
We drilled two holes into the center bar of the dolly and attached the back piece of plywood with bolts. This is plenty secure as long as your back piece of plywood extends to the outside bars of your dolly.
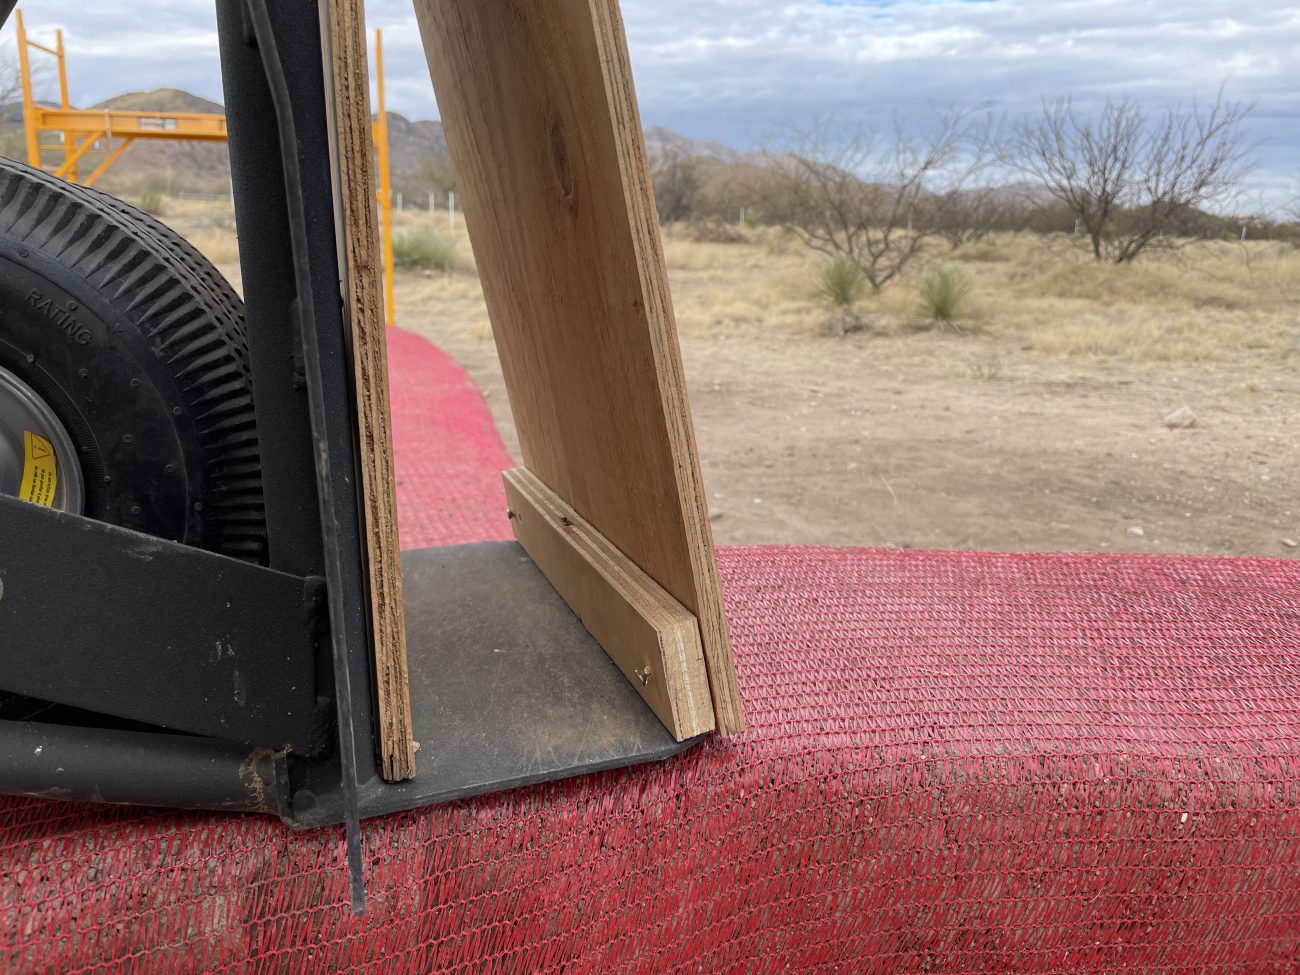
Now for the angled part, if you’re more handy with tools and have more options than we do, you could probably cut this to a correct angle, but we did it the cheater’s way. We used scrap 3/4” plywood and attached it to the front piece of plywood so that when it sits on an angle the inside piece of plywood acts as a lip and the angled piece is flush with the bottom of the dolly. Just take a look at this picture which likely explains things better than I just did :)
Wahoo! Now that you’ve made your own dolly system, let’s talk about the way we are laying our hyperadobe earthbags. Now, there are likely thousands of ways this can be done and the majority of it just depends on your soil. We lucked out and our soil actually has quite a bit of clay and sand in it already, so…let’s get into the details of how we’re laying our bags.
Laying Hyperadobe Earthbags
Hyperadobe bags are a little new in the earthbag world, and we couldn't find a ton of information on them. We're still learning, and may update our recommendations here, but this is what we've learned so far.
Measure, Cut & Tie Your Mesh Bags
First you’ll need to measure and cut your bag. We’ve opted for the hyperadobe mesh continuous bags on this build, but we’ll eventually be experimenting with another style on a future project.
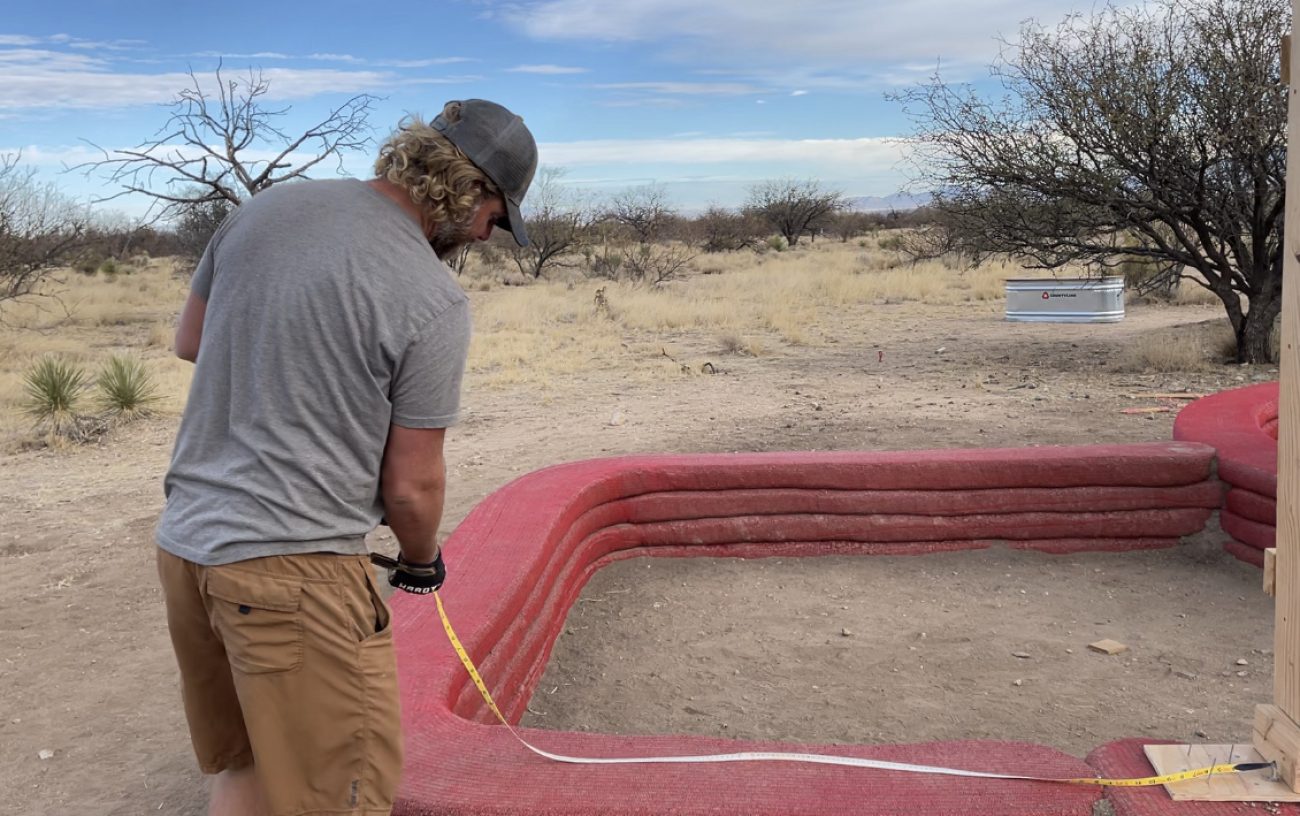
We use a flexible measuring tape to lay in the middle of our bags and determine how long it needs to be. Make sure you add 2’-3’ extra because you’ll be tying off the ends of the bags. We just use a standard pocket knife or box knife to allow for a clean cut to the bags.
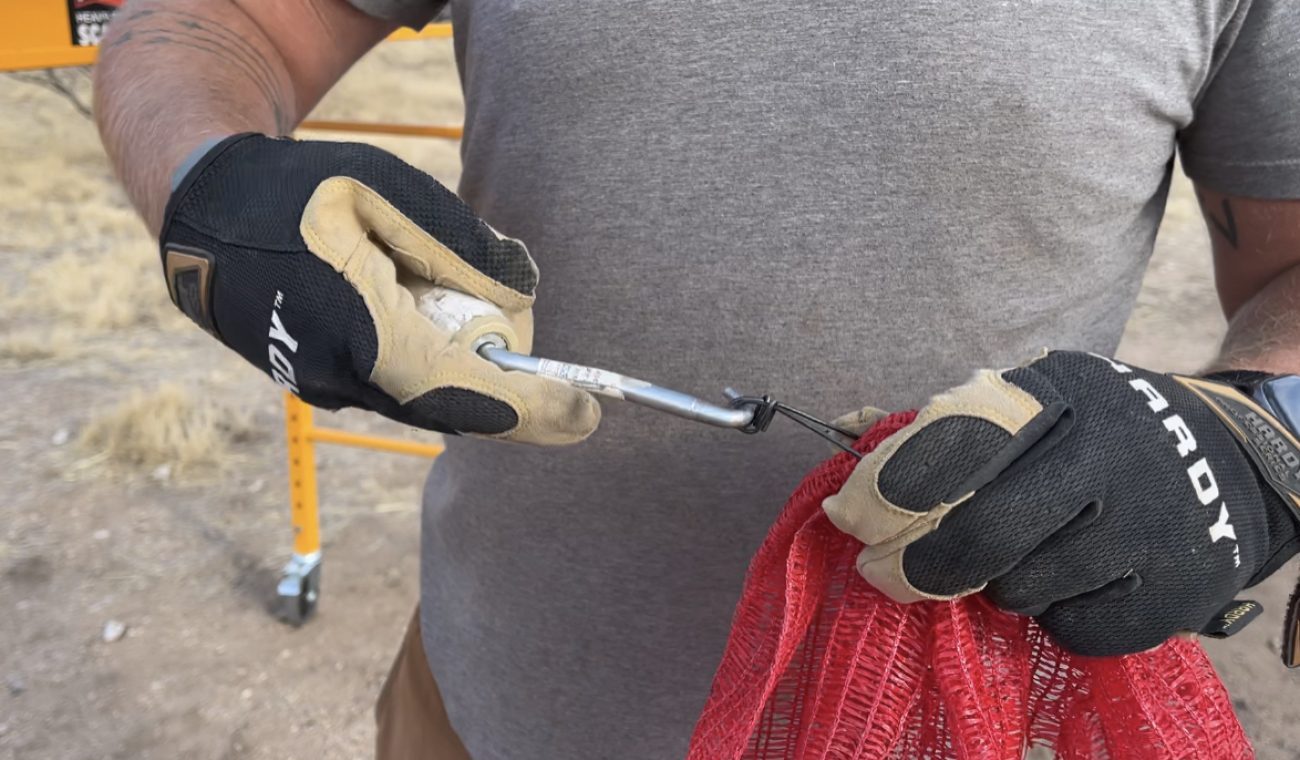
Now that you have your bag cut, you’ll need to tie off one end. We’ve seen people just tie a knot at the end, and that works, but it uses extra bags so we like using these rebar ties instead. You can find rebar ties and the twisting tool to twist them at any big hardware store. Now that your bag is tied off, we like to pull it inside out so that the tied end is on the inside of the bag. This is not necessary, but it makes the bag look real clean on the ends.

Put The Hyperadobe Bag on Your Bucket
With the bag pulled inside out, you can now thread it onto your bucket. Start at the bottom and just scrunch it up. We’ve found that 46 feet of bag is pushing our limit of what this bucket can hold. We could likely squeeze on 50’ of bag, but thankfully our building isn’t that big :)
Now that the bags are on the bucket, you need to secure them. We use an exercise band that we just tied to fit snug around the bags. This will allow the bags to slowly let out once you begin filling them with soil.
Mixing Your Material - Clay Soil with Water & Cement
Like I mentioned before, we really lucked out with the type of soil we have on our land. We have a few friends that come help us move dirt from one part on our land that will eventually be turned into a pond. We then sift the dirt through 1/4” screen and we’re good to go.
For our mixture, we’re adding 12 parts of our native sifted soil to 1 part Portland cement. This gives us added assurance that our mixture will stick together nicely. On the bags that are below grade, we used a 12:2 ratio for extra stability.
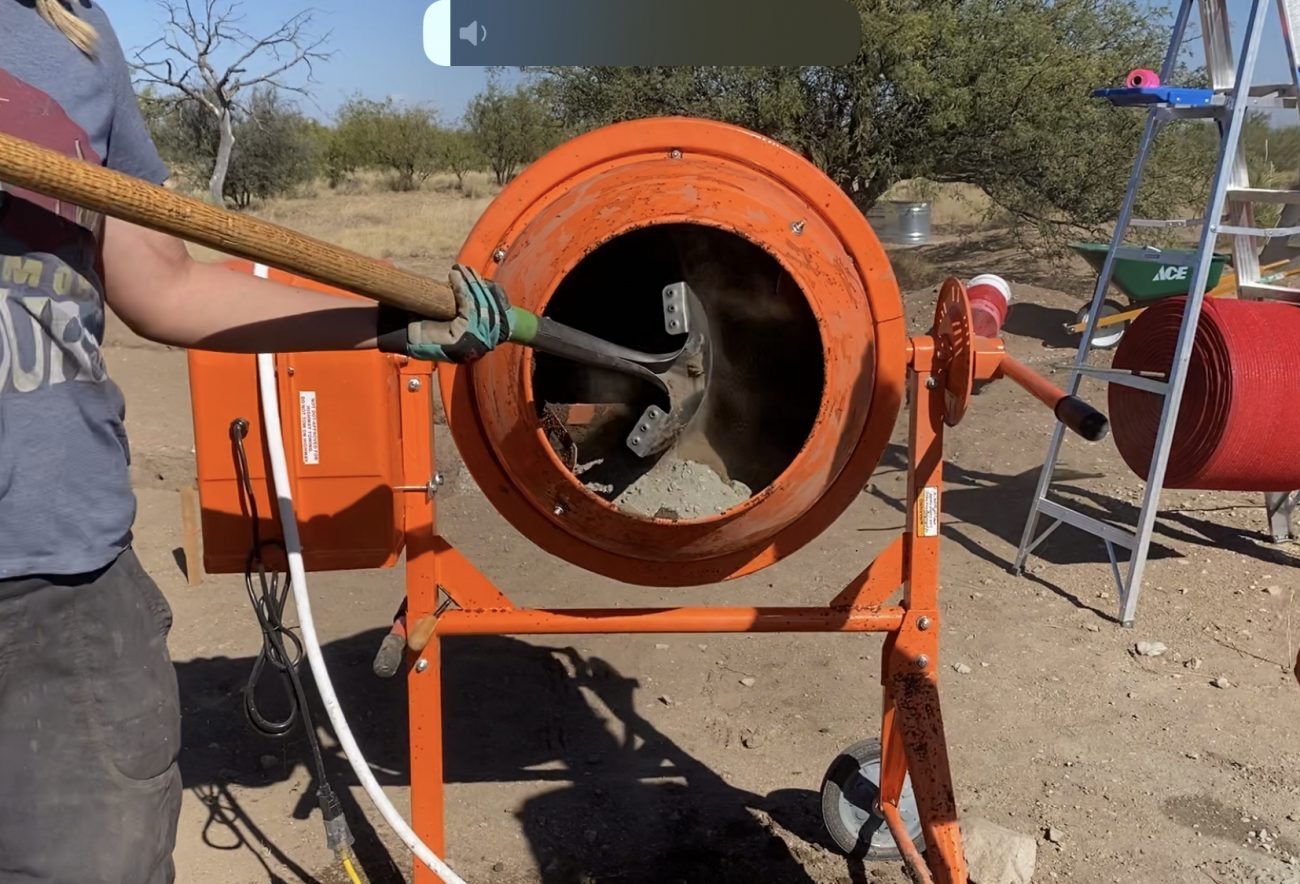
Throw the cement and the soil into our cement mixer, mix it up dry, then we just add enough water to get the consistency that we’re looking for. You’ll want to be able to form a ball in your hand and have it hold shape easily. Too wet and your mixture will be difficult to tamp, but too dry and your mix will likely not stay together. It’s a fine balance, but not too difficult to figure out.
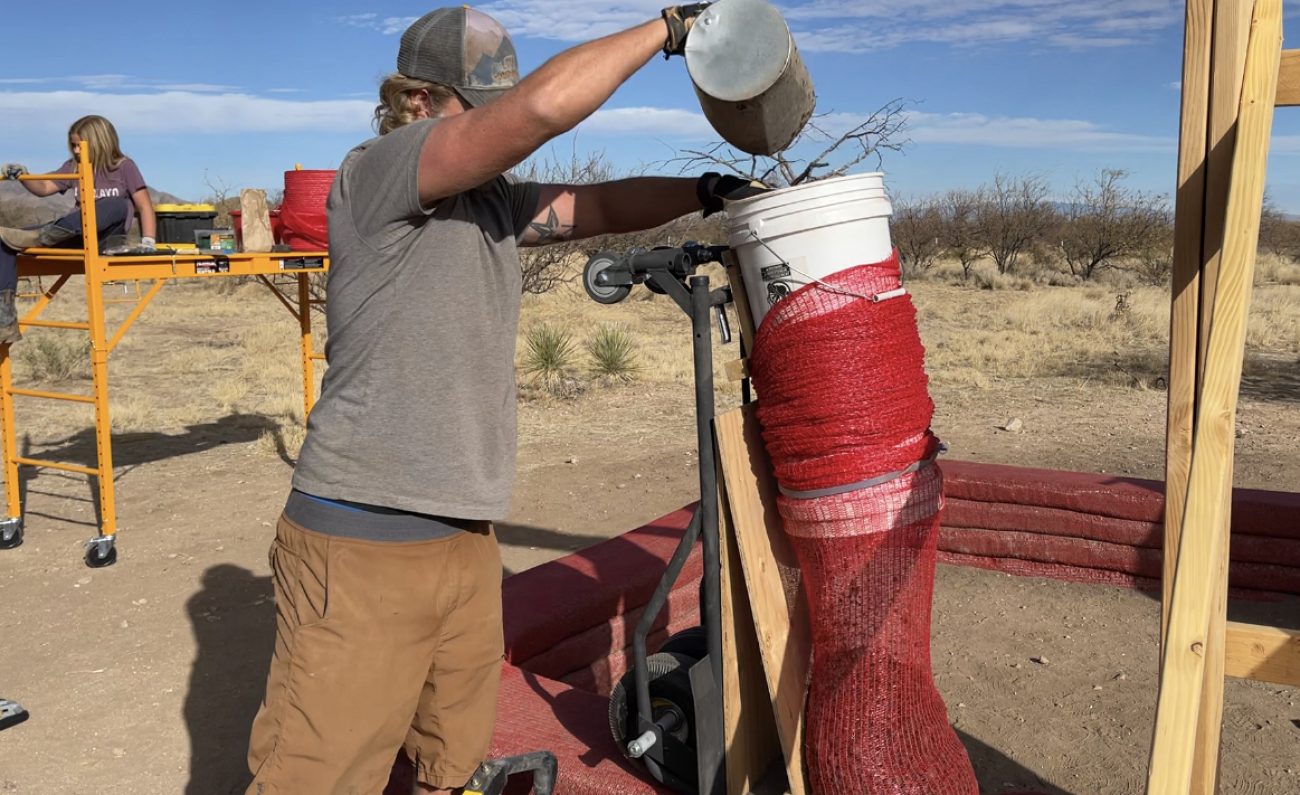
Fill Bags, Let Out & Form
Now comes the fun part - filling the bags! We take the mixed, damp material, dump it into our handy Gorilla Yard Cart, and bring it over to the area of the wall we’re working on. Many people use coffee cans or other small buckets, but we really like this feed scoop.
With your bucket system in place, start the process. The elastic band should allow the bag to let out slowly for an even fill. Ends are a little tricky. We usually fill about a 16” of dirt, pick up the bag and drop it against the ground a few times to flatten the end. Then we “swing” it up so the flattened end butts up against the wall or other bag it’s next to. Cal-Earth calls this “Hard-Assing” which is hilarious.
From there, you want to fill the bags all the way up into the bucket so that as you move the dolly back, the bag is let out evenly. Don’t be afraid to spend some time forming the bag before tamping. We’ve found that “getting it where you want it to go” is much easier by hand, and creates more uniform, flat bags.
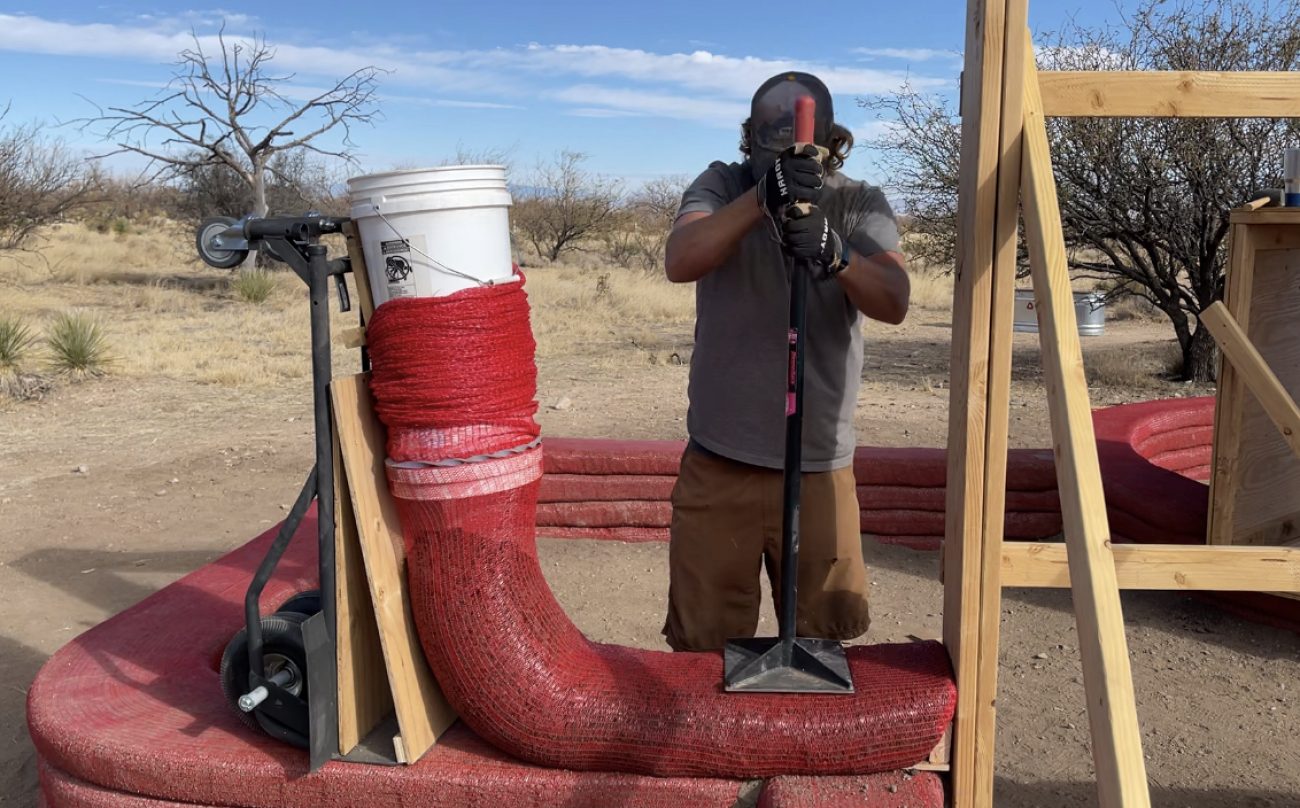
Tamping the Top & Sides
On our very first bag layer we made the mistake of tamping when we finished the entire 46’ bag. The first part had dried out too much by then, and we didn’t get the structure we were hoping for. So we learned it’s important to tamp as you go.
But if you tamp too close to the dolly, you can run into issues as well (since there’s still a lot of movement near the bucket, it could crack what you’ve done). Hyperadobe earthbag has a lot of “fine lines” in its process, and this is one of them.
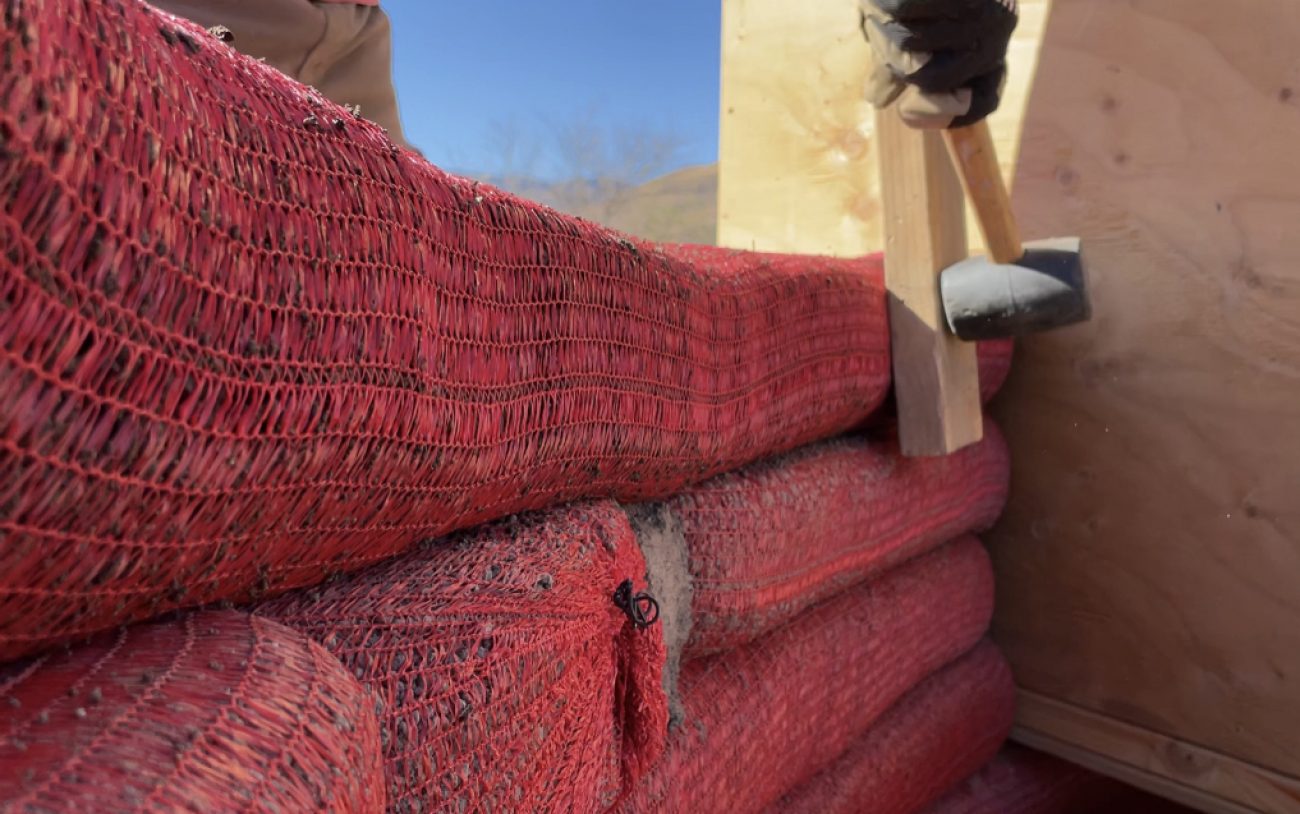
You’ll need to tamp on the material pretty hard to get it to compress. Don’t be afraid to really whack it.
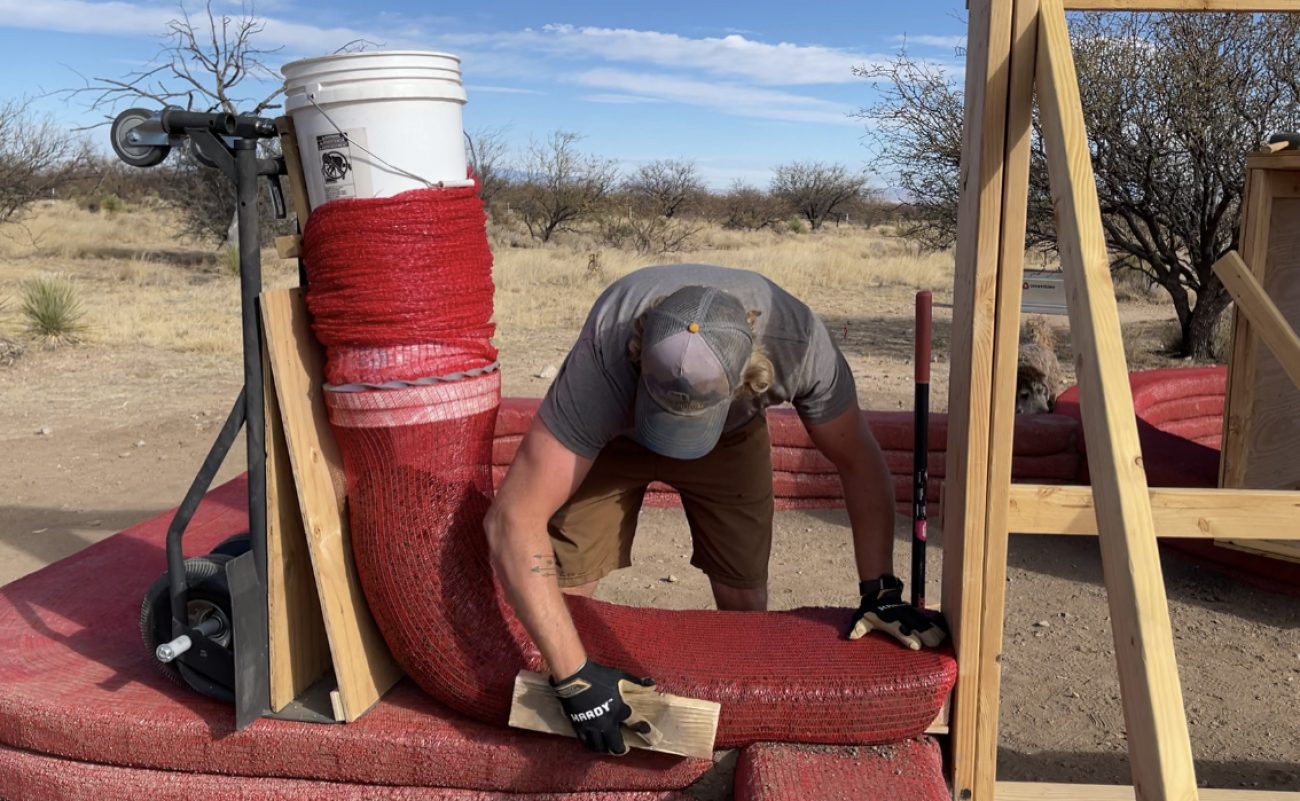
We take the extra step of tamping the sides with a 2x4 to ensure uniformity, and to make sure the sides are solid as well. This will also aid in our finishing as we'll use less material to fill in the cracks this way, as opposed to having rounded bag walls to work with.
It’s ok to come back and make changes, too. Sometimes you’ll think it looks good, but catch at a different angle and see that it’s not level. You’ll get the hang of it.
Tie Off Bags at End
As you get towards the end of your run, you may need to ditch the dolly, especially if you’re coming up against a hard surface like a door or window frame.
Take the bucket off in plenty of time so you don’t get stuck, and then just hold the bucket the rest of the way.
As you get even closer, remove the bag from the bucket and hold it by hand. Now you need to finish the end. We’ve been using our re-bar ties, but are considering just twisting and folding under because it’s difficult to hide those ties properly on the outside.
Knowing how much of the bag to fill, and how far it will come out after tamping takes a lot of trial and error. But you’ll get a feel for it quickly.
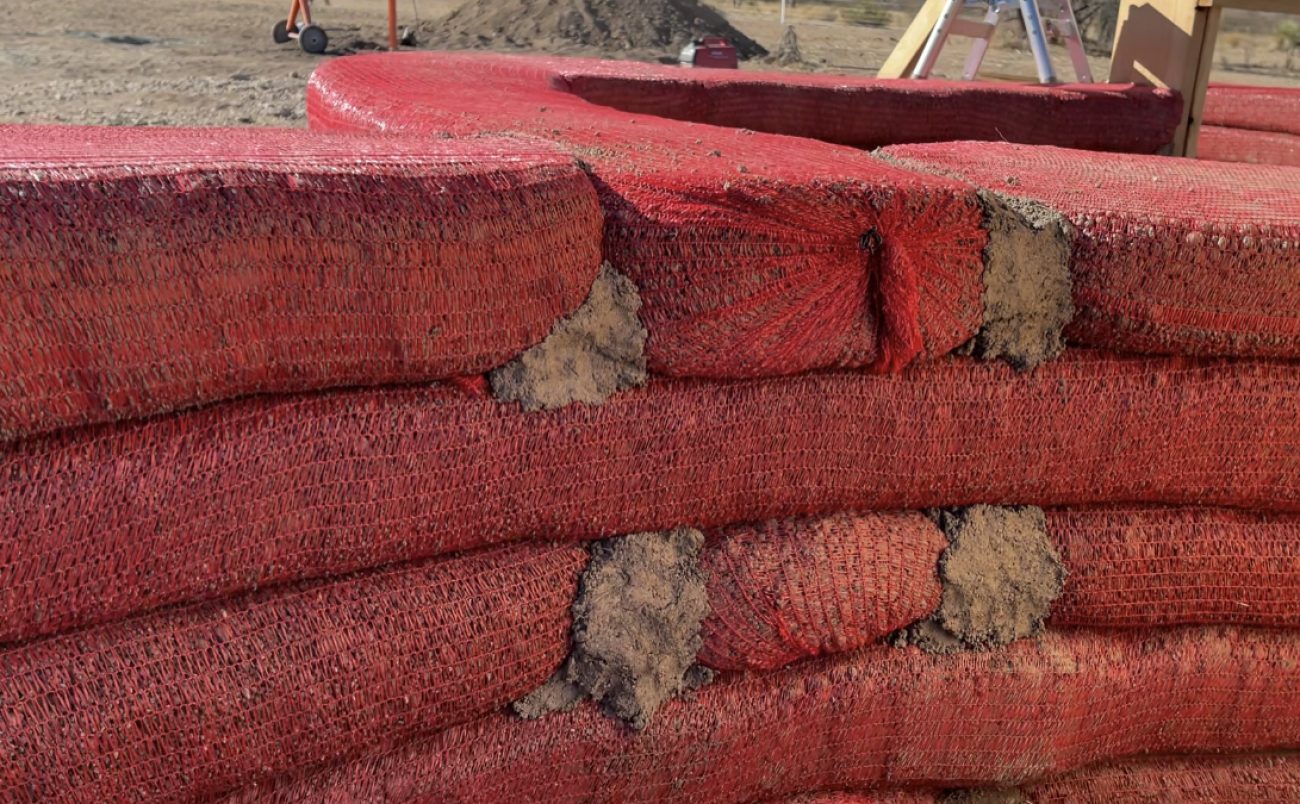
Overlap Bags at Intersections
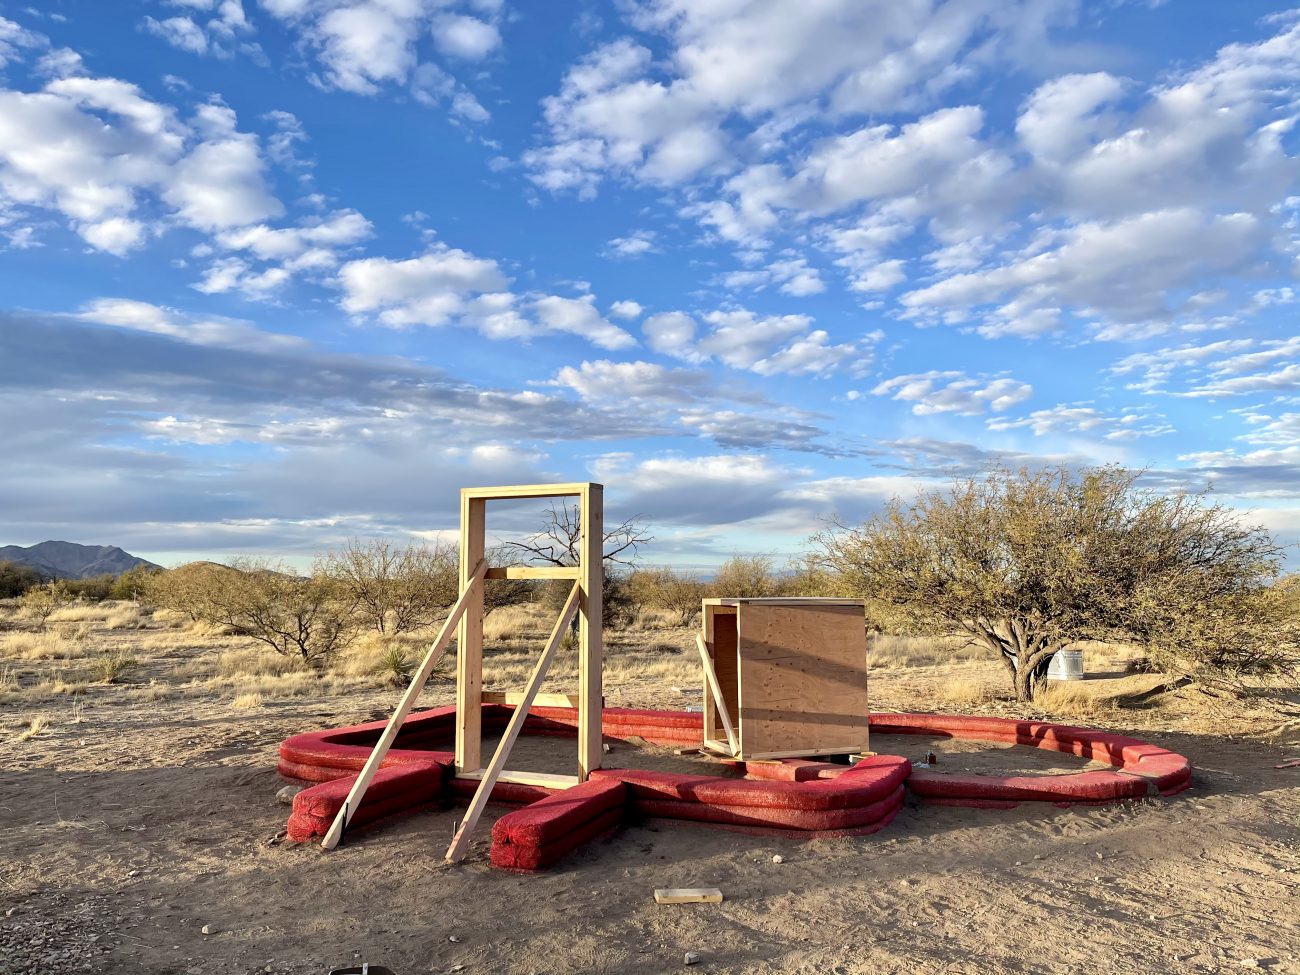
One more thing to keep in mind is buttressing and overlapping. For any non-framed entry way or a wall longer than 10’, you need buttressing support.
The buttress should interlock or overlap every other layer so they hold the wall in place. You should also interlock for any walls that intersect. In our case, the circle area intersects the dome, and we make sure to switch which wall overlaps on each layer.
Whew! We’re still in the middle of this project, and hope to share more details soon - but we hope that explains this process in detail and will help others who might be building with hyperadobe earthbags. Let us know if you have any questions in the comments.
Apparel
Grab a fun, comfy t-shirt & help support our family.


About the Author
Jonathan Longnecker is the strongly opinionated tattooed and bearded half of Tiny Shiny Home. He loves making music, figuring out nerdy solutions, exploring the outdoors, and living off-grid.
comments powered by Disqus