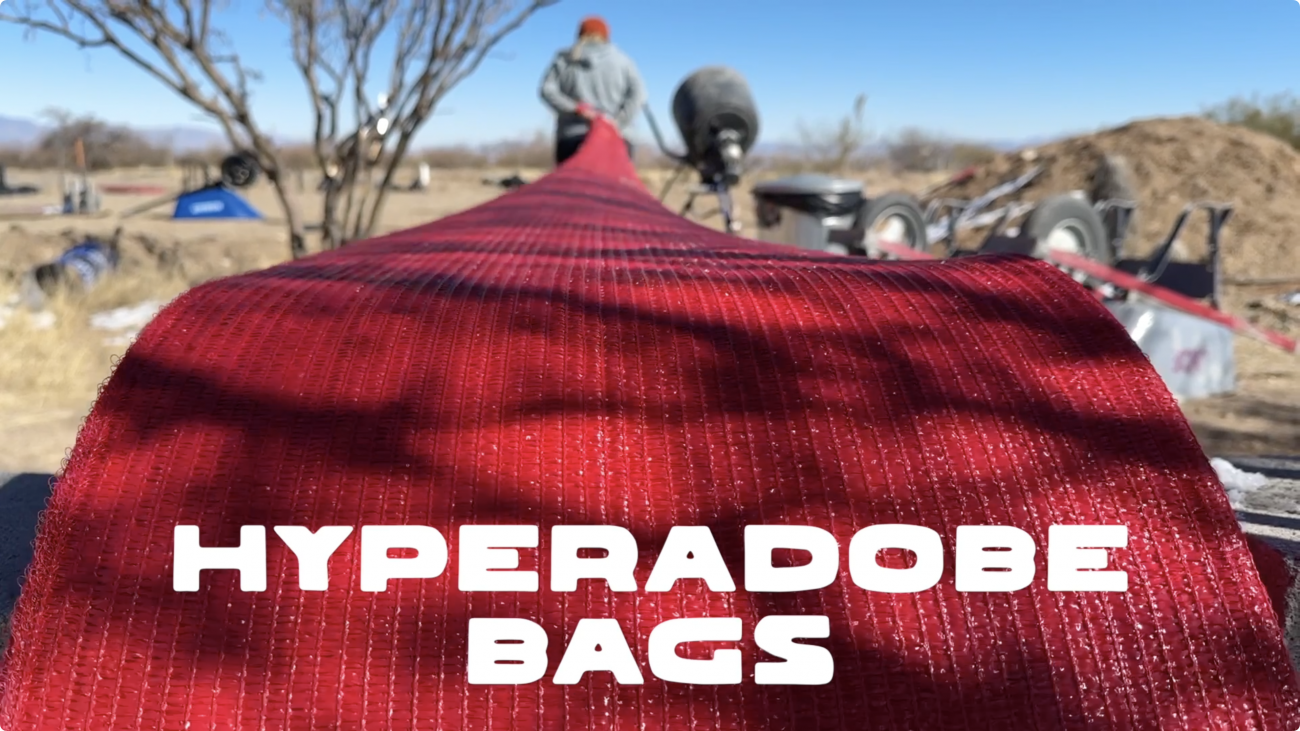
The Ultimate Guide to Hyperadobe Earthbag Building
Today we’re going to share everything we know about hyperadobe earthbag building - these UV treated raschel mesh tubes present exciting new opportunities, safer build sites, and huge cost savings for those of us building with soil.
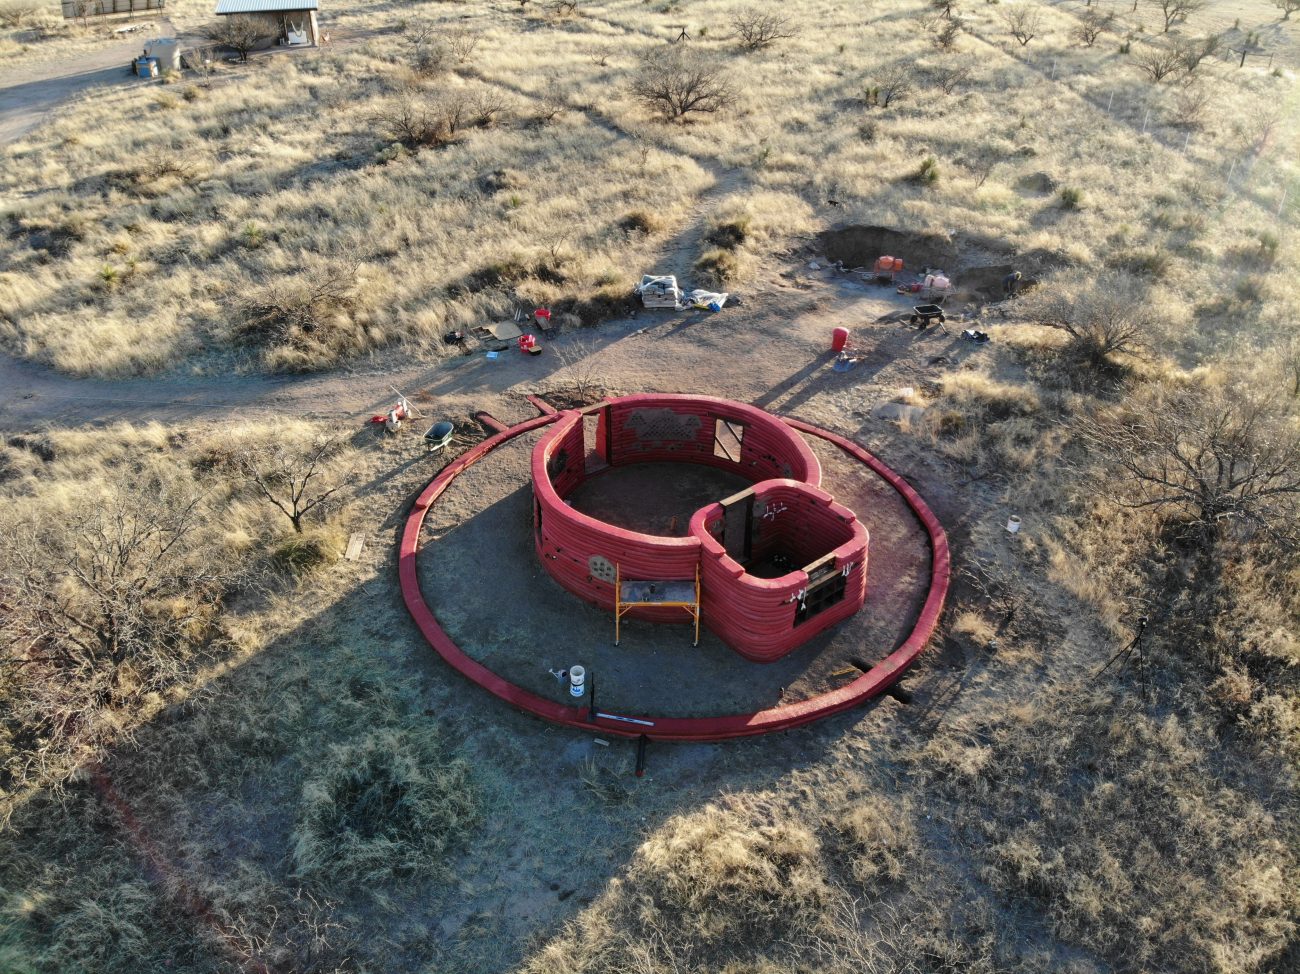
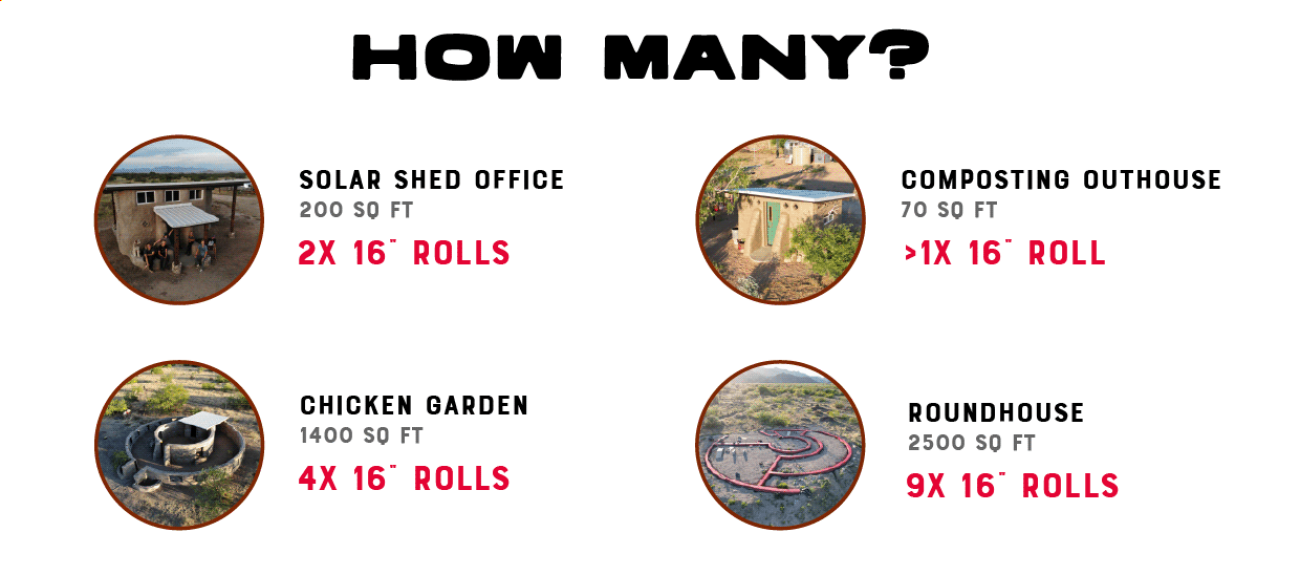
Since hyperadobe is so new, there’s not a lot of information out there. We’ve been furiously experimenting the last 4 years with it, building a solar shed office, a large outdoor chicken garden, a small composting toilet outhouse, and have taken everything we’ve learned from those projects to design a huge 2,500 square foot roundhouse for our family - all while documenting every step here on our YouTube channel.
So today, we’re going to do our best to condense all that knowledge - the pros and cons, wins and losses, and all the tips and tricks we’ve learned along the way into a single video so that you’ll be fully armed to go build your own hyperadobe dream home. Plus at the end of this article we’ll share some ways we can help with your specific project if you need it. Let’s get started.
Sections
- History
- Benefits
- Earthbag Basics
- Tools
- Bag Types
- Bag Sizing
- Calculating Bag Amount
- How To Lay, Fill & Tamp Hyperadobe
- Advanced Techniques
- Windows & Doors
- Roofing & Plastering
- Buy Hyperadobe Earthbags
- Questions?
History
We’re not going to get too deep here, but it’s important to know when, where, and why these building techniques came to be. Stacking bags of dirt has been around over 100 years. The military used them for flood control and bunkers because they were cheap, built quickly on site, and could even stop a bullet.
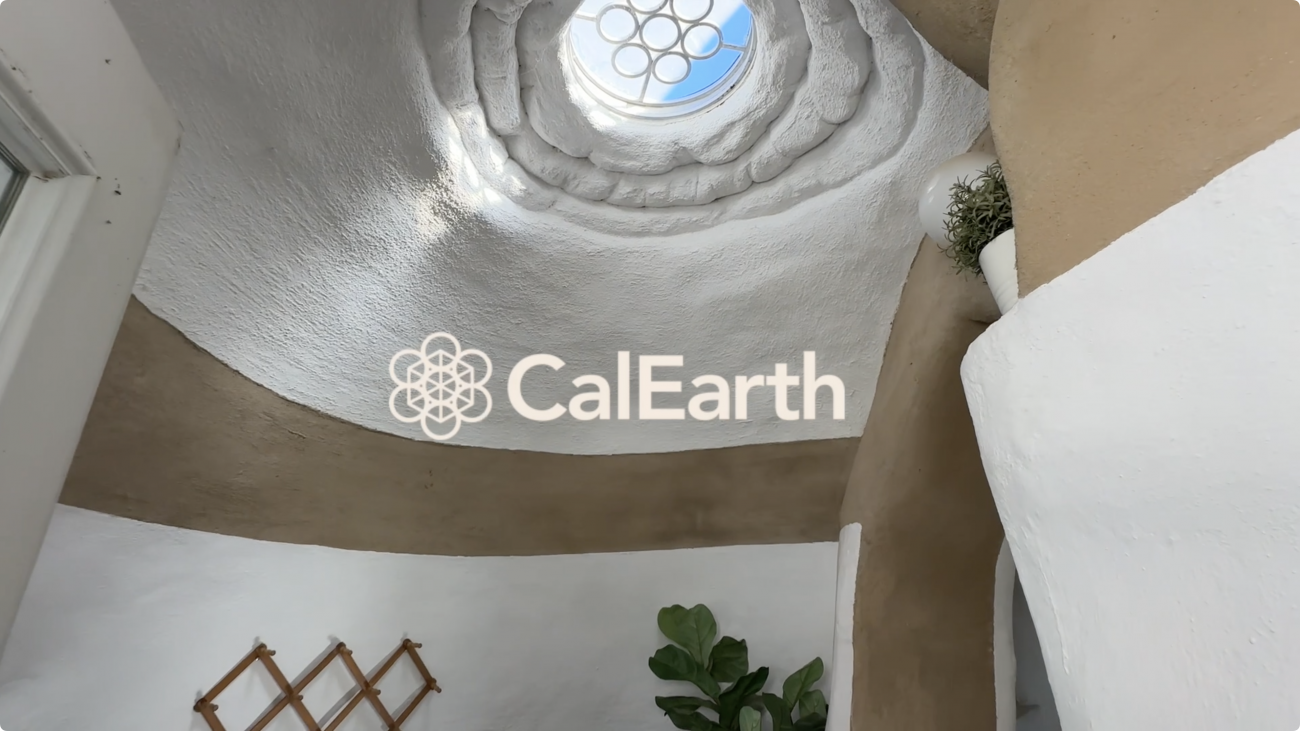
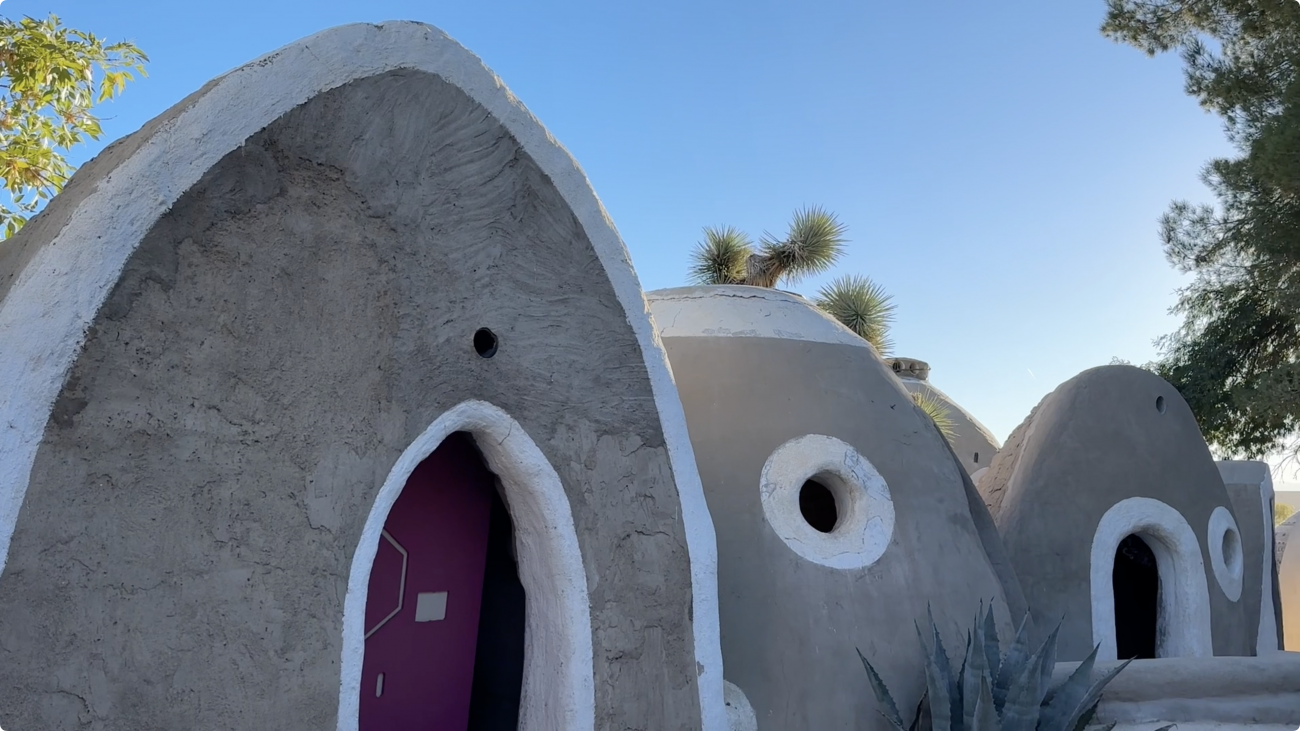
We’ll fast forward to the 1980’s where Nader Khalili popularized more permanent earthbag buildings at the Cal-Earth Institute. He combined ancient dome and arch construction methods with sandbags and strands of barbed wire to create a monolithic structure resistant to fire and earthquakes.
He further improved it by implementing “superadobe” or long tubes of enclosed polypropylene bag material that would be filled with earth, moistened and then tamped into a formed adobe brick. This would allow anyone anywhere in the world to build an earthbag structure with just manual labor and minimal tools.
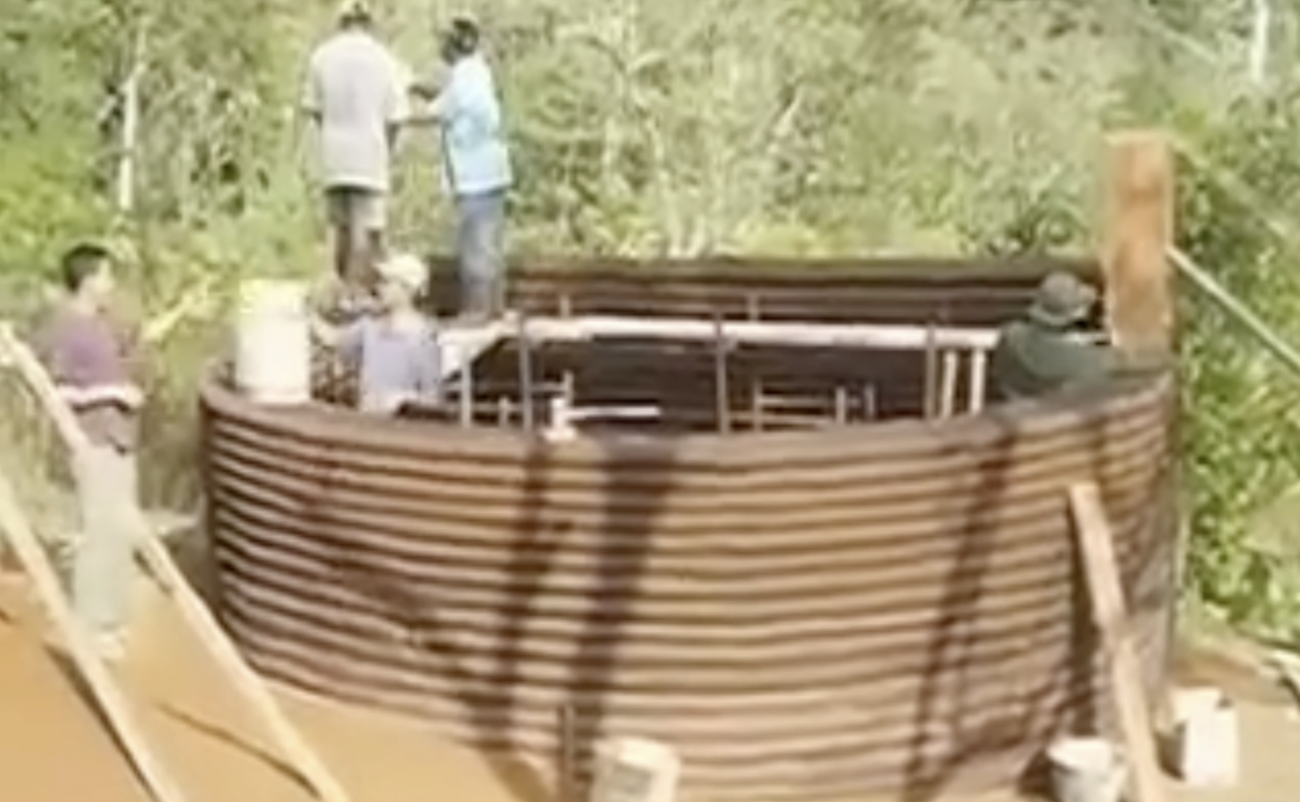
Nearly 30 years later, Fernando Pacheco developed the hyperadobe earthbag method. This focuses on building vertical walls using raschel knitted fabric - kind of like what you’d see fruit packaged in at the grocery store.
Not only does this mean you’re using a fraction of the plastic material around the dirt, but it costs about half as much as superadobe and doesn’t need barbed wire because the open netting allows the material from the lower layer to lock into the new layer above.
Having spent extensive time building this way we really think it might be the future of natural building - but that’s a big claim. Let’s talk about why you might want to build with earthbags.
Benefits
In our recent video about why natural building is so important, we talked about how constructing shelters used to mean you used what you had around you. Then the industrial revolution happened and 2x4’s are getting grown halfway across the world, milled thousands of miles away, and then transported even further.
Building with local materials like native soil drastically decreases energy use, pollution, and waste.
Traditional construction is also full of all kinds of chemicals that can cause cancer, tumors, thyroid issues, and respiratory problems. So by building with natural materials we create a safer, cleaner environment that we live in day in and day out.
Thick dirt walls don’t necessarily have a high insulative R-value, but they have thermal efficiency and thermal mass transfer.
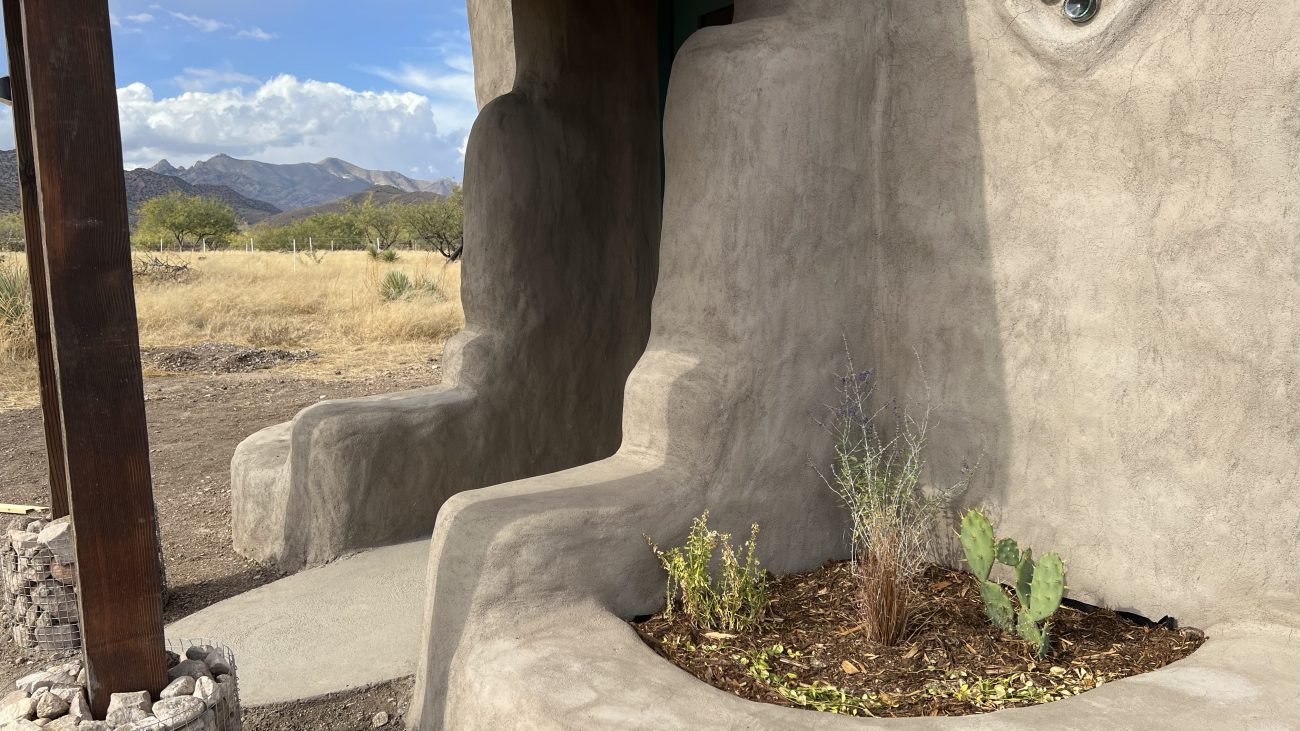
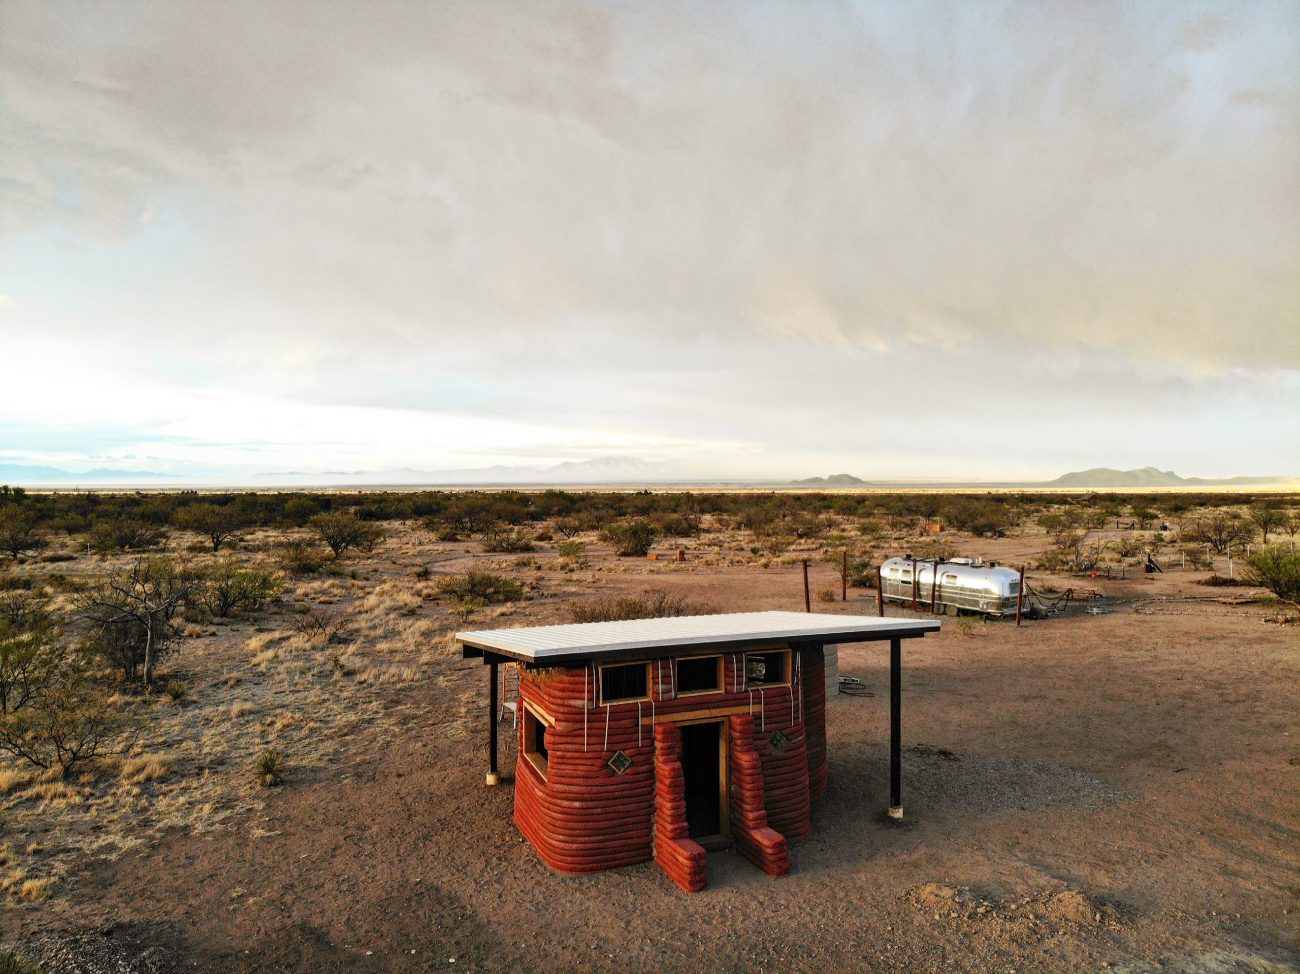
For example our solar shed office uses 16” hyperadobe earthbags. It has a traditional insulated roof to catch rainwater, and an earthen floor. We also have a mini-split ac and heat pump. With all these things combined, the mini split is incredibly efficient because once it brings the interior to temperature it holds for long periods of time.
Thermal mass transfer is the most interesting thing about earthbag walls. When the sun warms the wall, it gets absorbed and slowly passed through to the inside. For our 16” walls we’ve found this takes about 12 hours.
In our climate, the best way to use this to our advantage is to build our longest wall facing south so that in the winter, the sun is absorbed and naturally warms the inside overnight. You’re usually kicking off your covers around 2am.
In the summer, a traditional roof provides shade over as much of the walls as possible to help keep it cool until the very end of the day when the sun is low and blasting the western wall.
With proper insulation in your floor and ceiling, earthbag walls can be very thermally efficient using just the native material.
We already mentioned earthquake resistance, but natural earthen buildings with earthen or cement based plasters are also very fire resistant as well.
And probably the biggest reason to consider earthbags is just that anyone can do it. Our whole family pitches in every time, we don’t need any fancy expensive tools, the cost of materials to build a wall are insanely low.
We get to spend time together outside in nature making things with our hands. It’s a very therapeutic way of building.
It is a TON of manual labor, though. It’s not for the faint of heart or weak of body. But we’ve witnessed people of all ages rolling their sleeves up, getting their hands dirty, and finding the part of the job they can do best.
Earthbag building is truly affordable and accessible by almost everyone.
For those of you who are like, “Ok I’m in. how does this actually work? What do I gotta do?” We’re gonna get into it.
Earthbag Basics
Before we learn how to build with earthbags, let’s look at few core concepts.
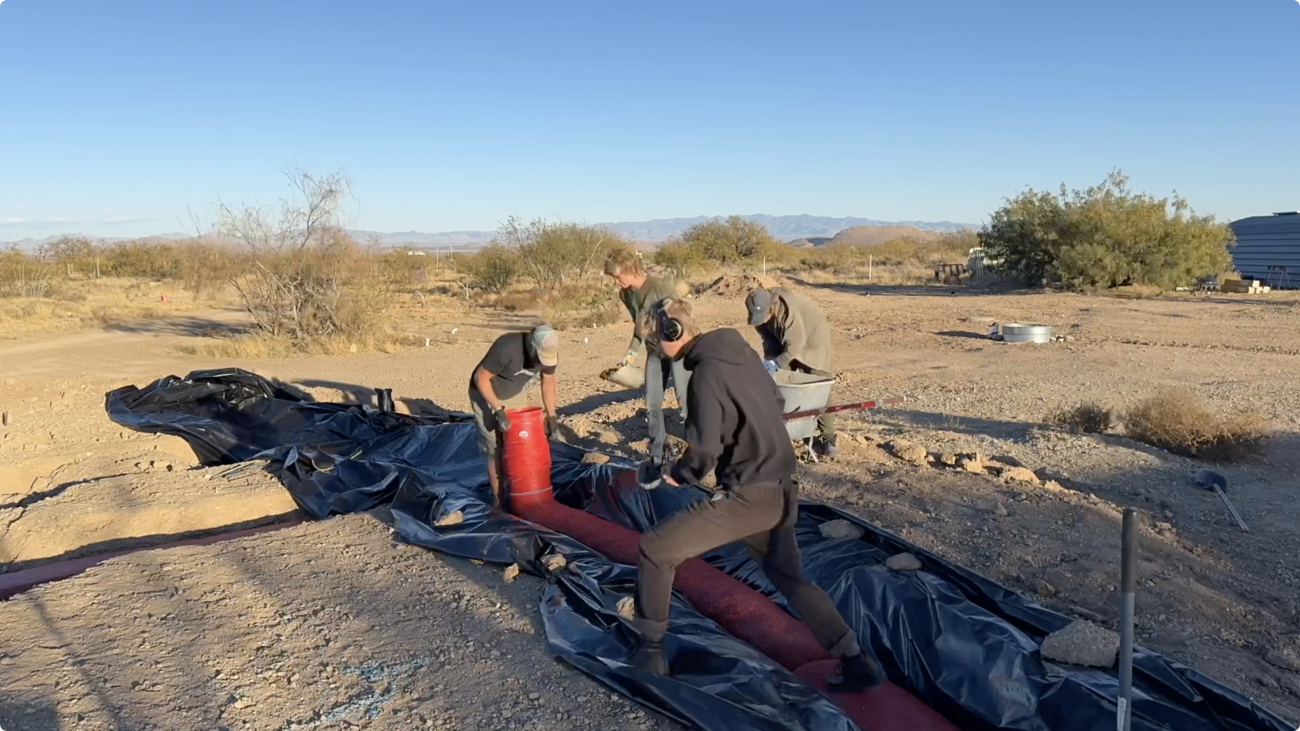
Think of the process like a huge 3d printer, and you’re the printer. Laying each course and building the walls layer by layer.
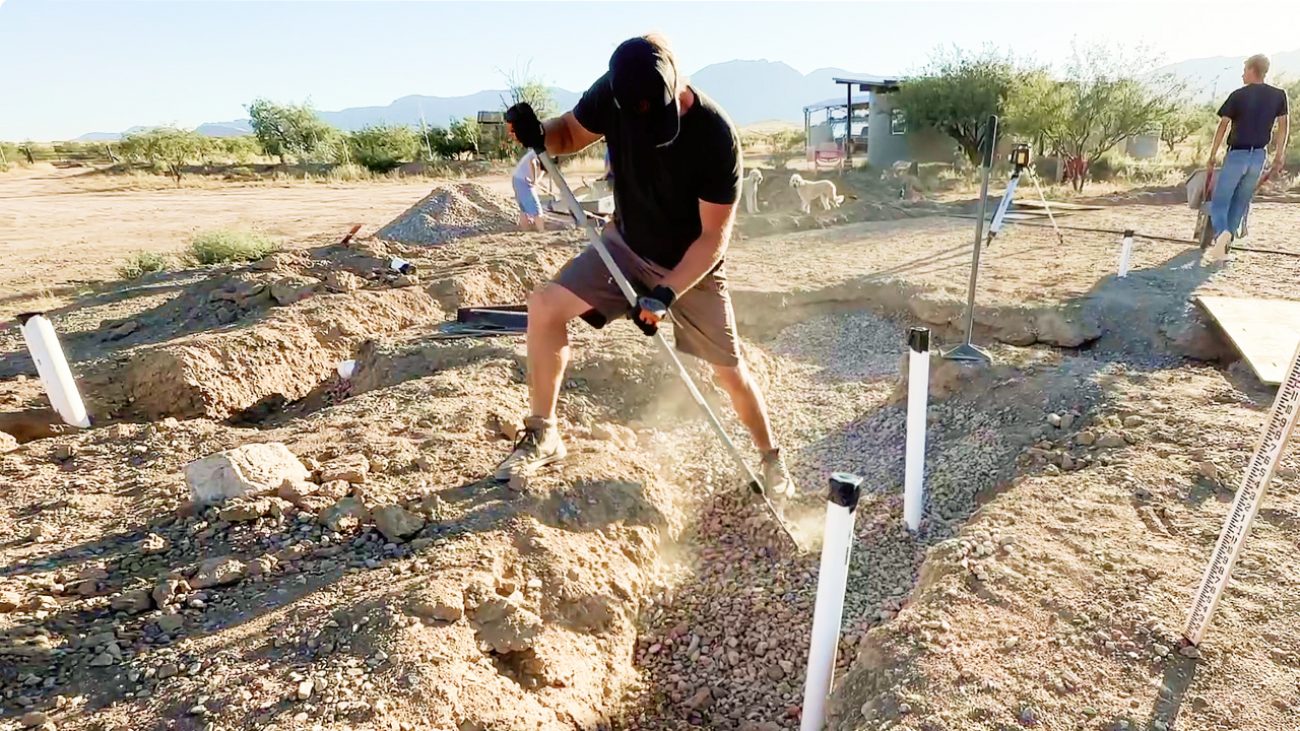
You should start with a foundation. Digging a trench where your walls will go is an important first step. Not only will it allow you to create options for drainage, water and rodent barriers, but it creates a “toe hold” for your walls to lock into the earth and stabilize.
We’ll take you through our full foundation setup in a few minutes, but let’s start with shapes, buttresses, and interlocking.
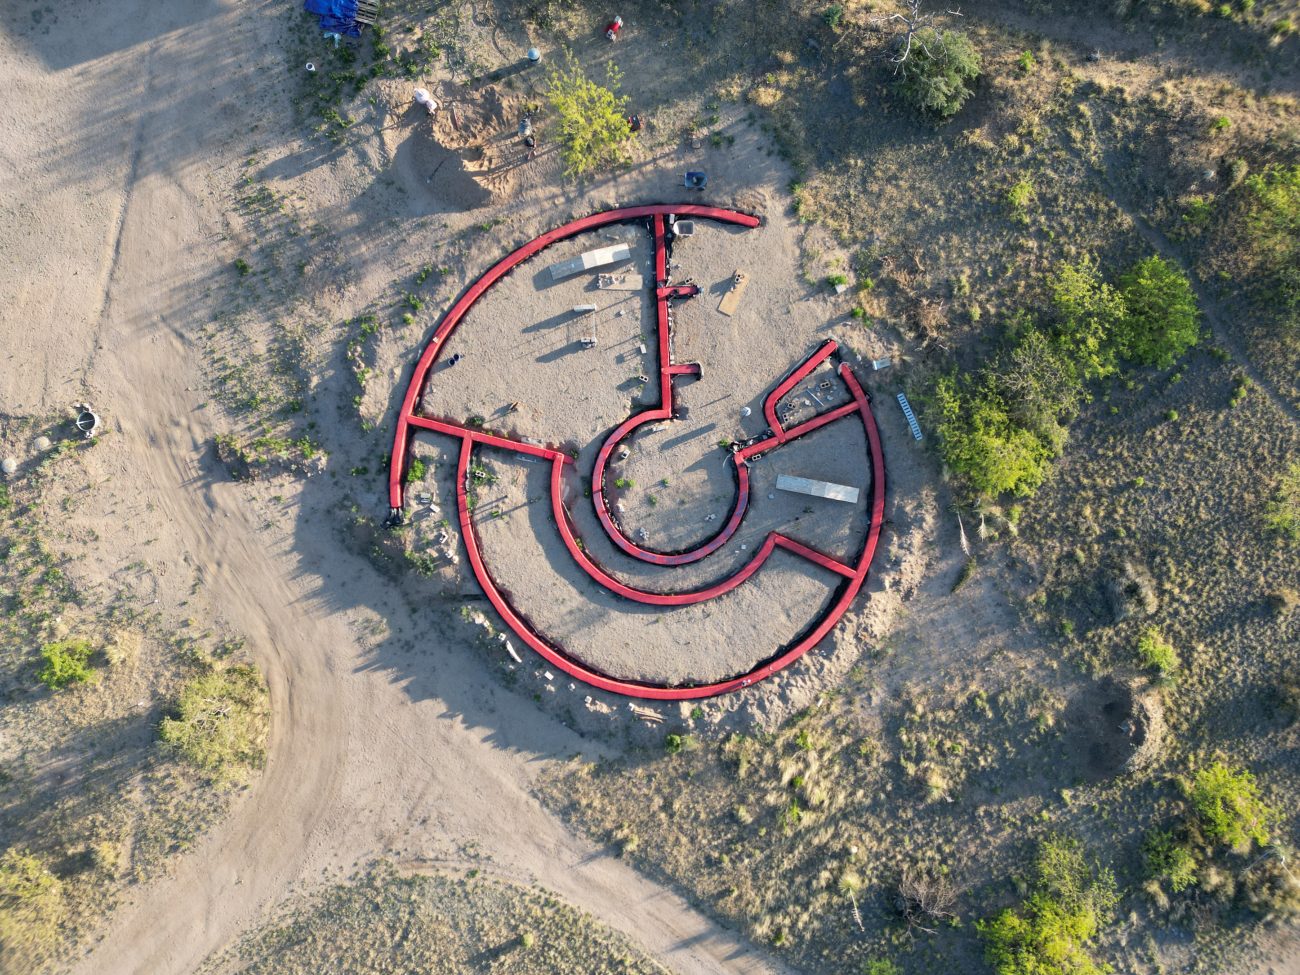
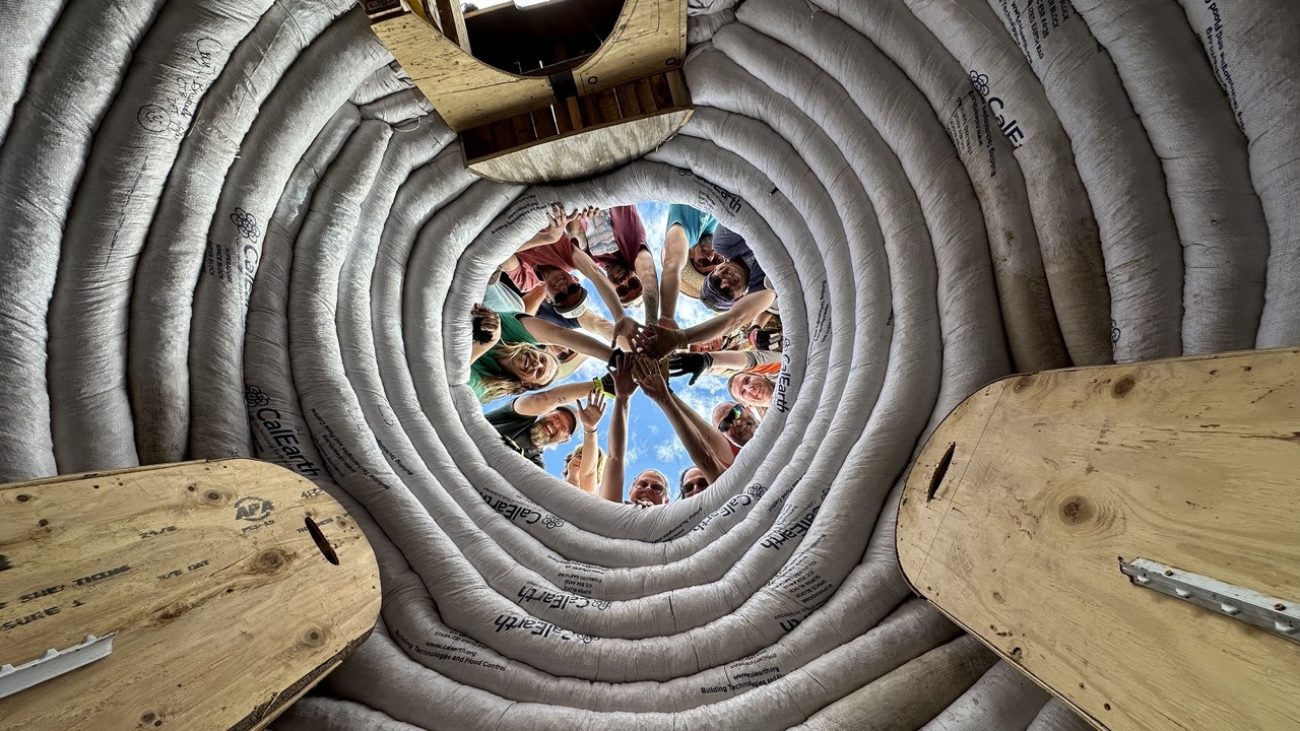
The first thing to keep in mind is that circular earthbag walls are inherently stronger than straight walls. You can create huge diameter vertical walls without any additional support because gravity will pull the wall in, but it’s stabilized against itself because of the shape.
Straight walls are definitely still possible, but you need to “buttress” every 10 feet or so. This means a small perpendicular wall at least 3-4’ that locks into the foundation and interlocks all the way up.
Buttresses should also be around door openings whenever possible to help support that large hole. Also, if you’re smart about your design, a buttress can even be an interior wall. It doesn’t always have to point towards the outside.
Whenever you have a buttress or even just a wall that intersects with another wall you need to interlock the layers. Think of it kind of like Lincoln Logs. One wall layer will go over the join point and the next layer will sit flush up against it. This helps create an incredibly strong, locked in structure, and should prevent against leaning, sagging, or blowouts.
Sidenote - One thing that superadobe bags and barbed wire do very well are domes. Not only are they circular, but they get smaller towards the top creating a very strong unified structure that doesn’t require a separate roof.
They are, however much more complicated to build as you need multiple compasses and points of reference to make sure the arch is mathematically correct and it doesn’t collapse.
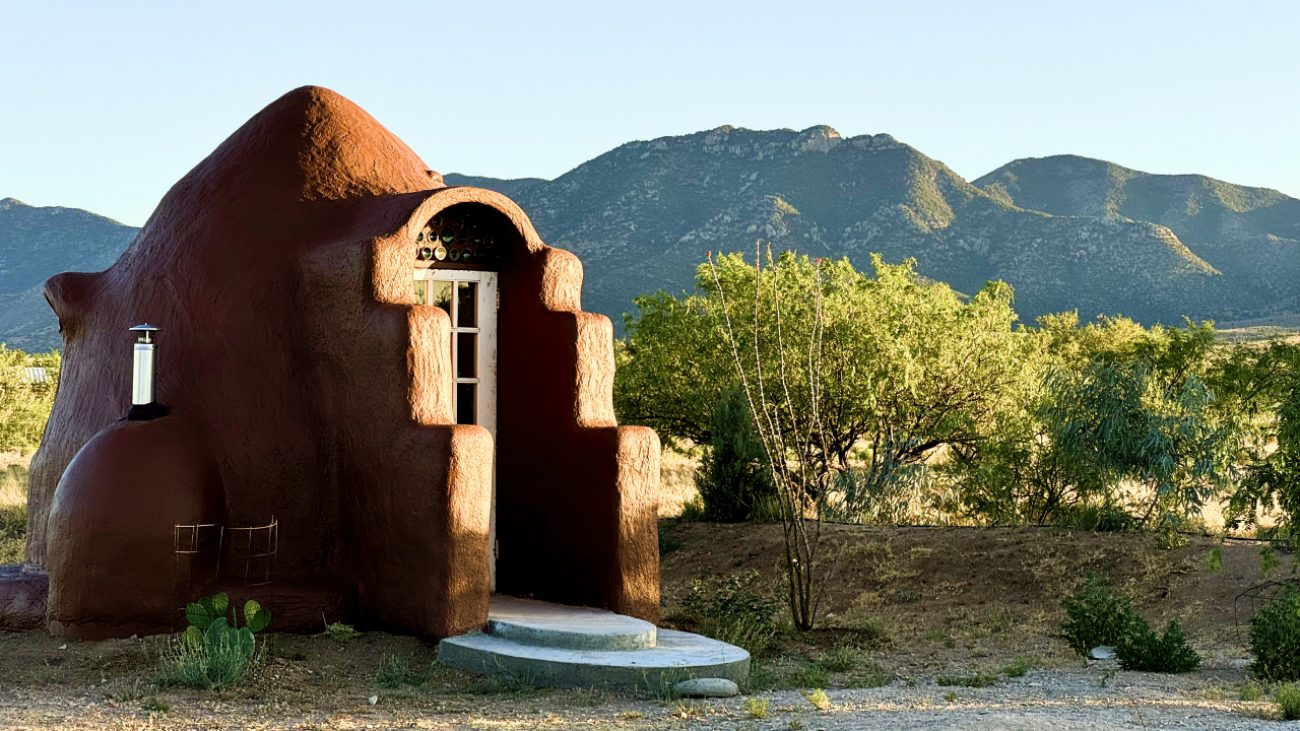
We love domes, and think they’re beautiful - but here in the desert we need to shade buildings and catch rainwater so that’s why we’ve focused on hyperadobe. They’re perfect for building plumb, vertical walls without barbed wire so you can put whatever kind of roof over them you want.
Now, you can totally do vertical walls with superadobe bags, too. It’s just more expensive and still requires barbed wire. If you’re building in an earthquake heavy area the barbed wire is important to that structural tensile strength so superadobe might make more sense for you in that scenario.
When you’re building vertical walls you do have to make sure they stay plumb. If they start leaning too much as you get up higher you’re creating a dangerous situation so use your tamp, a big level or a plumb bob to keep things in line.
We should also pause here and be clear that we absolutely do not recommend trying to build a dome with hyperadobe bags. The material is totally different than superadobe, the barbed wire won’t hold the same, and honestly there’s not enough research, examples, or tests out there to know for sure what would happen.
Now that we’ve covered some of the basics, let’s gather the tools we’ll need to build with.
What NOBODY Tells You Before Building a HYPERADOBE Home
FREE 1 hour video and 50 Page PDF Deep dive guide covering core hyperadobe safety techniques. Use to design your own smart and safe earthbag dream home.
What Tools Do You Need?
To build an earthbag building you’re going to need a few things.
Soil
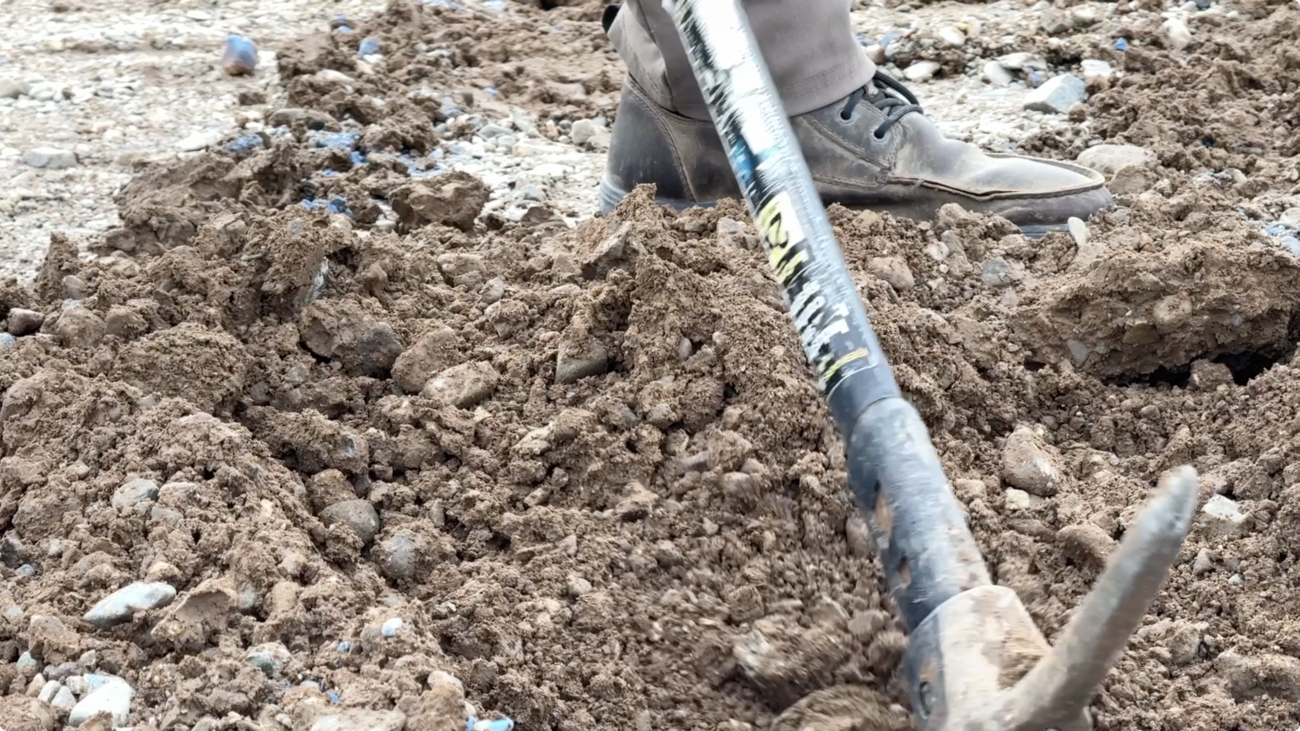
Easy enough, right? Well, the type of soil you have does matter. You can do a simple jar test or send a sample off for real scientific testing, but in general for wall fill material you’re looking for at least 30% clay. Any less than that, and it may have trouble binding together when you add water and tamp.
The best mix we’ve found is something similar road base or A/B mix which is 1/3 Sand 1/3 Rock and 1/3 Clay. Adding just a bit of water and tamping really locks this up quickly into a hardened brick.
Many also recommend adding 10% portland cement, especially to the foundation layers, header/bond beam layers, and around any forms that will be removed later.
Using the dirt right on your property is ideal, but if you have too much sand or too much clay or too many rocks it won’t be as safe or effective so you might need to supplement from a local gravel yard.
Be especially careful of too much clay in your mix, too. Not only will it be incredibly difficult to fill with a sticky, gooey mix, but rain events can make the walls unstable until they dry out again. Try to keep your clay ratio in the 25-45% range.
We always recommend making a few test bags and seeing how they perform.
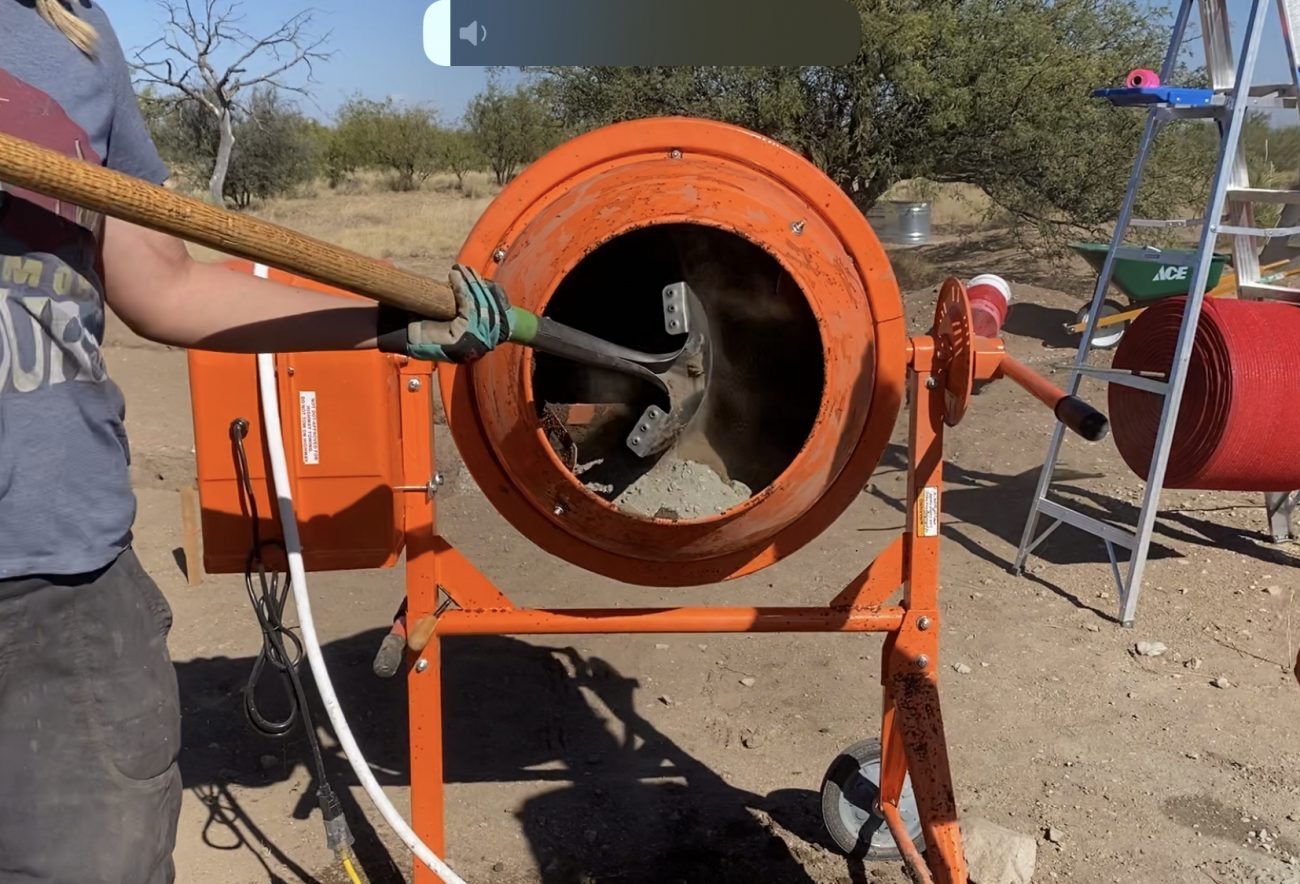
Cement Mixer
The key to properly filling a hyperadobe bag is getting the right consistency. A cheap cement mixer (we use the ones from harbor freight) are perfect for letting you add exact amounts of clay, rock or sand, and then water until it’s ready. They can be run off a small solar system or generator so you can use them anywhere.
While it is possible to mix by hand, a cement mixer is going to save you a lot of time and energy - which you’re going to need to transport, fill and tamp in the bags anyway.

Shovels
Good quality shovels are always going to help move the dirt around faster. We use them mainly to take dirt from our material pile and put in the cement mixer.
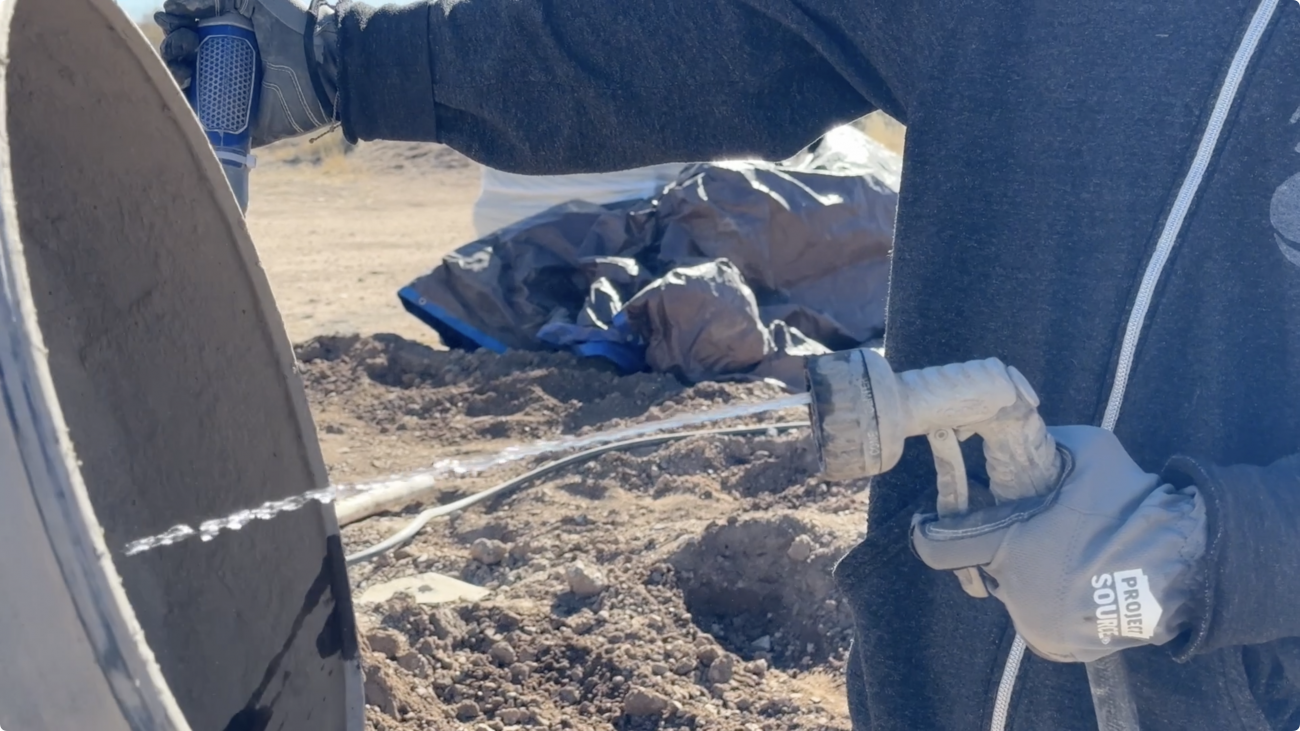
Water
You will need water to get the mix right for these earthbags. If you just fill with dry soil then it won’t compact correctly and you’ll end up with a dangerous, unstable wall - especially as you build up higher.
We use a solar powered pump pressurized setup with rainwater catchment tank, but really any way you can get water and pour in the wheelbarrow will work.
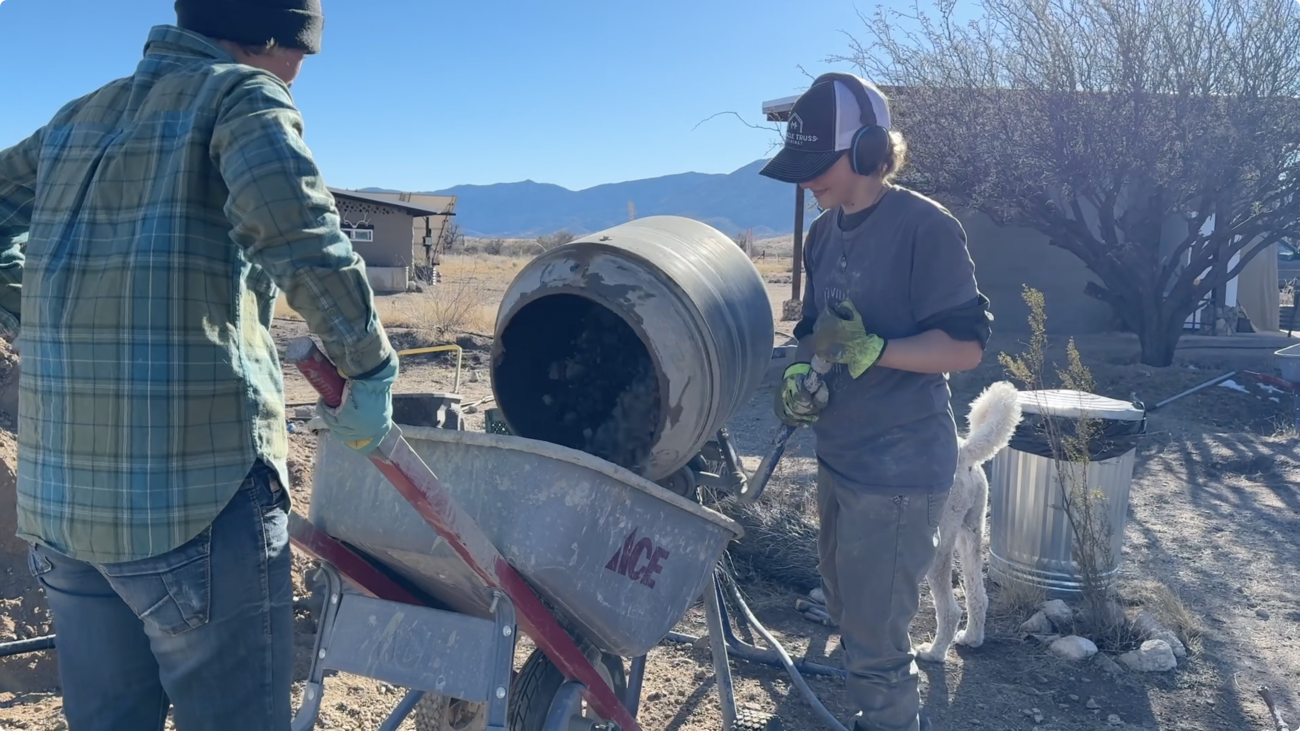
Wheelbarrow
Once the material is mixed you need to get it onsite to your wall. Since this will be a constant moving target, a wheelbarrow is highly recommended so you take a full batch at a time.
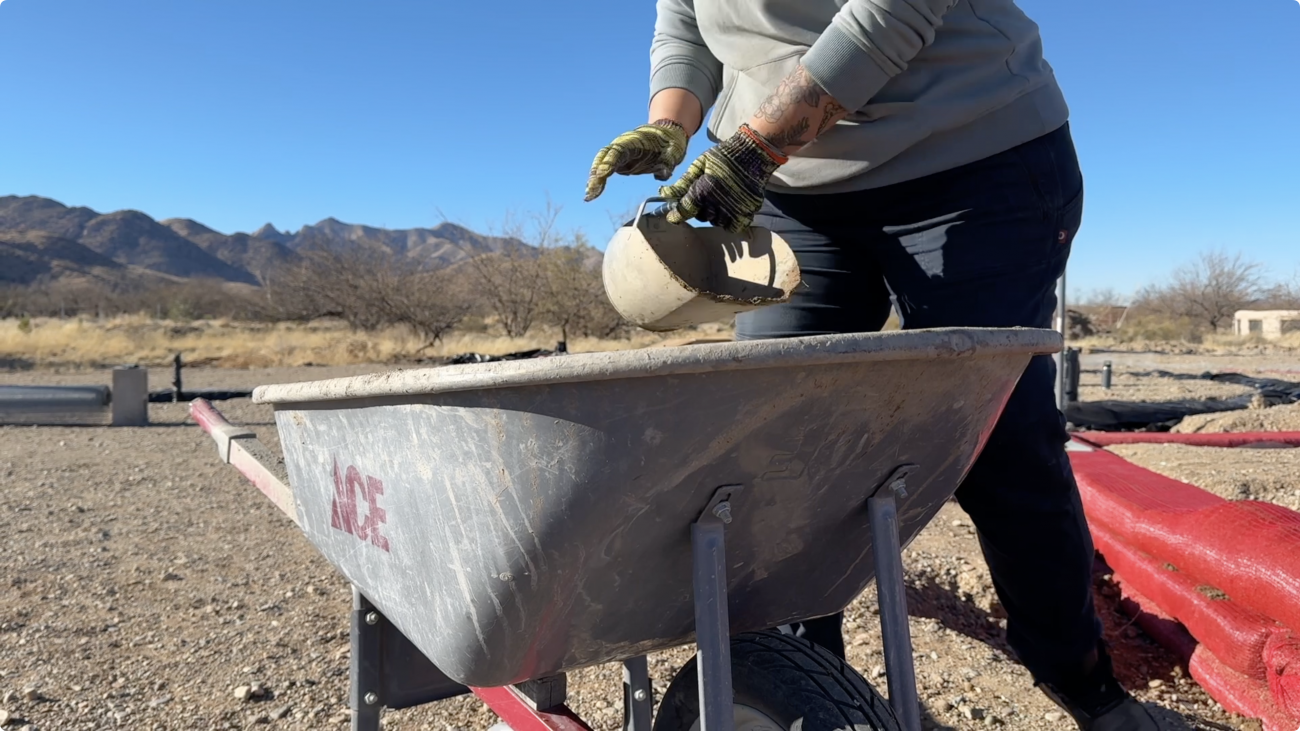
Scoops
In order to move the dirt from the wheelbarrow into your bag, you’ll need a handheld transfer method. Large coffee cans work well, but we really love these feed scoops from Tractor Supply. They’re the perfect size for this application and the handle is useful.
Hyperadobe Earthbags
Of course you ‘ll need the actual bags to fill as well. These come in long rolls that can be cut to size based on the wall you’re laying.
Buy Your Own Hyperadobe Earthbags!
Get your own super strong UV protected polyethylene raschel knit tubing. It's made in the U.S.A, and shipped directly to your door. Starting at $419/roll. DIY your dream project today.
Tamp
Finally once the bags are full and tied off you’ll need to compress the material into an adobe brick. Tampers are pretty easy to find at the hardware store, and we have a few different weights/sizes for different applications.
20lbs is a good weight to get the bag compressed quickly, but that can be heavy for some people. 10lbs will work, too. You can even weld up your own custom one if you’d like it to span the full width of the bag.
For the sides you can just use a 2x4 about 18” long.
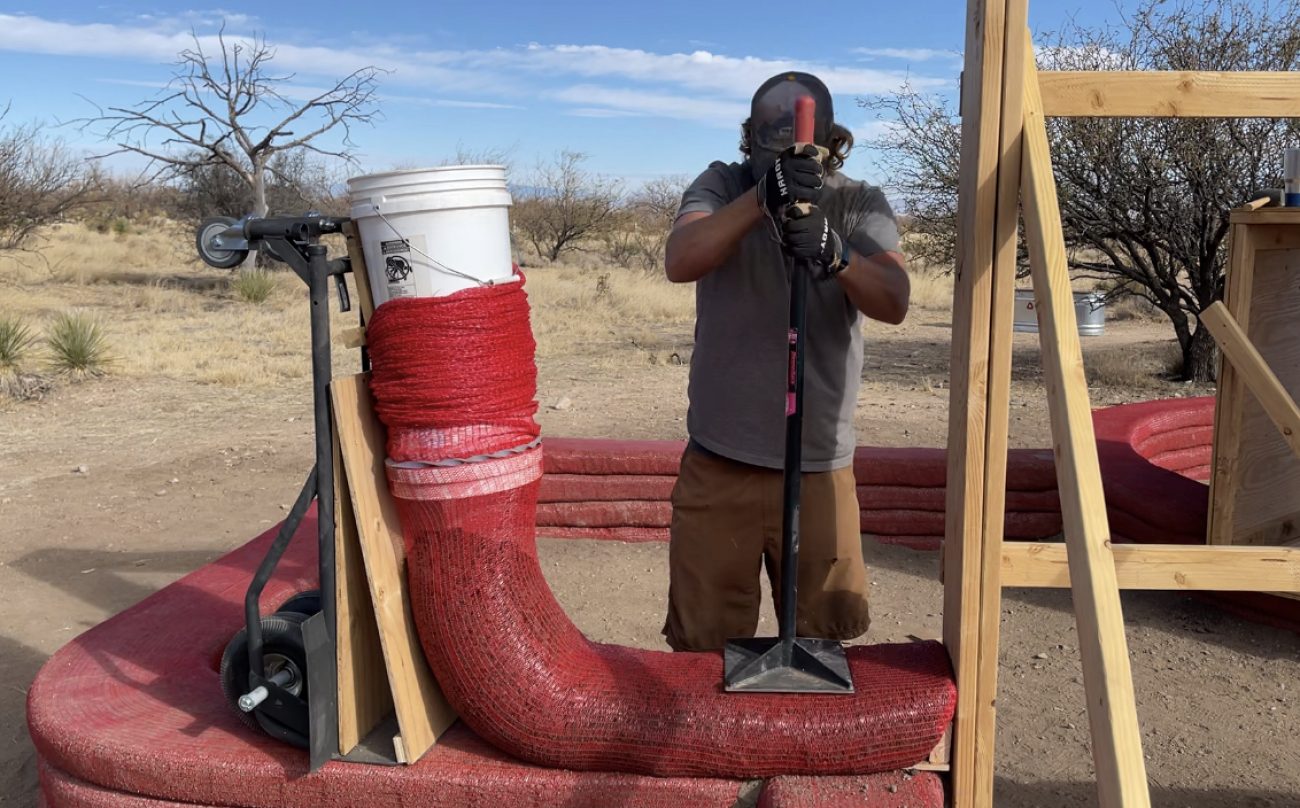
Dolly Bucket System
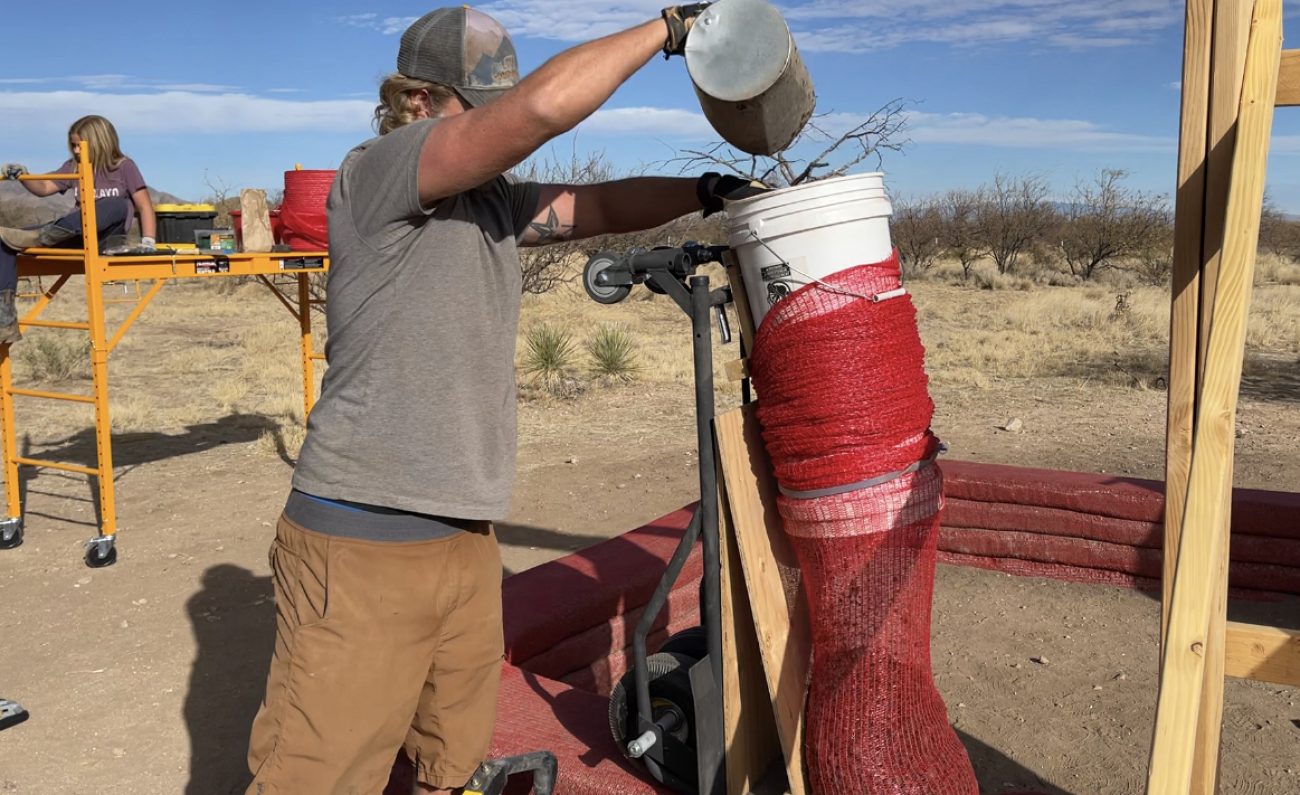
While it is possible to fill hyperadobe bags by hand, we definitely recommend the dolly bucket system to help you fill them faster, more evenly, and with less physical labor. The basic idea is to take two 5 gallons buckets, cut the ends off, tape them together and build a funnel that allows you to expand the bags, keep the wall straighter, and more evenly filled. An elastic band around the end lets the bag slowly release as it gets filled.
You can also add a bracket and modified dolly or handcart that the bucket can hook on to for very long runs and when you don’t have as many hands available.
The beauty of this system is that it uses cheap materials you can find at literally any hardware store. No proprietary custom made products for sale here. Anyone can make a bucket system.
Choosing Your Bag Type
While we love hyperadobe bags, it’s important to know the difference between superadobe and hyperadobe. Here are some pros and cons of each.
Superadobe
- Made out of Polypropylene, come in rolls of various lengths and widths
- Degrades quickly in sunlight
- $0.46 linear foot
- Requires barbed wire between layers
- Slippery
- Great for domes and monolithic structures
- Requires more planning, math, and calculations to be safe
- Can use bucket, but need to vortex as you go
- Stiffer and harder to scrunch for unbroken runs
- Smooth surface makes it more difficult to apply plaster
Hyperadobe
- Polyethylene raschel knit, comes in rolls of various lengths and widths
- UV coated, lasts for years in the sun
- $0.27 linear foot
- No barbed wire required between layers
- Grippy
- Great for vertical walls with attached roofs
- Simple, safe construction for the whole family - just build the walls straight up
- Can use dolly bucket to lay faster
- Flexible and easy to scrunch up to do long unbroken runs
- Knitted mesh surface creates a lathe to apply plaster directly to
One quick note - we haven’t mentioned a 3rd type of earthbag building here yet. Single bag. This uses individual sacks that are stacked end to end, but in general we feel like the long tube method is superior, and didn’t want to over complicate comparisons in this article. Just know it’s out there if you’d like to investigate.
Sizing
The size of your bag matters, too. The bigger or taller your structure, the wider the bag should be. In superadobe domes, the wall width should not fall below 10% of your internal diameter So our 9’ superadobe dome needed 12”-14” bags to be stable.
In hyperadobe, it’s not quite as important since you’re building vertical walls, but obviously the taller you go, the more important the width of the bag becomes. We’ve found 16” bags do great up to 12’ which is plenty tall for a house. Any taller and we’d recommend 18” bags.

Calculating How Much You Need
Feel free to use our handy roll calculator above! Or read on for the nerdy details.
- Add all perimeter wall lengths (i.e. a 10'x10' building would be 40 linear feet)
- Add the length of buttresses and internal walls (i.e. 2x 3' buttresses and a 9' internal wall would be 15 linear feet)
- Decide the height of the wall to calculate how how many layers you’ll need. (i.e. 8' or 96" / 5" tall bag = 19.2 layers)
- Multiply the length of one layer by how many layers you need, then divide by the length the roll comes in to know how many rolls to buy. (i.e. 65 linear feet x 19.2 layers = 1,248 divided by 1 roll of 1,640 ft = 76% of one roll)
- Add 10% and round up to the nearest whole roll (i.e 1248 x 1.1 = 1,372 - just get one roll!)
Below is a quick reference of how many rolls we've used for various sized buildings on our property:
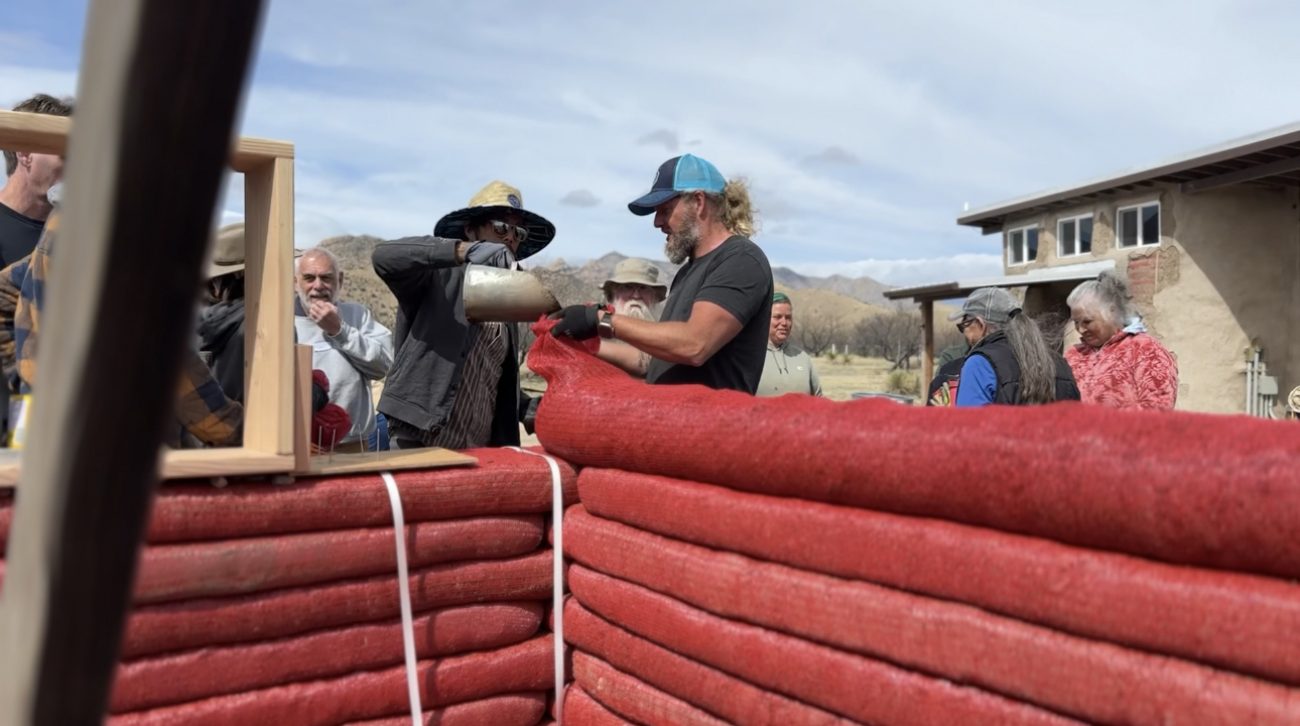
Laying, Filling & Tamping Hyperadobe Bags
The basics of laying a “course” or section of hyperadobe bag look like this (note, please watch the embedded video at the top of the page for a better visual explanation).
- First you’ll want to measure how much bag you need for the section you’re laying. The simplest way to do this without any additional tools is just to walk it off with one foot right in front of the other.
For circular walls be sure to walk along the outer edge or else your length will be too short.
Add at least 3’-5’ to the total because you have to tie off each end of the bag. - Head over to your roll (you should have it on some kind of spinning stand), grab the edge and walk out the same number of feet plus the extra for the ends.
- Cut the bag, make a knot, and turn it inside out. This is important so that the knot stays inside the bag and you have a nice clean edge.
- If laying the bag by hand, roll the edges down as far as you can so you have something to hold on to.
- If you’re using the bucket system you’ll want to scrunch the bag on the bucket as far as you can (we can fit about 70’ with 2 five gallon buckets end to end), but stop a bit before the end, pull it through, tie the knot on the inside, then finish sliding the back until it’s tight.
- With the bucket you’ll also need an elastic band to go around the end so the bag doesn’t slip off too quickly when filling.
- Over at your cement mixer, add your ratio of materials, mix dry, then add water. Remember we said we’ve found 1/3 Clay, rock and sand is a great mix, and you can always stabilize with portland cement.
The amount of water you add is important. Too dry, and nothing will stick or tamp together. Too wet and it won’t fill the bag properly or hold its tamped shape well. As always do lots of tests before starting on a permanent structure. - Once you get the mix right, it’s time to start filling the bag. If filling by hand, set the bag vertically a few inches from the end of the wall and add material until it’s about 1’ tall. Pick the whole thing up and let it fall on the ground a few times to flatten and tamp the end, then pick it up and lay it on its side to get started.
Note, dirt gets heavy very fast. I like to have a decent weight of material to really flatten the end, but filling too much and trying to pick it up you can hurt yourself so be careful. Also, flatting the end too much will expand and fill the bag larger than it should be, and may make it difficult to tamp level later. You’ll get a feel for it after a few tries.
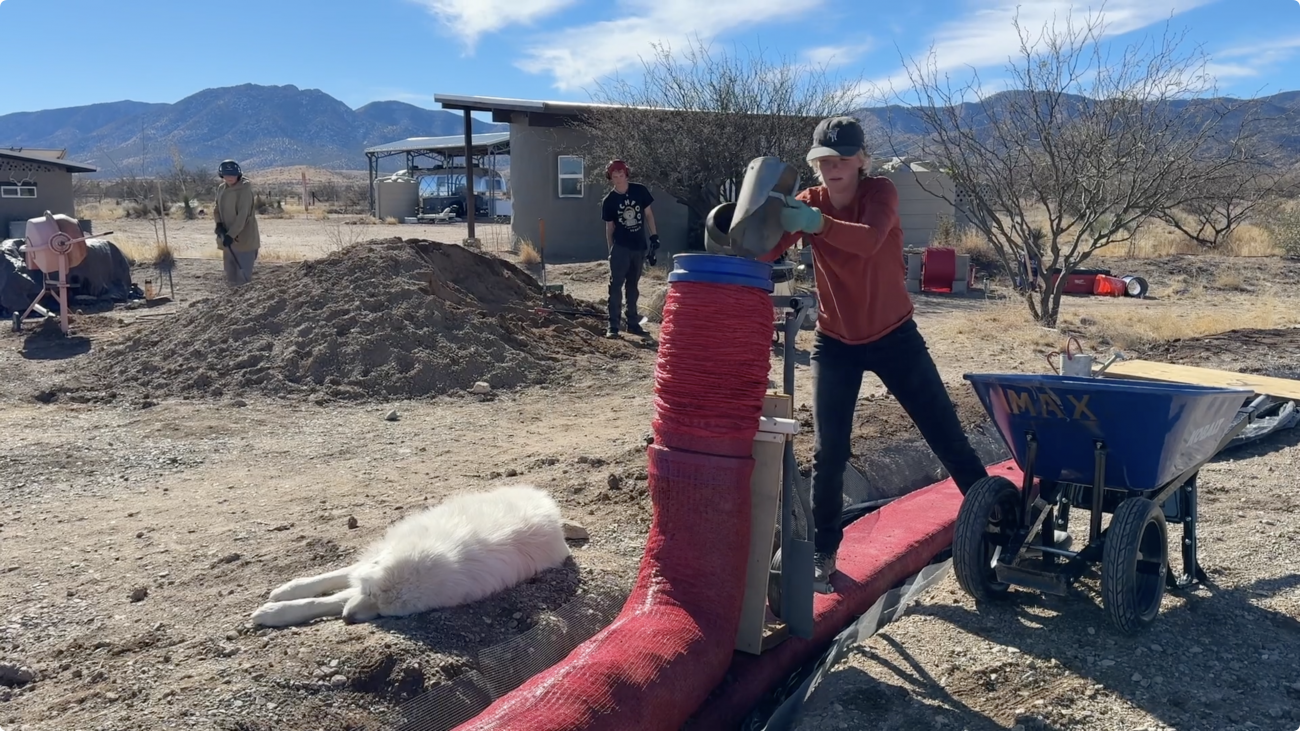
As you fill the bag by hand you’re going to want to roll the top as tight as you can to keep tension on it, and with each scoop use your other hand to smash the dirt in and fill the empty space. We’ll cover finishing bags in a minute. - If holding the bucket by hand, set it vertically a few inches from the end of the wall, and start filling. Once you get the bucket half full you’ll want to lift up and let the bag extend at least 6 inches. Lift and drop a few times to tamp the end. Keep filling until a few inches from the top of the bucket.
This is one of the more complicated moves. You’ll want to grab the tamped end of the bag with one hand, put your whole arm around the bucket with the other, lean it at about a 45 degree angle and pull the bag out and flat so that it’s about 1-2” from the end of your wall. Keep the angle on the bucket and keep filling, slowly shaking and moving the material down and filling the cavity left by the bucket. This is to try to get the cavity out of the bag that you’ll see from making that initial tilt. - The key to a perfectly expanded and evenly filled bag is gravity. So before you pull that bucket up anymore you want to fill it as much as you can again, shaking so the material fills the space, and gettin the bucket high enough so that it sits above the top of the bag. Otherwise your bucket will keep making big cavities and indentions in the bag. Once you get in the groove, and people are bringing you dirt you’ll really start to find that rhythm of filling, stepping back, and filling again.
- With the bucket on the dolly, you’ll want to move the whole thing at least two full steps back from the end of your wall. Start filling, and you’ll watch it fall naturally as it gets heavier. Once there’s 5-6” of material in it, grab the bag lift and drop a few times to get that flat end, then keep filling until you get near the top of the bucket. Brace the wheels or have someone hold the dolly while you grab the whole bag, and in one fluid motion flip the end out and pull it to within 1-2” of the end of the wall. You should have had enough material in the bucket to not have any cavities.
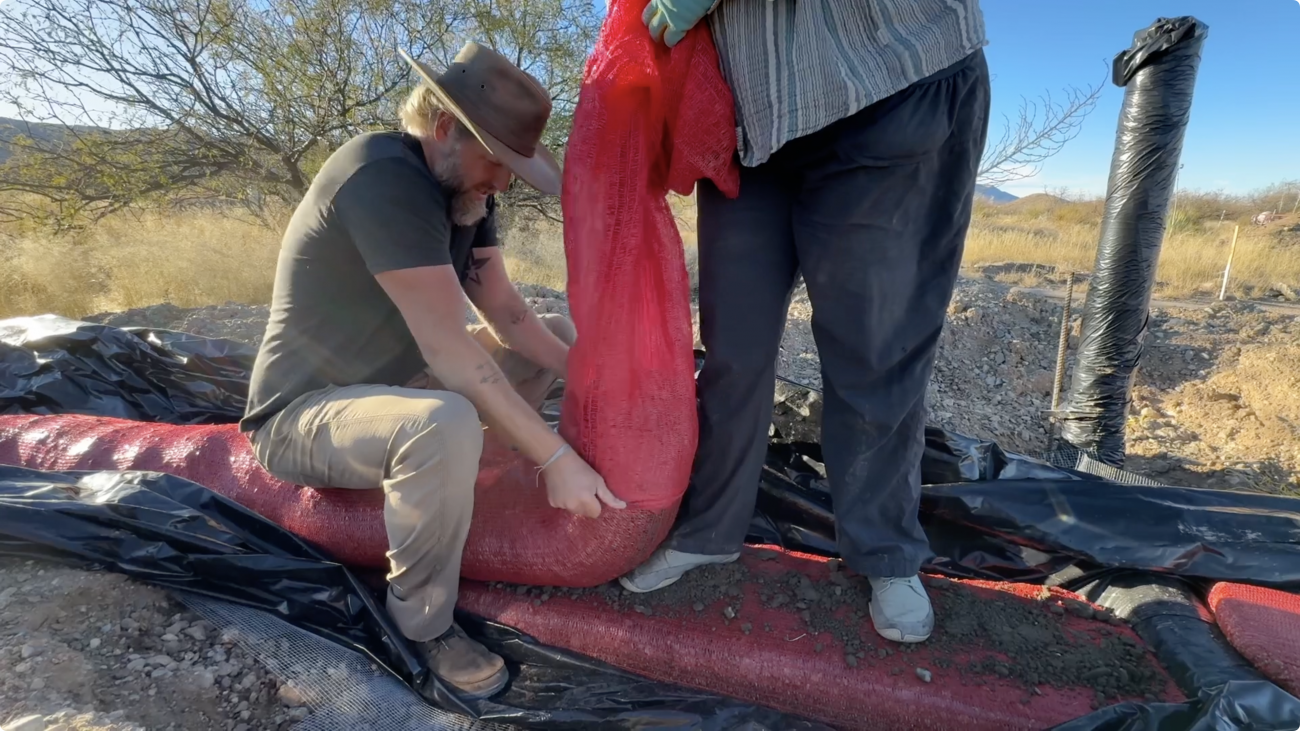
Now you can let the dolly sit there waiting for material while you roll it back slightly each time it gets full. You will have to keep a closer eye on the bags as you fill and pull, the dolly has a tendency to wander and remember you want hyperadobe bags to be perfectly plumb and vertical with the layer below. It’s much easier to make adjustments before tamping so just roll or shape the bag as needed. - Ending your bag is also an important step. If laying by hand you’ll want to get it as close as you can to the end, smash it flat with your hand, then lift up and have a friend grab the excess bag, pull the pinch point down to the bottom, twist at least 5x, then push under the bag while your roll it back down over top.
With the bucket by hand you’ll have to slide the bucket off near the end, fill the last bit by hand, and then follow the same procedure.
With the dolly you’ll have to do this complicated dolly dance to get it out of the way at least 3-5’ before the end of the wall, then fill the bucket while holding by hand, then remove the bucket, fill the rest holding the bag, then tie it off.
We lay a lot of bag without the dolly and you can probably see why - if your walls are too short then the dolly just gets in the way and adds extra steps. You have remove it almost as soon as you get started. But the dolly is really great for long unbroken runs. - Congratulations! You’ve got yourself part of a wall! But you’re not done yet. Step back and give everything a good look. Bulges, curves or uneven sections should stick out. Take a minute to massage the bag back into place before you tamp.
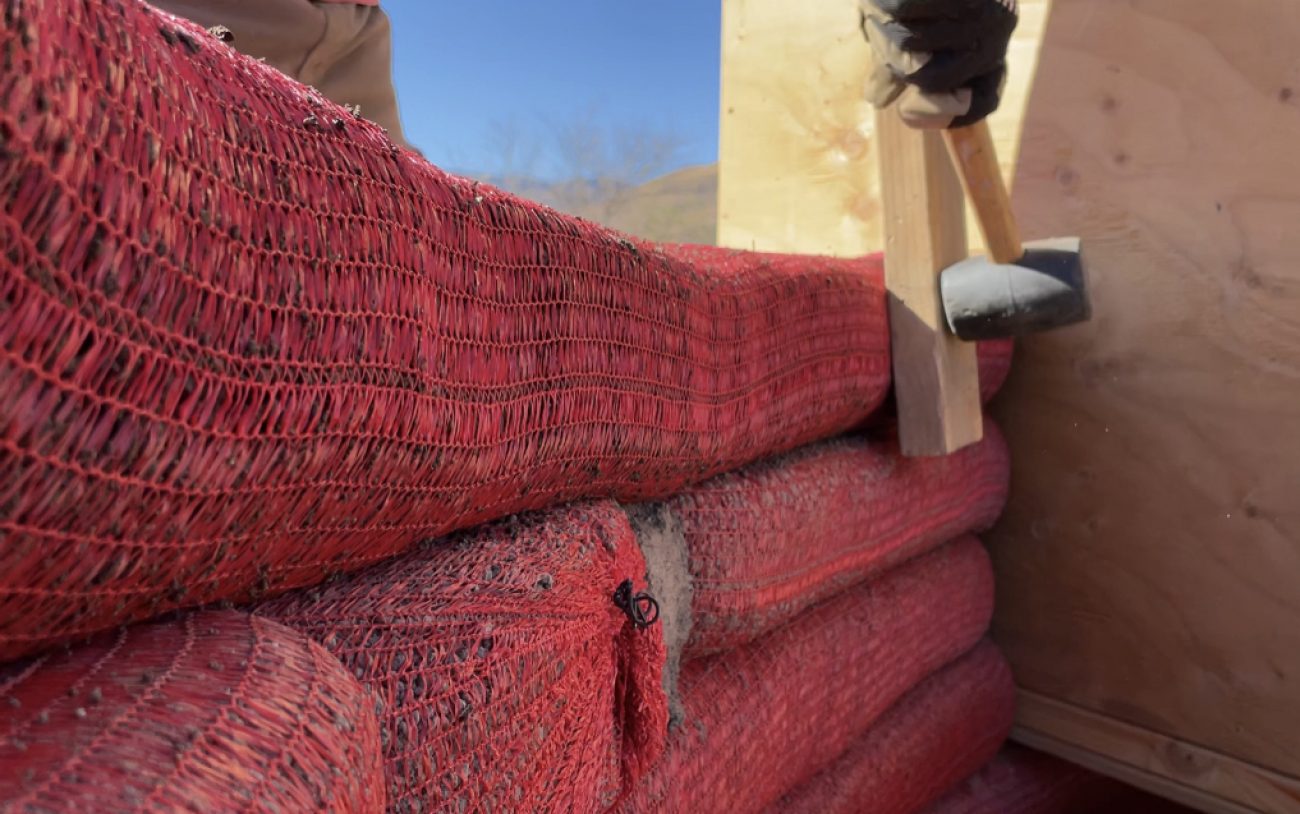
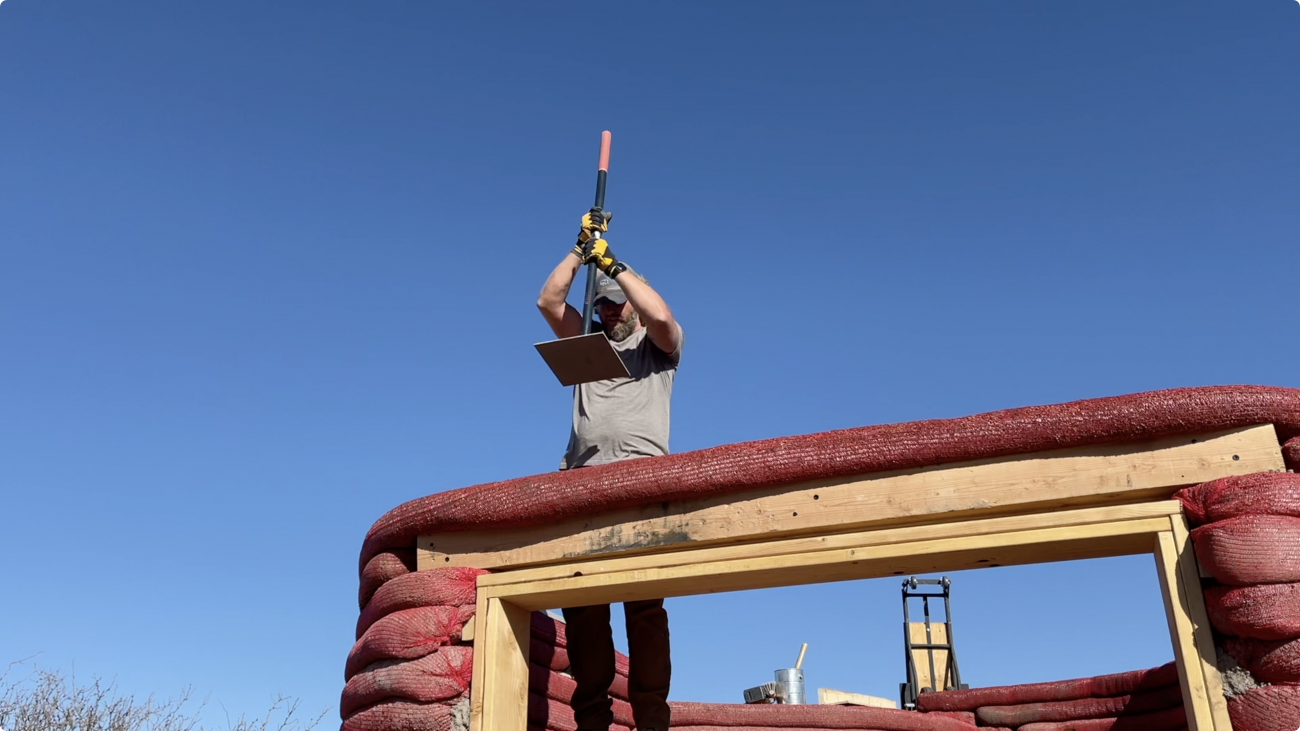
- Once the wall looks right, Grab your tamp and start working on the top. Don’t tamp too much - remember once it’s been compressed you can’t uncompressed it and make it taller again. So start slow, do a light pass to get some of the poof out, then a secondary pass to get it even, then a final hard pass to really get it locked in.
- Use a long 2x4 to smack the sides and compress those as well. Not only does this mean you’ll have less to plaster later, but the sides of the bags are where you see the most breakage of material. Locking in the sides is important for the structural integrity of the wall.
Advanced Techniques
The basics of laying hyperadobe earthbags are very simple, but of course there are always additional tips, tricks and considerations.
The first is how you protect your lower foundation layers. We mentioned that we think it’s important to create a “toe hold” or foundation trench to start your bags in. After building multiple structures and talking to lots of other people who have run into different issues, we’re recommending a few additional steps for any essential buildings like your house.
- Consider protecting from flooding by bringing in material, raising up and leveling and compacting the foundation to start. The amount you need to raise it up depends on your annual rainfall and flooding potential.
- Dig your trenches at least 18” down - consider the frost line in your area, too
- If your land has a slope, the 18” should be the shallowest part of the trench - use a level to get it all the same
- Create a rubble trench by filling with gravel - at least 5” and tamp into place - this will help with drainage and settling over time.
- Rodents can be a big problem - they can burrow through the walls and bags over time. Use hardware cloth to wrap the first several layers of bags until you get out of the ground to floor level.
- Similarly, any exterior walls should have a vapor barrier. Your fill material should have a decent amount of clay in it which wicks moisture up like a sponge. Over time as water runs down the side of the walls during storms, it could pull that water in and up the walls which isn’t good. Use a heavy duty vapor barrier that wraps just like the rodent barrier.
- You’ll wrap both of these up over the floor level bag and lay the next layer on top to lock them in.
- We definitely recommend stabilizing your lower layers with portland cement. 10% should be sufficient.
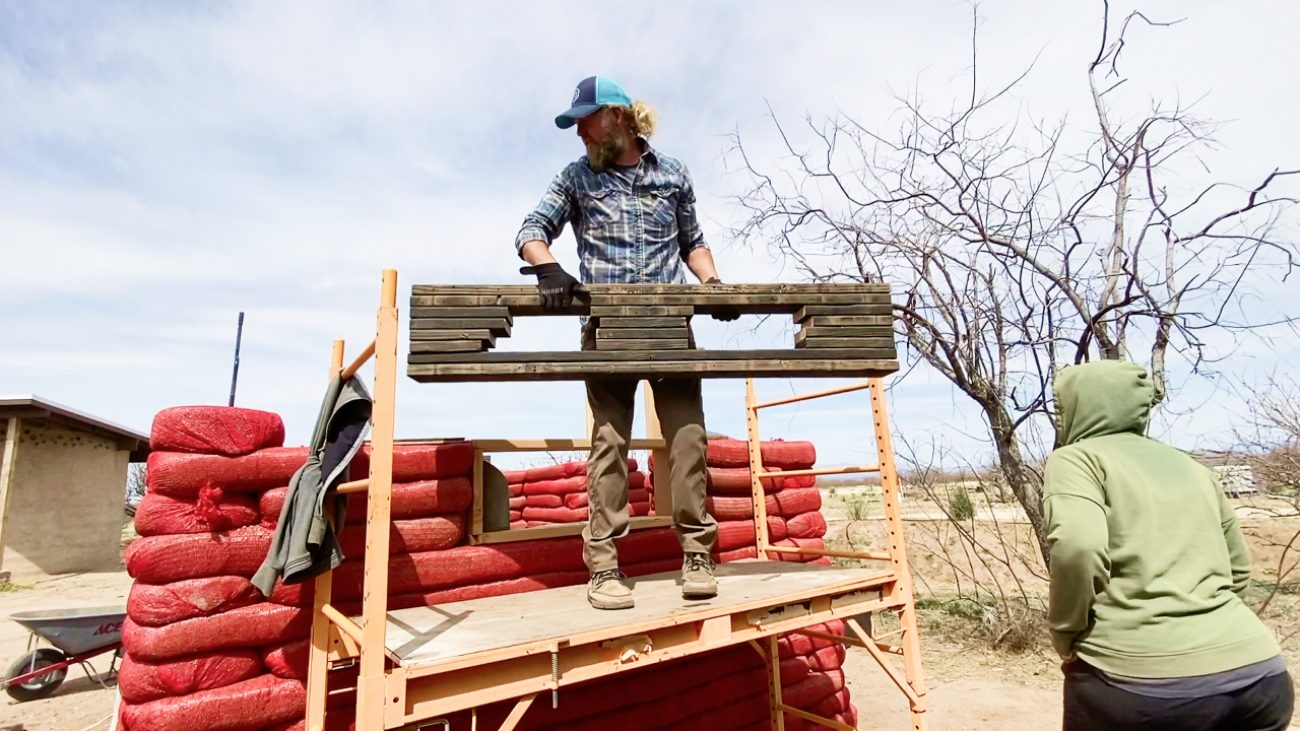
The next technique is what to do when your building gets tall! Laying bags is very easy when you can reach everything - but once it gets taller than you things slow down and get complicated. Personally we just use scaffolding. One person hands up a scoop, the next person puts it in the bucket. Some people use machinery like a bobcat or tractor to raise up the material and hold it in place while filling. This works good for exterior walls, but can be tough to get machines into tight spaces for interior walls.
Either way expect your progress to slow down once you get to this point. It’s perfectly normal.
What happens when you mess up? Sometimes you don’t measure the bag right, and it’s too short. You can either end it early and lay an additional small bag or slip more bag over the end and extend it. The hyperadobe bags are so stretchy we don’t recommend making long unbroken walls like this - only use the slip on extendsion as a last resort.
And speaking of broken and unbroken walls - keep in mind that the “seams” should never be right on top of each other. So if you have a wall that is 50’ long and you can only do 25’ max with your bucket don’t do the same thing every time. Go shorter or longer and stagger where the bags butt up against each other. Just like laying bricks…
Windows & Door Openings
There are two basic ways to build spaces for windows and doors.
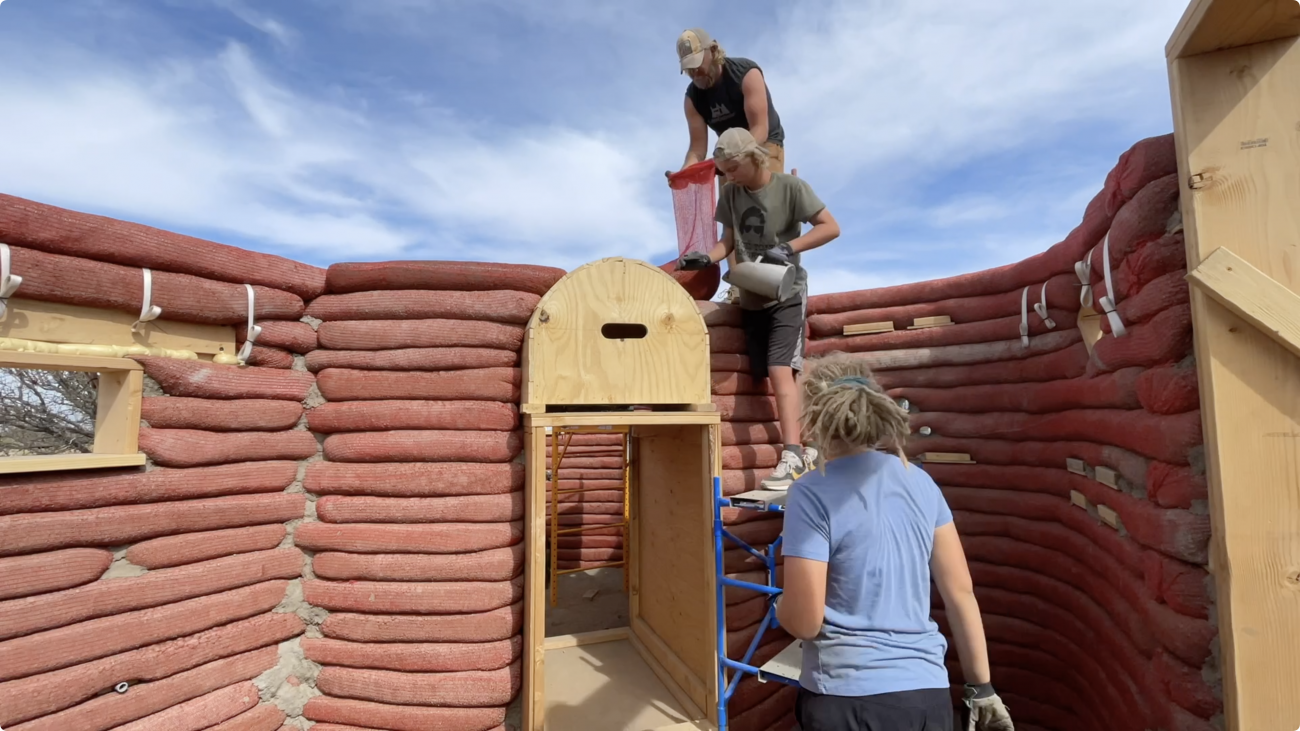
The first is a form. A form can be built out of cheap wood like pallets and plywood, and must be deep enough to go all the way through the wall. You will lay your bag up to it, and then remove the form when finished. Because of the forces pushing in on it, make sure to brace the form horizontally in multiple places. Forms are often used to create arches or organic shapes so you should heavily stabilize the ends of the bags and especially the ones that go over top with Portland cement.
Once the form is removed, you can install a traditional frame for your door and window to be mounted into.
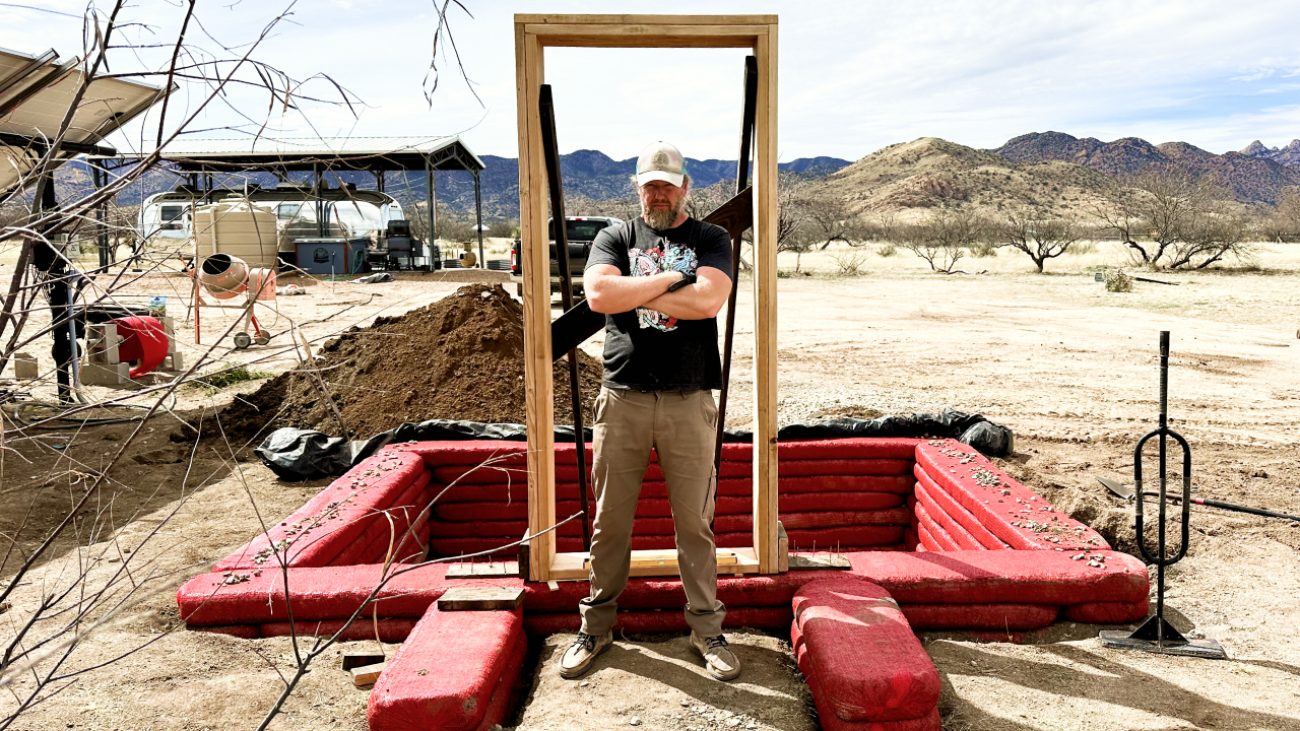
You can also build the frame directly into the wall. We recommend large boards - 2x8 or 2x10, double bucked and supported by crossbeams and held in place with supports. As you build the wall you’ll integrate cleats to lock it into place.
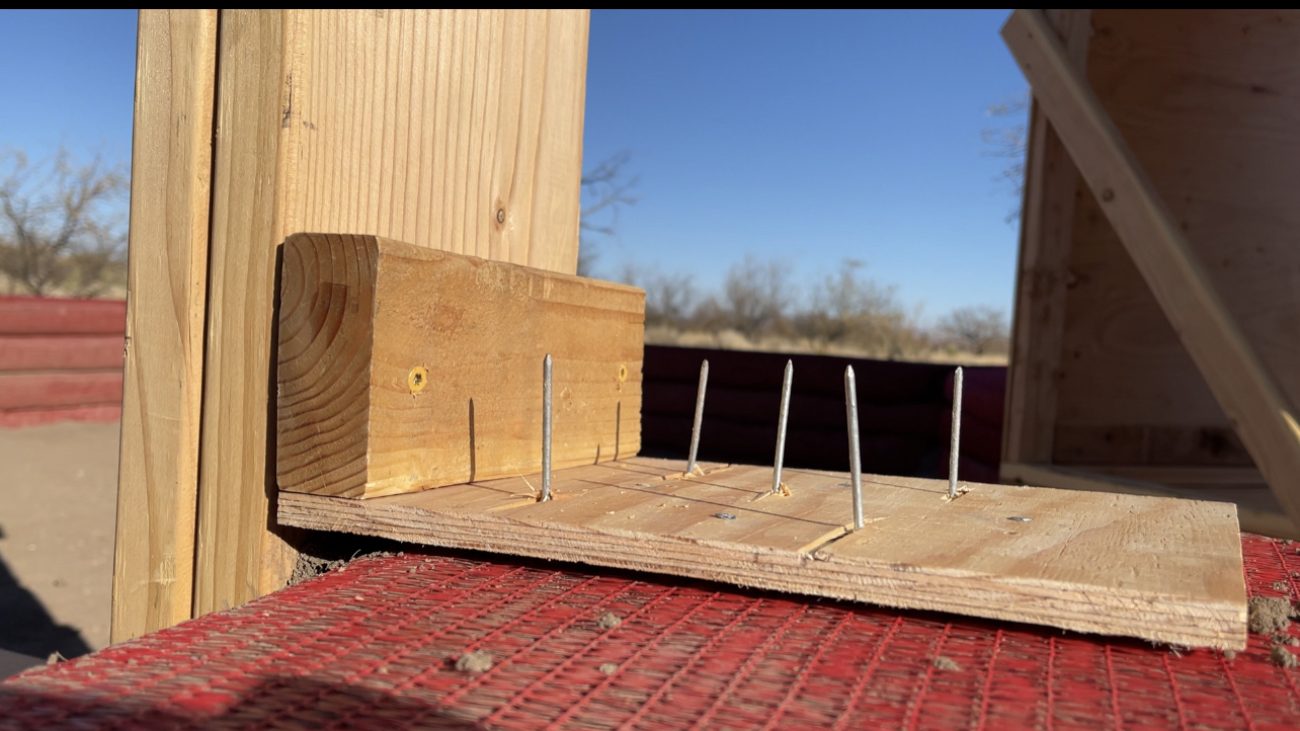
Cleats or velcro strips are small pieces of 2x4 and plywood with nails going up and down. They get hammered into the lower bag, screwed into the frame, and then the next bag layer locks them in. You should do this every 3 or 4 layers all the way to the top.
Keep in mind that traditional building techniques like headers apply here, too. You can’t just run thousands of pounds of bags over top of your frame and not expect it to sag, mess up doors or break windows over time.
If your arched form is built properly it should be self supporting, but a square frame needs heavy duty lintels over each opening. Like huge beams of wood that extend at least a foot past the wood frame and never touch the top of it.
Since earthbag building takes a long time, we recommend preserving your wood frames since they’ll be exposed to the elements for so long. Shou Sugi Ban is a cool Japanese technique we use often - go check out this video if you’d like to learn more. Or you can screw the frame into the cleats from the inside so you can replace the whole thing later if it starts to fall apart.
Roofing & Plastering
We’ll touch briefly on two last items - roofing and plastering.
Since hyperadobe is meant to be built vertically and capped, you can easily integrate more traditional roof building techniques right on top of the bags. We recommend hurricane strapping at least 5 layers of bags down that will come up and over your beam structure. This uses the weight of the bags to keep the roof tightly attached.
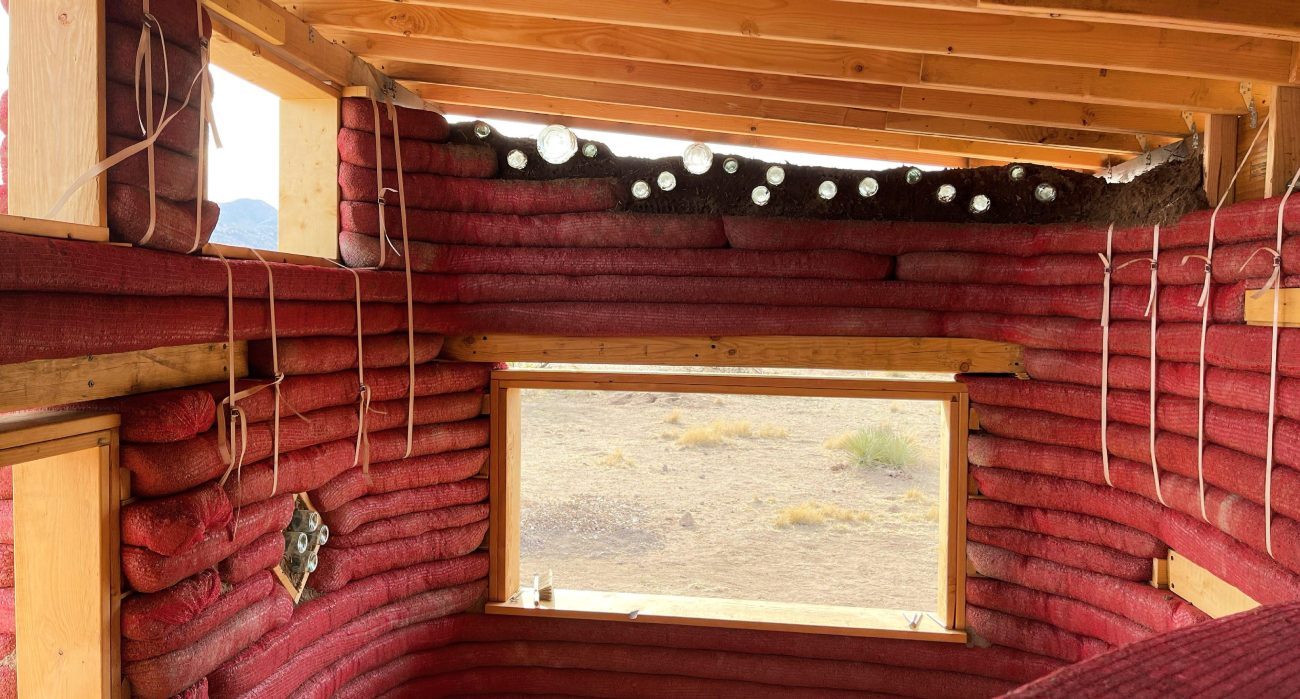
Some pour a concrete bond beam on top of the bags to connect their roof, and some attach directly with cleats and screws. There are lots of ways to do this. Most regular roofs are going to be pitched which means you’ll have space left between where you stopped laying bags and the beams. Consider filling this space with cob and bottle bricks for a beautiful light show each day.
You can also check out mounting a geodesic dome on top of the bags for a unique and cost effective structure.
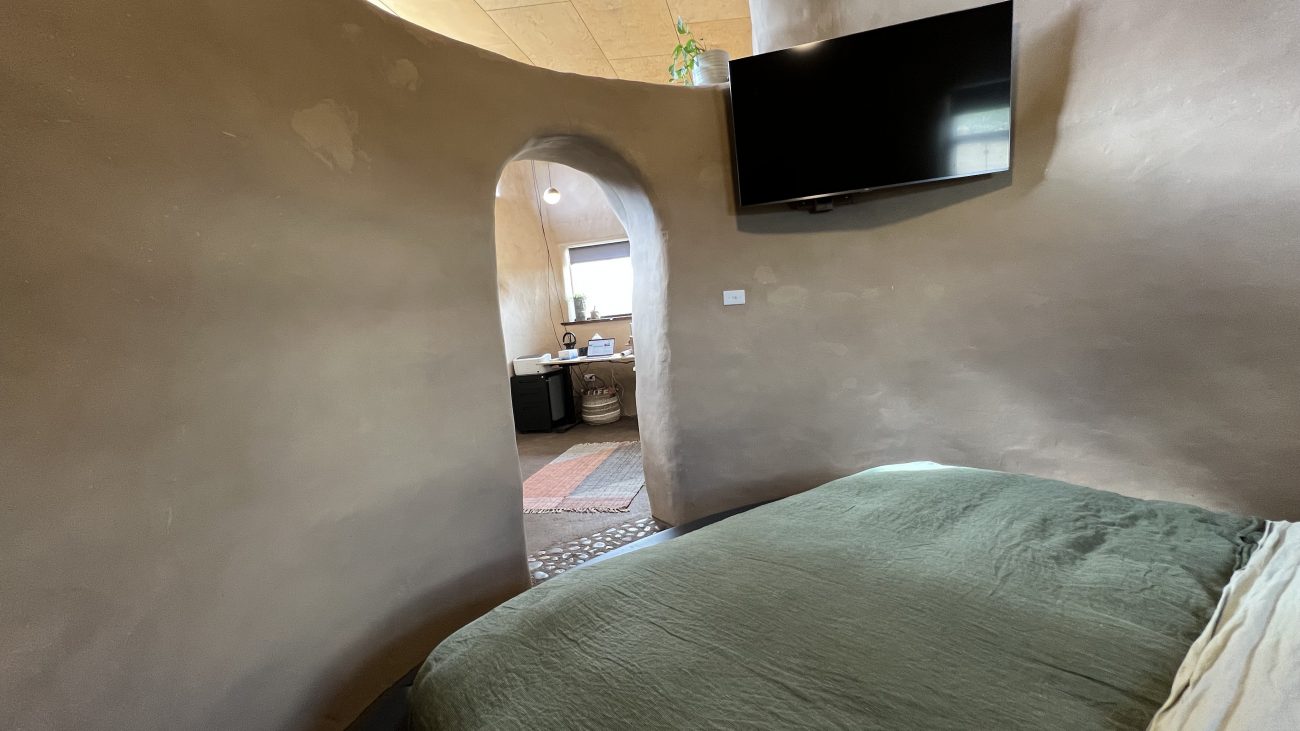
For plastering the nice thing about hyperadobe bags is that 1. they are UV treated so you won’t need to feel rushed to get them covered as quickly as possible and 2. the mesh bag does act as a lathe for applying the material directly so it should save you time.
We recommend an earthen plaster on the inside (see our most recent plaster mix video here for the dome) and a much stronger waterproof covering on the outside. Personally here in our climate with winds, hail and rain we’ve had to resort to a fiberglass based stucco and elastomeric waterproof covering. It’s not as natural as we’d like, but so far it’s holding up much better than our first earthen cement based attempts.
Plastering applies to so many other natural building techniques that we just can’t get too detailed here. There are lots of resources out there for plastering earthen buildings if you’re interested in the subject.
How We Can Help
We hope that this deep dive on hyperadobe has given you what you need to go forth and make your own awesome creation. But if you still need some help we have some options.
If you’d like to get some hands on experience, we do run paid workshops here on our homestead pretty regularly, and have a special email list that you need to get on to be notified before everyone else. These usually happen in the spring and fall when the weather is accommodating.
If you need your own hyperadobe bags you can now officially buy them from us! See below:
Buy Your Own Hyperadobe Earthbags!
Get your own super strong UV protected polyethylene raschel knit tubing. It's made in the U.S.A, and shipped directly to your door. Starting at $419/roll. DIY your dream project today.
Finally, we’re officially taking the wraps off our off-grid homestead coaching. After 4 years of researching and experimenting with earthbag building, solar systems, permaculture, water catchment, septic and composting, community building, and extreme weather prep we finally feel like we have some wisdom to offer in paid one-on-one video Q&A sessions. Plus you’ll get access to all our downloadable products like solar wiring diagrams, water pump plans, recipes and more.
Lots more info over at tinyshinyhome.com/coaching if you’re interested.
Wrap up
Oh my goodness friends, we feel like we’ve covered so much, but if you still have questions about hyperadobe earthbags leave a comment, and we’ll do our best to answer. Who knows, we might end up with a followup video.
Update: See the Q&A video below covering:
- Wet & Cold Climates
- Earthquake Zones
- Tornadoes + Hurricane Zones
- Permitting
- Utilities
- Material Between Layers
- Mounting to Walls
- Insulation
- Rebar Reinforcement
- Automation
- Underground
- Insurance + Mortgage
- Cost
- Microplastics
Anyhow, lots more earthbag building is coming up - make sure you’re subscribed so you don’t miss the next one. Until next time!
Apparel
Grab a fun, comfy t-shirt & help support our family.


About the Author
Jonathan Longnecker is the strongly opinionated tattooed and bearded half of Tiny Shiny Home. He loves making music, figuring out nerdy solutions, exploring the outdoors, and living off-grid.
comments powered by Disqus