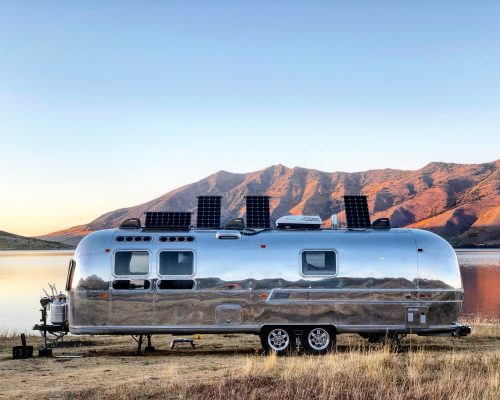
Vintage Airstream Renovation Checklist & Guide

Airstream renovation is more popular than ever! We get messages each week from people starting their own renovation projects, and they have so many questions. We totally get it, we did too.
But what are you really getting into with a vintage trailer restoration? We thought we had it all planned out, but holy smokes did our project throw us some curve balls!
This article is an exhaustive look back at our process, master plan, checklist, process - whatever you want to call it. And as a companion we've created a PDF Checklist you can download to print and follow along for your own renovation.
It may cause you to think twice about jumping into a project this size. And if this 10,000 word article doesn't do it, maybe our ridiculously thorough cost breakdown will :)
But if you're still game, we have lots to share below. Let's get to it!
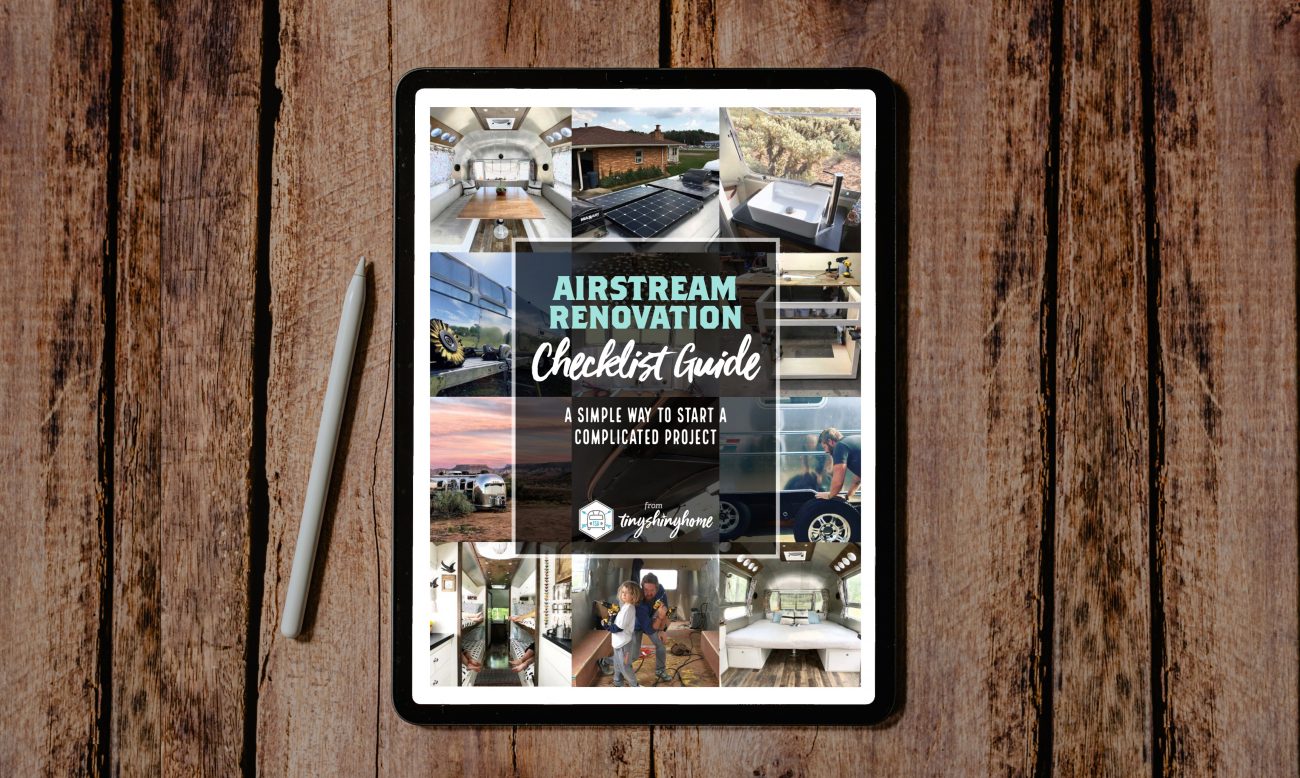
Download our Renovation Checklist
Get an exhaustive overview of everything you'll need to think about for each step of planning your Airstream renovation. It's a simple way to start a complicated project.
Get Access for Free!Article Overview
- Assessing the Damage
- Planning Your Airstream Renovation
- Demoing your Airstream
- Floor & Frame Integrity, Testing Tanks
- Shell-Off Renovation
- Removing Interior Walls
- Exterior
- Inspect Wiring
- Roof Installation
- Closing the Belly Pan
- Axles & Wheels
- Re-wiring 12V and 120V
- Insulation
- Install Interior Panels
- Take a Minute to Party!
- Building the Interior
- Batteries & Power
- Lighting
- Overhead Storage
- Propane Lines
- Appliances
- Bathroom
- Countertops, Tables & Sinks
- Cabinet Facings, Latches, Hardware, Doors
- Floor Installation
- Finishing Touches
- Go Adventuring!
- Additional Resources
Assessing the Damage
Buying a vintage trailer should come with its own handbook, amiright? There are so many things you want to keep in mind when purchasing one of these beauties, but much of it you’re never going to know about until you really get in there and start taking it apart.
So once you’ve made the huge decision of which trailer to buy, before you do anything it’s time to start taking stock of what needs to be fixed.
Checking for leaks
Oh, there will be leaks, friend. Even if the owner tells you there aren’t. As much as we love our Tiny Shiny Home there’s definitely a few flaws in the design. Over the years, rivets will lose their seal, compartments will start to leak, and rear frame separation where they put steel and aluminum next to each other is a genuine concern.
Start by opening the cabinets and looking for water stains on the subfloor. Also, look for water stains along the interior skins and ceiling.
You’ll likely find even more leaks once you finishing demoing, but this is a good place to start.
Testing Water Systems
Does your city water inlet work as expected? Any leaks around your faucets? Look for water lines in cabinets and under the sink and check for leaks.
How about the fresh tank? Can you fill it up and use the water pump to push water to the faucets?
Does the hot water get hot and mix properly? All of these are important features you wan to be working properly.
Sagging Axels & Old Tires
Most likely you’re going to need new axels and tires. In fact, I’d say get them replaced before moving the RV long distances if you can. We got lucky and towed ours about 1,000 miles right after we bought it, but we easily could have had a blowout or axel failure. Shoot, we had a 3 year old axel fail so it happens.
That being said - if this renovated trailer is just going to sit permanently on some property you can skip this step. But if you plan on traveling with it, invest in good axels and tires.
Oh, and add a lift for good measure, especially if you plan to boondock or take it off-grid.
Windows
Airstream windows are like gold encrusted diamonds. They have rounded corners and are curved vertically to the shape of the trailer. In other words, you can’t just run down to Lowe’s and grab a new one.
Plan on shelling out $500-$700 a piece for any broken or missing windows on your vintage Airstream. Plus they may be out of stock or hard to find, even at the places that sell them. This is important to keep in mind when planning our your renovation. Are half of them busted? It’s going to cost a small fortune to replace them, and you may have to wait months before they’re even delivered.
Rivet Leaks
Next you’ll want to check the exterior rivets for leaks. Use this suction cup on each one, and if it pulls off easily then it’s time to replace. For now, just mark the problematic ones with some tape. You’ll want the interior skins off to buck rivet new ones later.
Checking each rivet now will give you an idea of how many rivets you need to buy and how much time to set aside for resealing.
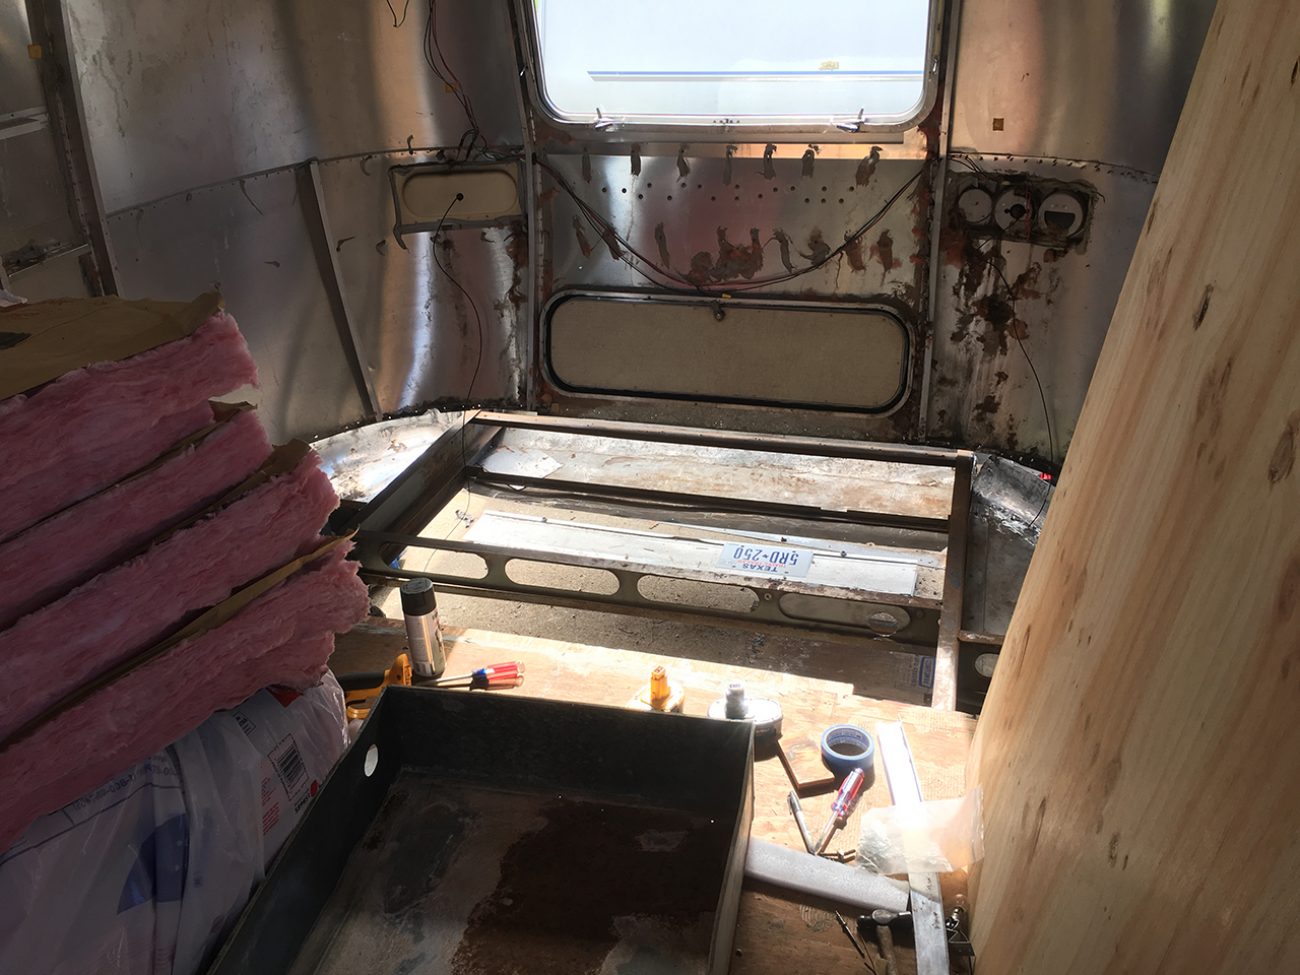
Floor Damage
Like we mentioned above, viewing the subfloor for water stains is a great way to look for leaks. But it could also signal larger problems you need to be thinking about now. Is the floor soft in any areas? Does it feel like it drops down (especially in the rear)? There’s a good chance the stains have turned into more permanent rotted wood which will need to be replaced.
You won’t know for sure about any of this until the Airstream is properly demoed, but will help you mentally prepare for the work ahead.
Seals
There are a number of seals on the door, compartments, and windows that you’ll likely need to replace. While they are fairly inexpensive, there’s a lot of manual labor involved with removing the old, rotting seals and replacing with fresh ones.
In addition, the windows will probably need new positioner guides, and screens will need to be replaced.
And for goodness sake, be careful taking the windows out - remember, they’re expensive!
Electrical
At this stage, it’s important to test all the electrical systems. Does the battery & 12V system work? Do the lights and switches operate properly? How about fans and speakers? Furnace, fridge, and water heater? Do all the running/brake/backup lights work when connected to a tow vehicle? Do the brakes engage?
When connected to shore power do the plugs and air conditioner work? Is there an inverter that powers the plugs from the batteries, and is it working properly?
At this stage it’s important to check basic functionality because if things aren’t working right, there could be issues with rodent damage behind the walls. This can also inform whether you get to use the existing wiring or will have to replace.
Propane
Did the trailer come with propane tanks? When was the last time they were certified? With a vintage trailer you’ll probably need to get them re-certified so that they can be re-filled.
What about propane lines? Are they in tact and free of leaks? Do the propane appliances like furnace, hot water heater, stove, and oven work as expected?
Plumbing & Tanks
Any leaks around your plumbing?
Take stock of how your tailer is setup. Does it have a fresh tank, gray tank, or black tank? Ours didn’t have a gray tank at all - that’s right, all that sink and shower water just flowed out onto the ground! You could fill up the tanks, but it’s going to be hard to really test for leaks these until you demo, so just make a mental note of the setup for now.
Cabinets
Original vintage RV cabinets can either be in surprisingly good shape, or in need of immediate replacement. Most of the time, you’ll be able to tell pretty quickly which category yours falls into.
The first step is to open and close all compartments. Our vintage Airstream had these weird sliding doors everywhere called Tambours. Some of them still worked great, but many of them wouldn’t budget or got stuck half way.
Spend some time pushing and pulling on the walls and cabinets, too. You want to see if they’re still properly attached to the walls and to each other, creating a safe, strong interior.
Lots of people don’t bother replacing cabinets because 20 years ago everything was built like a tank. Even with our 1972, all the interior walls and cabinets were super solid, and we hated ripping them out.
If you do, make sure to take some time and marvel at how well each piece fits together and provides structural integrity while still remaining lightweight. Pretty cool.
Appliances
Test those appliances! These can be some of the largest costs involved with renovating a vintage Airstream, so take some time and really put each one through its paces.
Furnace - Does the thermostat work properly to turn it on? Does it blow hot air out all of the vents? Check the outside vent to make sure it’s not blocked with any debris. And of course, check for propane leaks as well.
Refrigerator/Freezer - Does it stay cool as expected when connected to shore power? Does it switch over to propane when running off your batteries? Check for propane leaks here as well.
Stove/Oven - Do these light and create a flame? Do the knobs work to change the flow? Sometimes these units will be separate, so be sure to check them independently, and look for propane leaks. While you’re at it, why not cook up a tasty dish just to make sure?
Air Conditioner - Does the thermostat work properly to turn it on? Does the compressor kick in and blow actual cold air? Are there any leaks around the unit on the roof?
Hot Water Heater - Most likely you’ll have a 6 gallon water heater that uses propane and/or electric to heat your water. If you haven’t used it before, it will take time to fill the reservoir and get it up to temperature. Try it both on battery power (so it uses propane only) and hooked up to shore power. With both, check for water and propane leaks.
Vents - Do they open and close properly? Do they leak? If there’s a 12V fan and light, see if they still work.
Tongue Jack and Ball Hitch
You’ll definitely want to make sure your hitch coupler locks properly. The last thing you need is it coming decoupled when towing, right? We’re still using our original because it was in great shape, but they are easy to replace if yours is making you feel unsafe.
Also, keep an eye on that tongue jack! Ours was electric and totally gave out on us right at the end of our renovation. We took the Airstream to the countertop shop and couldn’t get it off the truck because it wouldn’t go up high enough.
--
Whew, that was a lot of assessing, yeah? Well friend, we’re just getting started. Now that you’ve taken stock of what works and what doesn’t it’s time to dig in and begin your planning. Ready, set, go!
Planning Your Airstream Renovation
Oh my goodness - where do you even start? We know exactly how you feel. Renovating a vintage trailer is a gargantuan task that requires knowledge of everything from electrical to plumbing to fabrication to woodworking to interior design and more. But I think we can all agree that before you start any work, you should have some sort of plan.
Will this plan change? Most likely! That’s ok, though. Get some ideas on paper so you can start thinking through how everything connects together.
Research Other Renovations
First things first, spend some time researching what others have done first! There are so many beautiful renovations out there, and you’ll get lots of good ideas in inspiration. Here’s a few to start with:
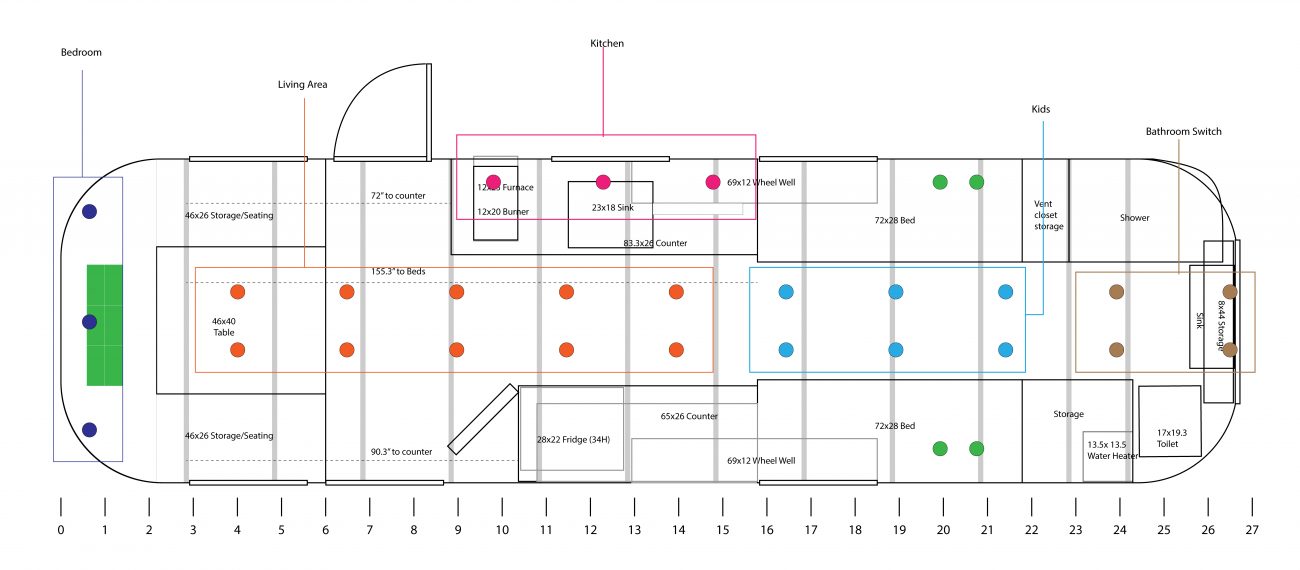
Basic Floorpan & Layout
Now it’s time to plan your own. Measure your interior dimensions, make a mockup, and start placing cabinets, beds, appliances, bathrooms, etc… where you want them. We used Adobe Illustrator because I’m a designer and that’s what I was used to. You can also try programs like Sketchup or just grab some graph paper, make cutouts and move things around.
The key is that your mockup has to be to scale so you have a realistic idea of what will fit where. Even at this early stage, you need to start thinking about some how other systems will integrate with your design.
- Make sure to put the wheel wells in your mockup. You’ll quickly see how what you thought was an empty space actually isn’t - and how you’ll need to build cabinets or beds to conceal them. Or maybe you’ll work them into the design as a bench. Just don’t forget to put them in the floorpan.
- Get under the trailer and see where the propane lines come up through the floor to various appliances. Start thinking about which appliances you’ll want to have propane, and how you might need to reroute those propane lines if they’re in a different place.
- Another thing that may not be obvious until you start demoing is the furnace ducts and tank cavity heating. If you’re planning on using a propane furnace, remember that you’ll need space for ducts to run the entire length of the trailer on the side it’s installed. You’ll also want to plumb that duct into the water tank cavities under the subfloor to keep them from freezing in cold temperatures.
- Speaking of water tanks, don’t forget that their location is critical to how you run your plumbing. You may not know where they are exactly right now, but you should be able to tell by searching your model online. The location of the tanks are important, so it’s probably best not to change these radically. For instance, the fresh water tank is likely located just in front of the axles for stability when towing when it’s full. And too many full black or gray water tanks near the rear of the trailer could cause trailer sway. Make sure you’re thinking through how your sinks, shower, and toilet will drain - their location may be limited by where the tanks are located.
- Related to grey tanks, you’ll also want to plan around their vent tubes. If you look on top of your trailer you’ll find at least one opening where the tank can vent. You may have to build cabinets around these to hide them so keep that in mind.
- Finally, when thinking about plumbing always make sure you can access the connections. So even with a cramped area like a shower give yourself a way to get in there if something needs to be fixed.
Decide on your power system and Create an Electrical + Wiring Plan
There are so many ways to power a vintage Airstream! It can be hooked up all the time, or run off solar and batteries. Planning your power system is kind of a whole thing that I won’t get into here. But you can check out our deep dive article, and see how we chose to design a low power system specifically for living off-grid.
To go along with your floorplan, create another layer and start thinking about how you’re going to get power to your appliances. We also focused on where our lights would go, and how they would be grouped together for switches. You’ll have to figure out how to run wires through the ceiling or along the floor in cabinets, keeping in mind which side of the trailer your appliances, switches, and plugs will be on.
At this point you don’t need a 100% locked in electrical plan - things will probably change the deeper you get into the renovation. But you want to have the high level things figured out, and be thinking about how it will integrate with your cabinets.
Demoing your Airstream
Now that you’ve got a plan, it’s time to start disassembling everything.
I should back up here for a second - many people decide to use as much of the original interior as possible so a full gut isn’t always necessary. I mean, we recommend it if you plan on living in it or traveling with it because of potential structural issues that may need to be addressed.
But if you’re trying to keep it uber simple you can probably skip this step. Alright, onwards!
You may be tempted to just take a sledgehammer to everything, but we recommend taking it slow and paying attention to how everything is put together. You’ll get a lot of great ideas for your own build when you see how the engineers designed these vintage interiors. We were really impressed with their ingenuity.
You’ll also find out very quickly that everything is connected to each other. There’s no way to just take out one cabinet because it’s attached to the wall, ceiling, and nearby cabinets, too. Often in ways you wouldn’t expect. Just keep hunting for that rogue screw - you’ll find it eventually :)
We tried our best to keep things in good shape, hoping to sell. Especially the appliances. They’re still sitting in a storage facility somewhere, but if they still work try not to trash them. Maybe someone can use them.
One thing we recommend is saving the dividers as templates for when you create your own walls. Recreating that curve is THE WORST™. Trust us.
We ended up making several trips to the dump (and getting charged for it), but we had a few dumpster divers come and pick up some of it for us which was kind of nice.
Speaking of the dump - if your water lines use copper, try to save it and recycle. Same if you’re going to replace your propane lines. You’ll get a few bucks back at least.
Be careful pulling out plumbing and fixtures - there could be water left in the lines or you could crack your tank like we did taking out the toilet and have to buy a new one.
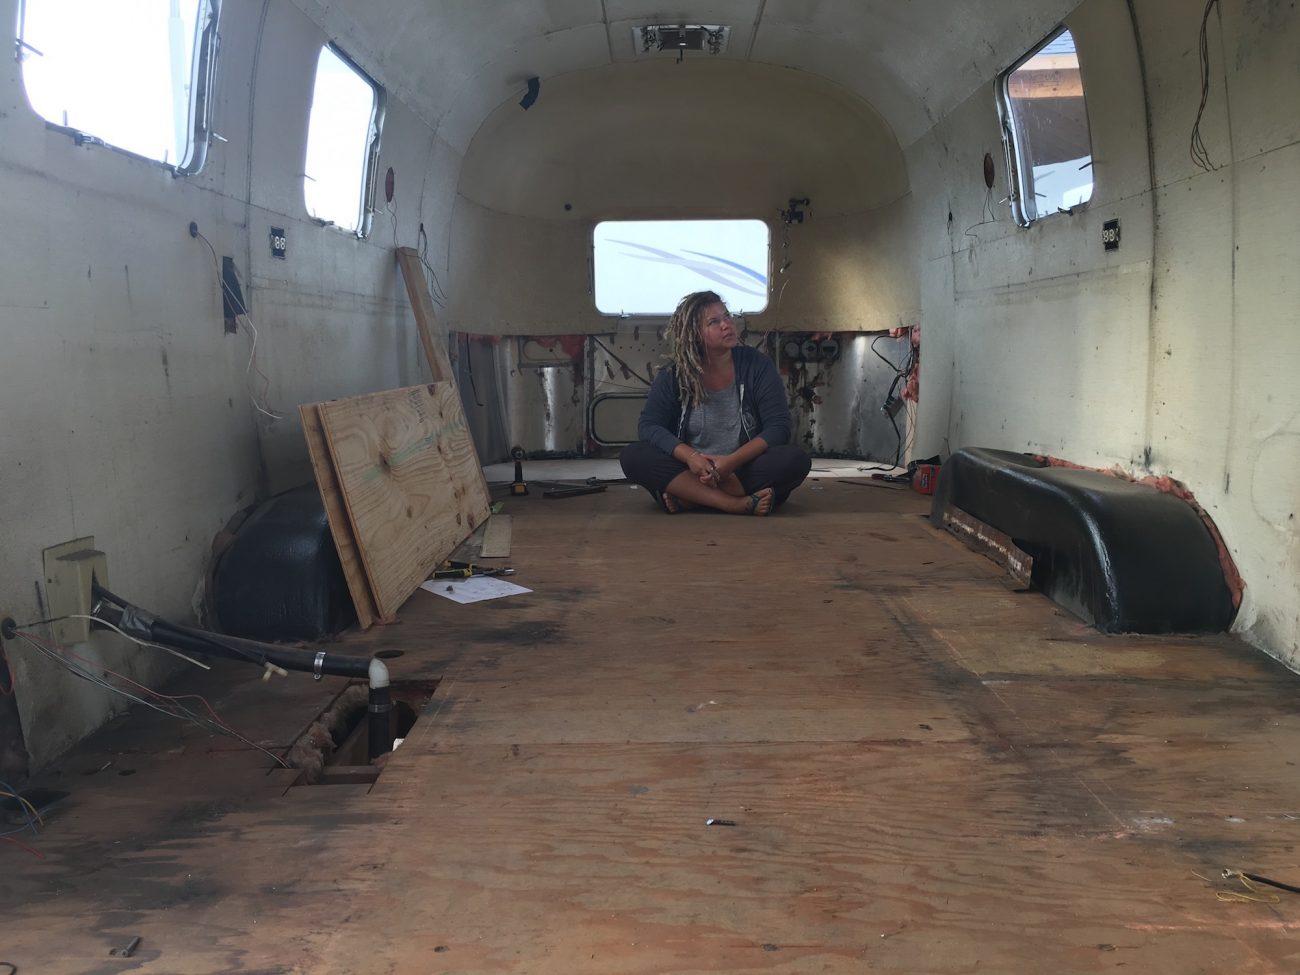
Eventually you’ll get all the cabinets and fixtures out, then you can focus on the flooring. Getting down to the subfloor will be really important because you’ll be able to clearly see any soft spots, rotten areas, or water damage.
At this point, you’ll also need to decide if you’re taking your interior walls off. If you’ve come this far, we highly recommend it. Having access to the area behind the walls means you can adjust or replace wires, insulation - and most importantly deal with leaks and re-riveting. More on that in a bit.
Congratulations, the first stage of your demo is complete! Now let’s see what your frame and tanks look like.
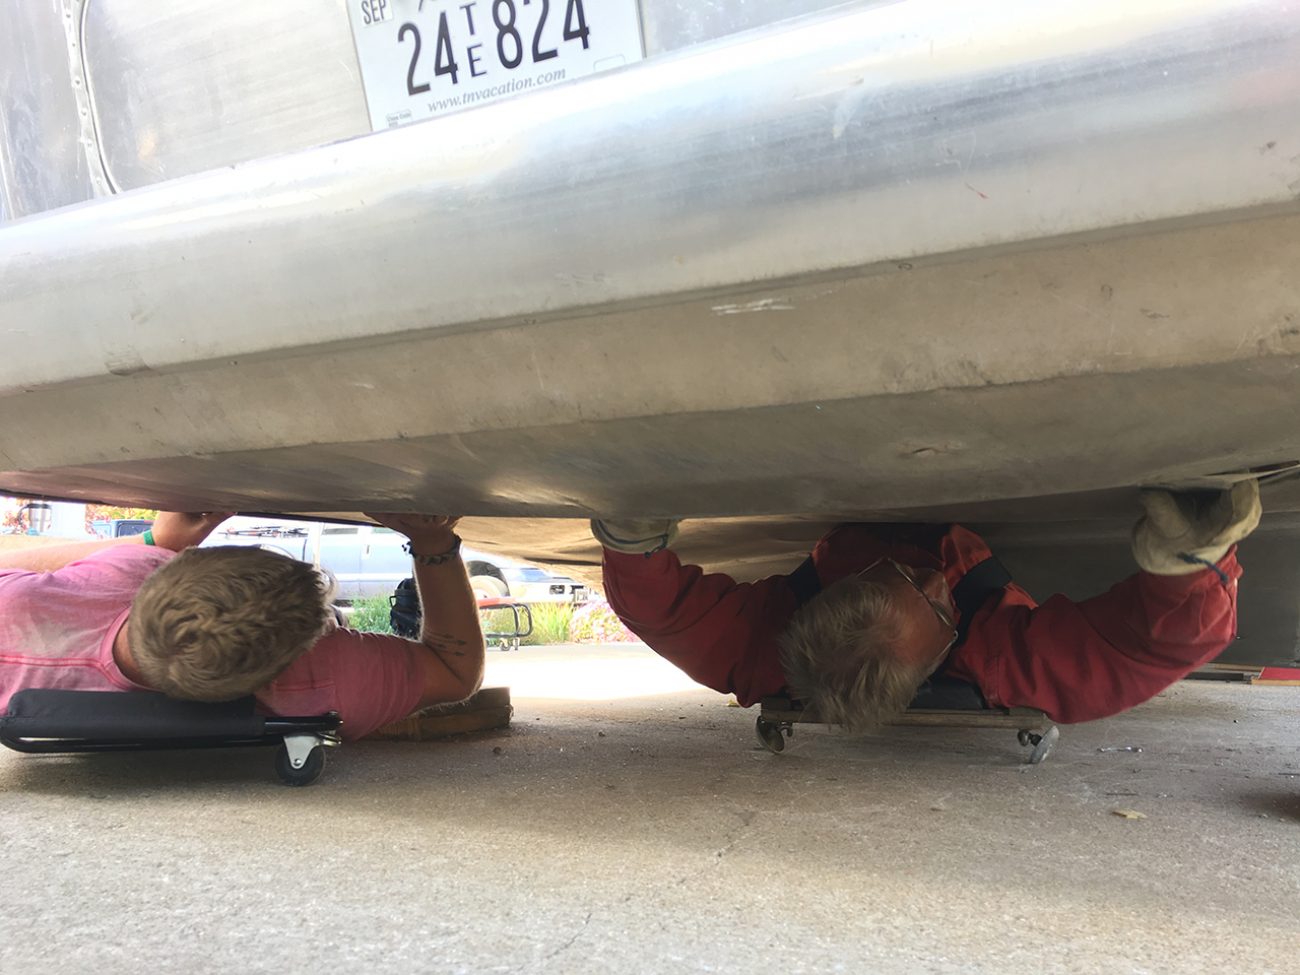
Checking the Integrity of your floor and frame, testing tanks
Now it’s time to open her up and see how big of a project you’ve gotten yourself into. The next step is to drop the underbelly and check the frame for rust and cracks.
A deteriorating frame means you’ve entered “shell off” territory, and you’ve got a more complicated project ahead of you. You’ll have to separate the top of the Airstream from the floor and frame, re-build it, and reassemble. More on that in a minute.
Now we did have to replace part of our subfloor. The back near the bathroom had rotted out, and we had the beginnings of rear frame separation. So we did do significant work there. But we didn’t need a lift or total re-fabrication of the frame.
While you have the underbelly off, now’s the time to really test your existing tanks for leaks. If you can, remove them entirely, fill them up, and see what happens.
Also, if you’re going to need new tanks (or additional tanks), you need to think about ordering these soon. They are custom and take time to fabricate. Ordering custom tanks was one of the most stressful processes of our renovation. Making sure we specified the exact location and type of fitting was terrifying since they were so expensive. Thankfully, it all turned out ok in the end.
Shell-Off Renovation
We mentioned that we didn’t have to do a shell-off renovation, but in case you do find yourself with an unsafe frame, these are the basic steps.
- Remove interior walls, wiring, and insulation.
- Brace the frame so it doesn’t warp or bend when you lift it off.
- Remove the sub-floor (this is very difficult because of the way the floor, frame, and shell are bolted together).
- Carefully use a pulley or lift system to suspend the outer shell so you can work on the frame.
- If you’ve come this far, you’re probably going to re-build the frame so hopefully you're good at welding. Might be worth having a company build it for you.
- Once you’ve got a shiny new frame you’ll lower the shell back down, and connect the subfloor and frame all back together (this is also difficult).
Like we said, we didn’t have to do this, but we know others that have. Here’s a few folks you should check out for more detailed info on shell off renovations.
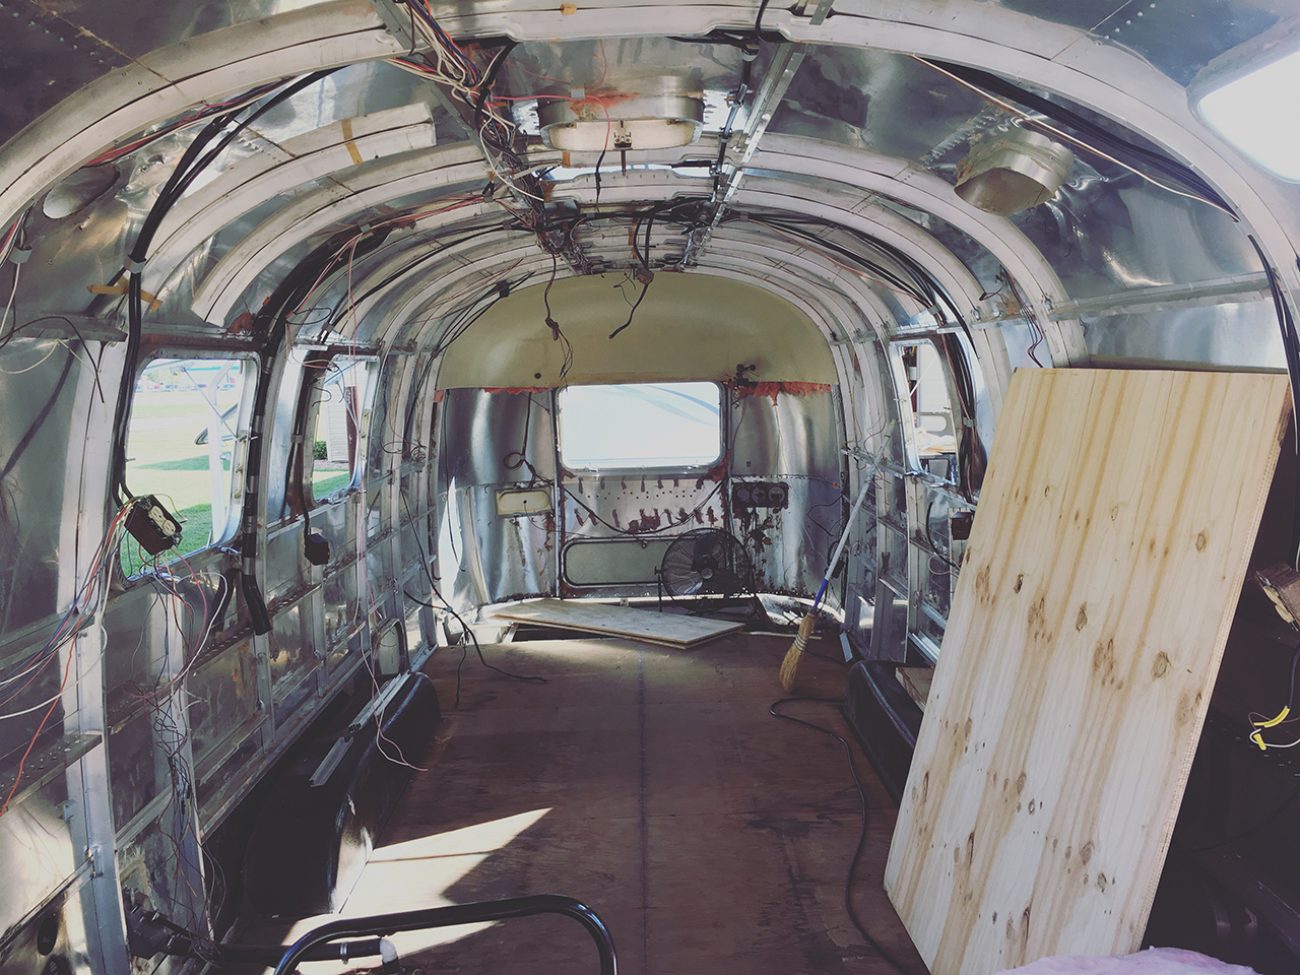
Removing Interior Walls
We quickly skipped over interior walls earlier, but wanted to provide some more context.
Document panels before removing
We highly recommend taking copious amounts of pictures and numbering each interior panel as you remove them. That way you’ll know what order and where to put them back. Drilling out interior rivets is easier than buck rivets, but also tricky. You have to get right through the middle and destroy the expanded part on the other side of the wall. The exterior ring will break off and get stuck around your drill as well. Take it slow, and have some extra hands for those big panels. Or use Clecos to keep the panel up until you’re ready to take it down.
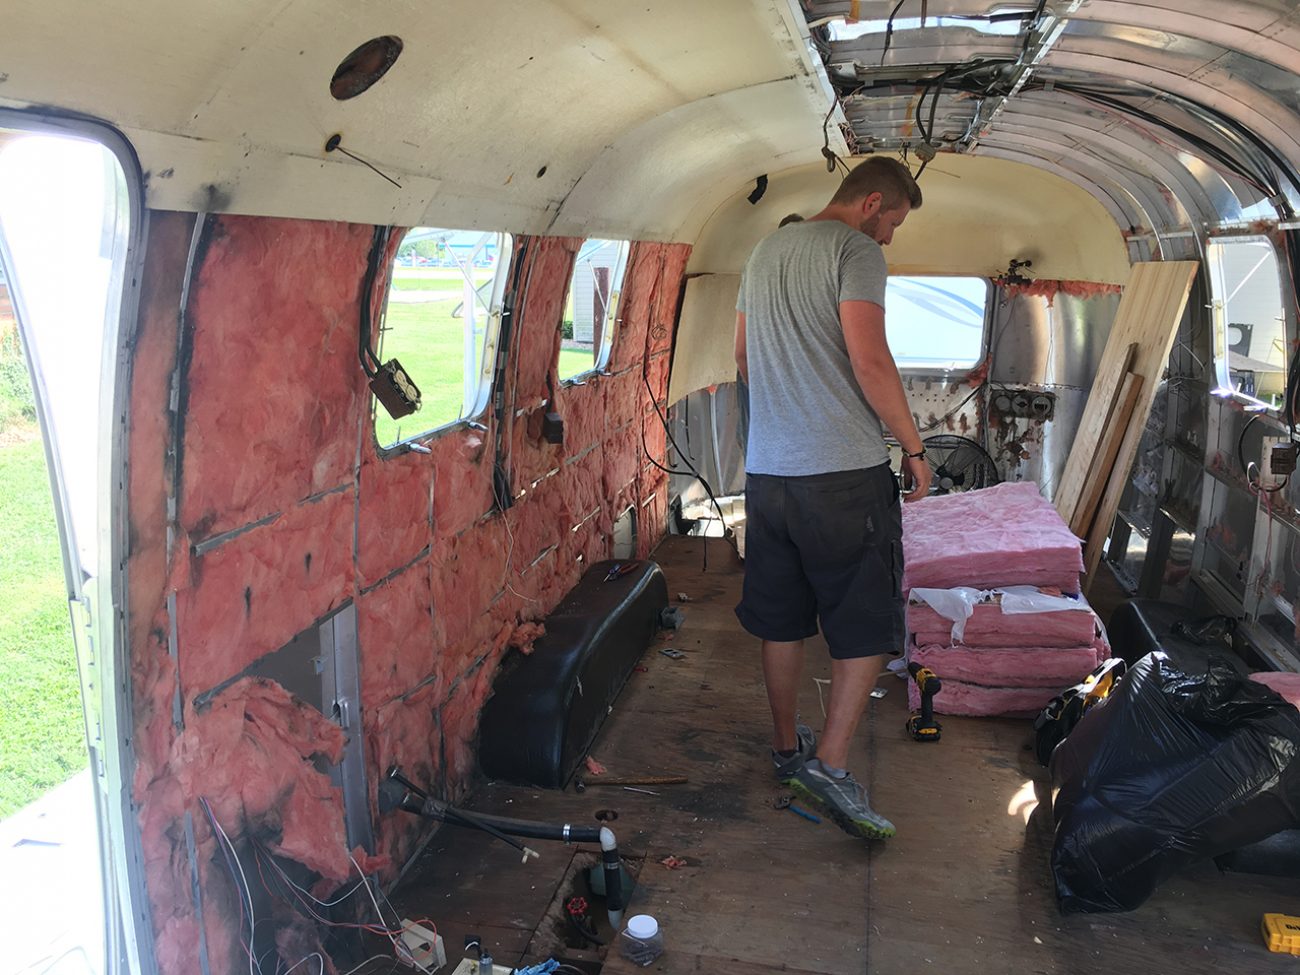
Check Insulation
With the walls off you’ll either have some nice fiberglass insulation to remove or a horror show of dead rodents, feces, and chewed wires. Our plan was to replace this insulation so we removed it all.
Remove Vinyl
Have vinyl, fur, or some other ridiculous material covering your beautiful aluminum? Turns out you can remove it (with great effort). Get heavy duty gloves, some disposable paint brushes, and a large flat area. Start in warm weather and layer several coats of Jasco on the vinyl, letting each application sit for 20 minutes or so. Depending on the age of your panels, you may need 3-4 coats before you start to see the vinyl bubble up.
At that point you’ll be able to rip a lot of the vinyl off by hand or with pliers. But there will still be stubborn parts left. Re-apply your Jasco again until they start to loosen up, and use a plastic scraper to get the rest off.
Now comes the hard part - what’s left after removing the vinyl is the glue they used to adhere it. And it is some nasty stuff. You’ll need approximately 400 heavy duty paper towel rolls, and gallons of Goof-Off. You’ll put the Goof-Off on the glue, and you’ll get a few seconds to wipe it off. The key is that you can only remove a few inches of glue at a time. It’ll quickly dry and then start smearing if you’re not using fresh towels and Goof-Off so take it slow.
Finally, use WD-40 to polish and shine it up when finished. Oh, and take note of what parts of your panels will actually be visible. There’s no need to do a bunch of extra work for an area that will be covered by a cabinet!
Removing Endcaps
If your Airstream is like ours, you probably have some large plastic endcaps inside that will also need to be removed while removing the other panels. Be very careful with them to avoid cracking, especially if you’re going to re-use them. Our front cap had a bunch of gauges in it so there was some wire detangling that needed to happen during the process. They’ll likely be large, heavy, and awkward so get them on a solid surface as soon as possible.
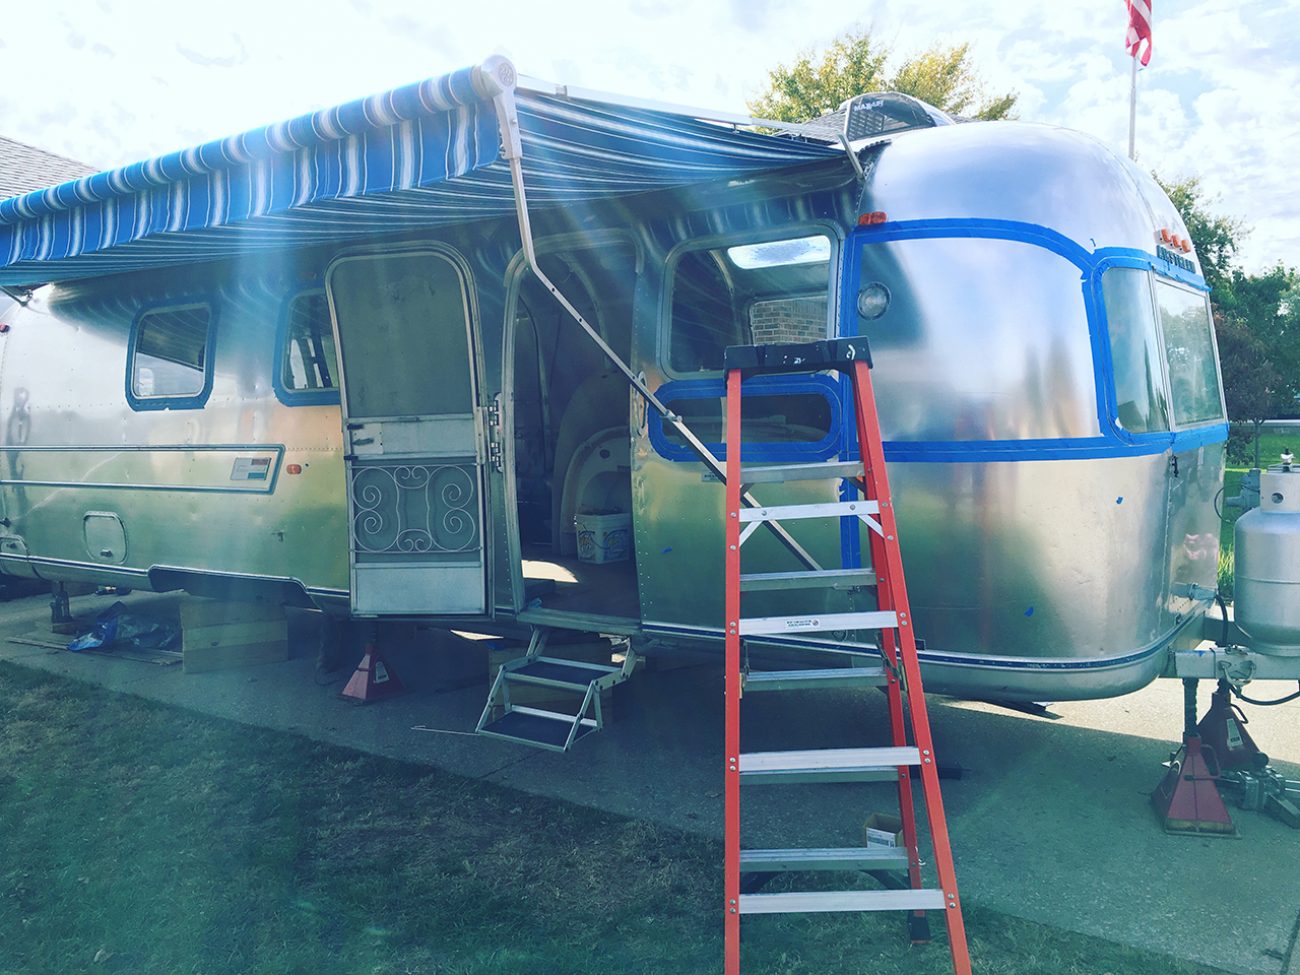
Exterior
Oh the vintage Airstream exterior! It’s so shiny, but so prone to leaks. You’re going to have a lot of work to do on the outside before you can focus on the inside. Let’s get to work!
Testing rivets for leaks
If you didn’t do your rivet leak test already, now’s the time. Check every. single. one. But now you’ll want to drill out the bad ones and replace them. Don’t bother with the expensive fancy rivet drill - just use a 1/8” drill bit, take it slow, and you’ll get the hang of it quickly. We recommend buck riveting with a bucking bar instead of using olympic rivets. With the interior walls off you’ll have full access to do it right.
Also, check all your seams for leaks. Scrape off the existing caulk and re-seal with Trempro. Related - don’t bother with any other sealers. Trempro is the only thing you need, trust us. Go ahead and re-seal the inside seams with Trempro for good measure.
Remove & replace all seals from windows and compartments
Rubber gaskets are relatively cheap, and the last thing you want is a leak you could have easily prevented. Take each window and compartment off, scrape off the existing seal, and replace.
Windows will probably need new screens, which can be found at any hardware store and are easy to replace. And you might need new positioner guides as well. Vintage Trailer Supply sells them, and they’re easy to drop in.
Stabilizers
You’ll want to decide if you’re using the original stabilizers or adding new ones. You would have had to take them off when removing the underbelly. Ours were in pretty good shape so we disassembled, painted, and re-lubed them before putting them back on.
Front Door
Re-sealing the door and screen will be tricky, especially if you don’t want them to leak. Do lots of testing here before putting everything back together. Also, we recommend adding a deadbolt at this stage for extra security as they normally require access behind the interior walls. We wish we had done it back then as it’s too big of a pain to do it now.
Remove Paint
Those old Airstreams really love blue, amiright? There’s a chance you’ve got a few lovely blue stripes or multi-colored plaques that are going to need updating. How you choose to do it is up to you. Some strip all the paint off and re-finish like it was to maintain that vintage glory. Others like us remove all the color for a more modern look. Either way, there are going to be letters, plaques, decoration that need some attention.
Stabilizers
While you have the underbelly off, take those existing stabilizers (use some jacks to keep it steady while they’re off) and give them new life. We completely disassembled ours, removed the rust, primed, re-painted, and re-lubed so they were as good as new.
Patch Holes
There’s a good chance you’ll need to do some patching on your exterior. For us, there was some damage near the door and an old radio antenna we didn’t need anymore. This is pretty simple, cut some exterior aluminum larger than the hole in the shape you want, add some Trempro behind it to keep water out, drill holes evenly, and use clecos to hold it in place. Then buck rivet permanently. You can even make fun shapes like stars, circles, etc… to give your trailer some personality.
Tail & Running lights
Besides checking to make sure the lights actually work when hooked up to a tow vehicle, you may have a damaged, leaking, or broken light. Taillights can be in a pre-made enclosure that you might have to replace if it’s messed up enough. But the running lights are fairly standard, and can be changed out easily. Be careful, though - sometimes these are leaking through their holes into the shell and need to be sealed from the inside.
Leak Testing
Finding, fixing, and re-fixing leaks turned out to be one of the most frustrating aspects of our renovation. Just when you think you’ve got them all, you’ll find a new one. Or realize the patch job you did didn’t work. The best way to leak test is to have your subfloor visible, the inside walls off, and then let the trailer sit outside in a couple of good downpours. With the interior walls off you’ll have a much easier time tracking those leaks down (they’ll be visible on the wall or ceiling). And with the subfloor visible, you’ll find those small, but persistent leaks as you see visible wetness on the wood.
I’m not going to get into too much more detail, but just want to encourage you not to give up. Sealing the trailer is going to be vital to its usage and longevity in the future, so keep at it until ALL the leaks are gone.
Inspect Wiring
With the interior walls off and insulation removed you should have full access to all your wiring. So it’s time to make some decisions!
Use Existing Wiring
Inspect the 12V wiring already in use. Does it all look good? Did everything work before you demoed? What are you power plans like? If you’re trying to throw something together quickly and not reinvent the wheel, you could just leave everything as is.
Or if you’re like us and planned on re-designing the power system from the ground up for our family of 6 to live off-grid you might as well pull them out and re-run everything. I mean, if you’ve gone through all the trouble of ripping the interior out and removing walls and insulation I’d go ahead and replace the decades old wiring - but that’s just me!
Additional Wires
Even in a perfect world where you have no additional power requirements, and all your cables look perfect, now is the time to run any additional wires for displays, switches, remotes, antennas, thermostats, and more. Make a plan, start a wire list guide, and know exactly what you need to do.
Create Your Own Wire List Guide!
Quickly plan and assemble your very own digital wire list guide with this handy template. Use our exact wiring as a guide, and organize your installation by wire number, color, gauge, polarity, and more.
7-Pin Wiring
How do the wires look for your brakes, running lights, brake lights, etc…? These were the only wires we didn’t replace - though we probably should have.
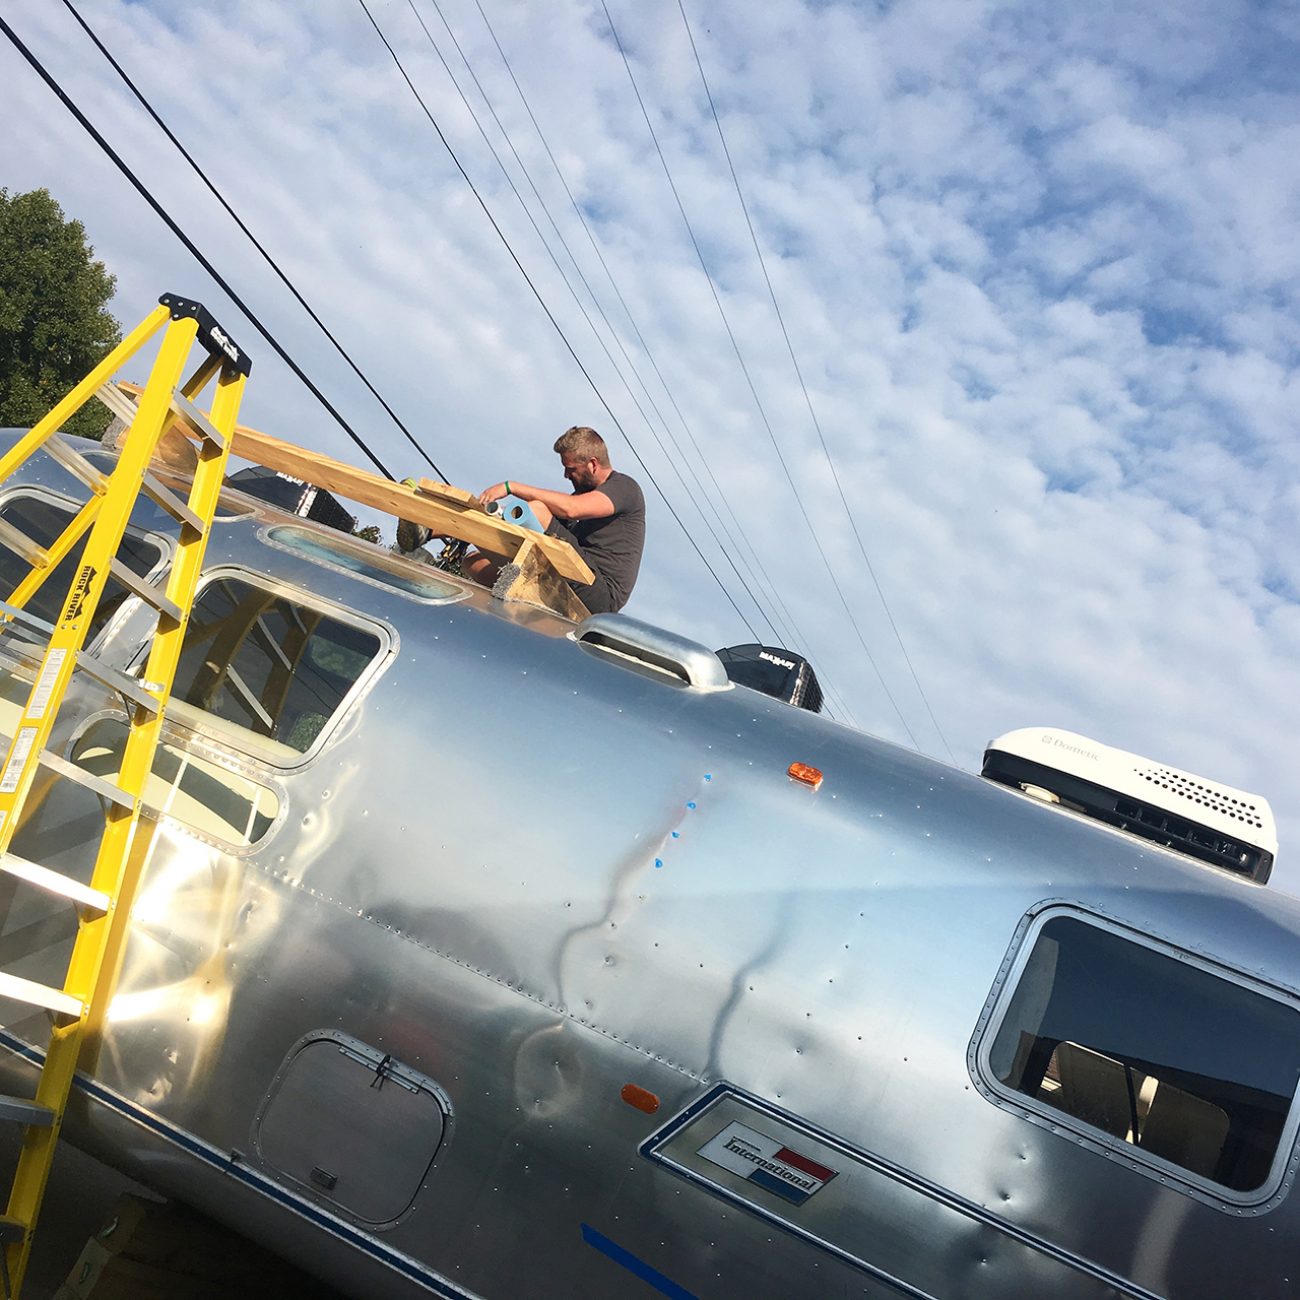
Roof Installation
Let’s get that roof installed, patched, and waterproofed! An Airstream renovation will likely involve replacing a lot of the equipment on the current roof. And you want to get it all put in and sealed back up before moving on to the interior.
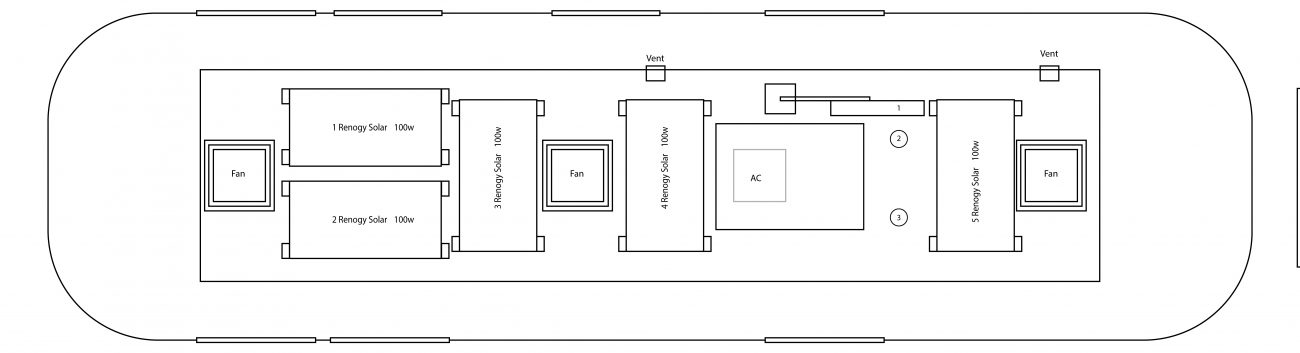
We spent a lot of time doing mockups and layouts of our roof because we had to find the best way to fit as many solar panels as we could up there. Sandwiching them between 3 vents, an air conditioner, and various TV and internet antennas - on a super curved roof no less - took a lot of measuring and planning.
Vents & Fans
Good vent fans aren’t super expensive, and are most likely worth replacing. Keep in mind the size of your vent shrouds when measuring for other items like solar panels.
There are also gray water vents to keep in mind. We had two, and even though we kept them in the same place, the vents themselves needed to be replaced and re-sealed.
Air Conditioner
Even though our 1972 AC still worked, we weren’t about to hit the road full-time without replacing it. With an Airstream, you’ll want to install the drainage kit that allows the unit to drip its condensation through a tube that runs through the walls down to the wheel well. This was a little tricky, and made it hard to connect to the should inside with the wooden runway we added to the ceiling. The connecting tube was only so long!
TV Antenna
There are newer cool omnidirectional TV antennas - if TV is your thing. But we opted for an old raise, lower, and point style so we could attach a directional internet antenna to the top. Honestly, this turned out to be a huge pain because we had to install it to the side of the AC with all the solar panels we added, necessitating a crazy custom mount because of the curve of the roof. We’re glad we got it done, but it was a huge pain.
Internet Antennas
In addition to the directional, we also installed an omnidirectional 4G antenna and wifi booster antenna as part of our robust internet setup. These took up very little room, so easy to plan for.
Need a reliable, boosted internet setup?
In this beautifully designed PDF, we cover our exact internet setup - from carrier plans to boosters to routers to antennas.
We'll even tell you how we installed it and how it all connects together.
Get Access for $19Solar Panels
Like I mentioned, our solar panels required a ton of planning to get 5x 100W panels to fit between everything. We decided not to screw our panels, but to use special tall mounts, Aluminum primer, and VHB tape. Then we bought our own aluminum bars, tapped them, and created a way to tilt at 45 degrees in the winter.
Running Wires
Some of the things you install on the roof will have their wires built in. For instance, a TV antenna’s wire will come down through the bottom, so you don’t have worry about finding a way to run the wire through the roof and keep it waterproof. Same for your vents and air conditioner.
But items like solar panels and internet antennas you’re on your own. Some people use a combiner box - it’s a water proof box that requires you to cut a hole in the roof and seal it. The box allows you to make connections inside, run wires out the bottom inside, and close it up on the top.
Airstreams also have these really cool refrigerator vents that you can use to run wires into if you don’t want to drill holes in your roof. However, there area are a few things to keep in mind.
- Make sure to let the wires go down past the vent before going up into it so that water can’t follow the wires inside
- There will probably be a screen of some sort that you’ll need to cut through. Keep as much of this as you can so it still functions to keep bugs out.
- The edge of the vent and the screen are very sharp. Use some PVC pipe or something similar to protect your wires on those edges.
- Use wire guides to keep your roof nice and tidy.
Closing the Belly Pan
With the outside shell sealed and the roof finished, you probably want to move as quickly as possible to get the underbelly buttoned up. This will allow you to move your focus to the interior, and be sheltered from the elements. That doesn’t mean this step is easy, though! There is still a lot to do.
Wheel wells
How have those plastic wheel wells held up after decades of use? Do they need to be patched or replaced? Now’s the time to do it. We ended up just patching ours with aluminum pieces and rivets.
Install Water Tanks
This is a big one. Replacing or re-installing your fresh water, gray water, and black water tanks is a big job, and tied to any planning you have already done for placement. Because of our composting toilet, we converted our black tank to a gray tank and added a second smaller gray tank that we connected via a PVC pipe to make one big gray tank. Making sure all the tanks are properly supported and insulated is very important.
Floor Insulation
When you dropped your bellypan, you likely found a bunch of old gross fiberglass insulation down there. This is the time to replace it or come up with a new type of insulation to put in. We ended up using string and small pieces of wire to hold the individual sections up until we were ready to put the pan back on.
Propane Holes & Vents
Where are your propane appliances going inside? Do you need to plan for more holes in the underbelly or close off some existing ones? Same thing for any floor vents you may not be using anymore. Now is the time to patch them up.
Rivet the Underbelly Back On
With everything in place, use clecos and a pneumatic rivet gun to put the pieces back up one at a time. If existing rivet holes are too large, go with a bigger flanged rivet, or drill new holes. This is a big step, friend! Take a minute and celebrate!
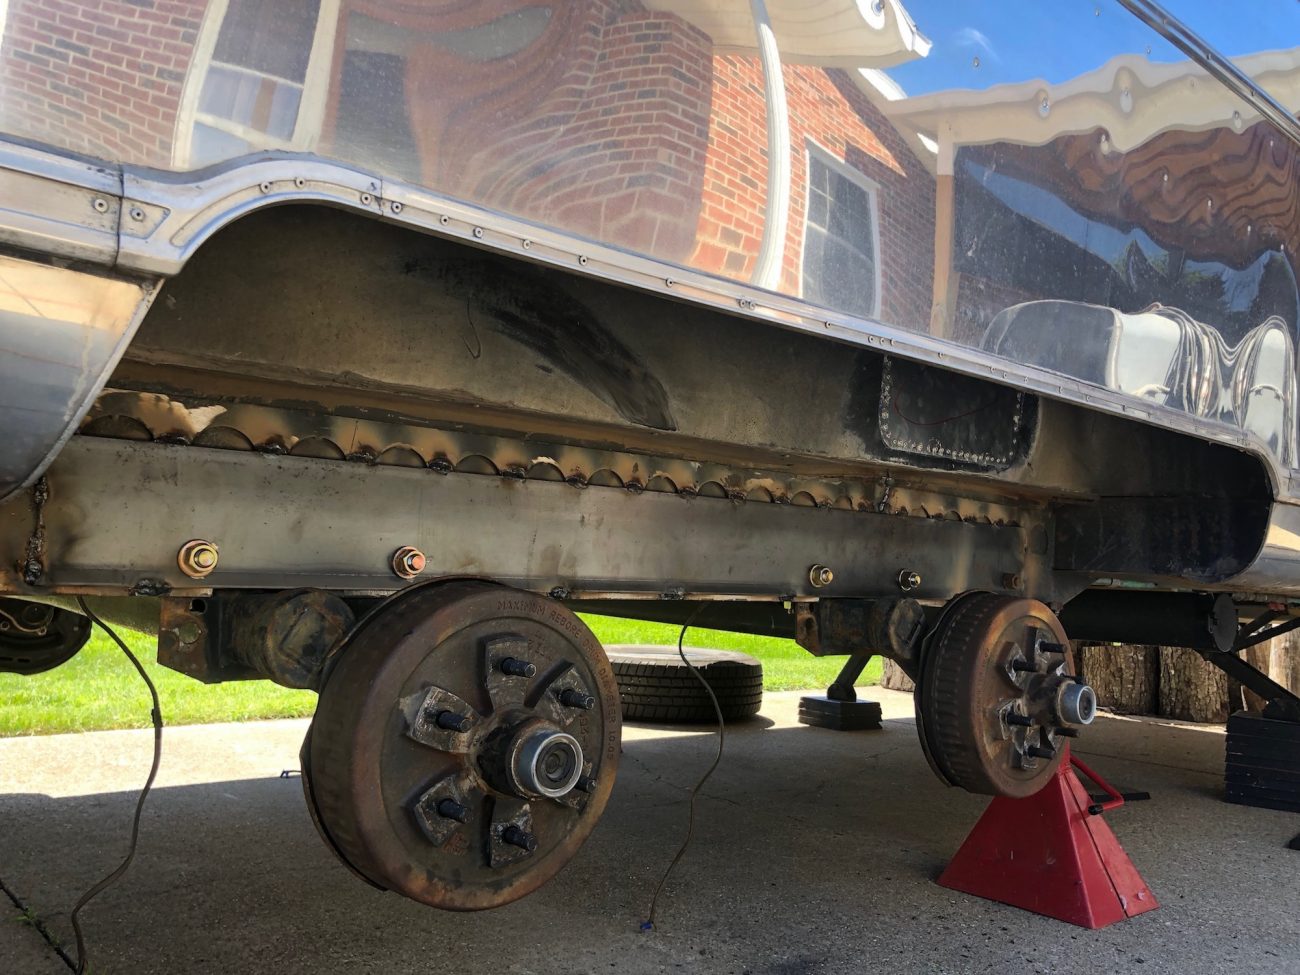
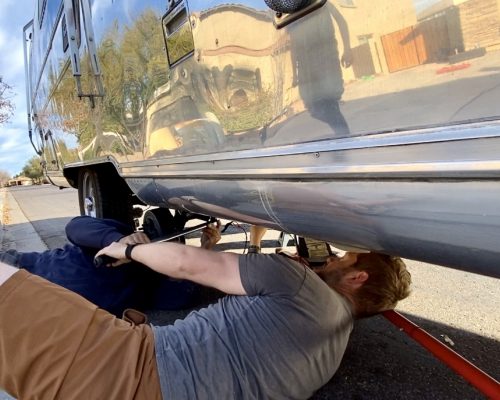
Axles & Wheels
With your belly pan back on, let’s install your axles and tires!
Install new axles and wheels
We highly recommend putting new axles on your trailer, especially if you plan on driving it anywhere. Torsion axles wear out over time, and unless someone has put new ones on recently they aren’t safe. Same with your tires. A blowout or axle failure on an Airstream can be catastrophic, so spend the extra money and replace these.
The axles will bolt to your frame, and you may have to drill new holes to make it work. We ended up removing our shocks during the process as they didn’t fit with the new axles. We also recommend 16” truck tires for a small lift and guarding against blowouts.
Decide if you want a lift
While you’re adding axles, now is the time to add a lift if you want one. We made the mistake of waiting a year, and adding it after the fact was incredibly difficult with the existing propane lines. A lift will help longer trailers not bottom out so often, especially coming out of weird gas stations or going down boondocking roads.
Test your brakes and lights
There’s a good chance your brake lines will run inside the belly, so once the axles are put back on and wired up you should take some time to test them. Also test your running lights, brake lights, and reverse lights as well.
Re-wiring 12V and 120V
We touched on this earlier under “Inspect your Wiring,” but really you probably don’t want to get into a huge job like rewiring until everything is sealed and closed up outside. Re-wiring your trailer is a huge job - so huge we have multiple deep dive articles explaining what we did.
This “checklist” article won’t get into that much detail, so make sure to go read those for more background.
Plan where your power center and batteries will be
Knowing where your batteries, inverter, converter, distribution blocks, and fuses will be will directly impact how you run all your wires. Lithium batteries can be installed anywhere, but Lead Acid and AGM have to be vented to the outside. Most of these large pieces of your power system should be very close together, too.
Once you’ve decided on an area that will fit all this equipment and be safely vented, you can get into the details of wiring.
Plan Every Wire
You’ll want to know where every single wire is going to and coming from - and how it’s going to get there. Things like:
- Lights
- Fans
- Charging ports
- Appliances
- Switches
- Thermostat
- Antennas
- Gauges & Displays
- Speakers
- Wall sockets
- Air Conditioner
- and more...
We recommend first designing a mockup of your trailer showing where all major appliances and lights will be. Be thinking about your cabinets and how you’ll run and hide wires.
Then use a wire list guide to number and add additional information to document your entire wire setup.
Create Your Own Wire List Guide!
Quickly plan and assemble your very own digital wire list guide with this handy template. Use our exact wiring as a guide, and organize your installation by wire number, color, gauge, polarity, and more.
Install wiring
With your plan in place, run each wire, numbering it on both sides, and bundle them based on the route you’ve decided on. We have bundles running through our roof, walls, and along the floor on the roadside.
Make sure to allow extra wire on both ends, and use wire clips to keep them snug up against the ceiling. For wires in the wall, tuck them into the ribs next to the insulation.
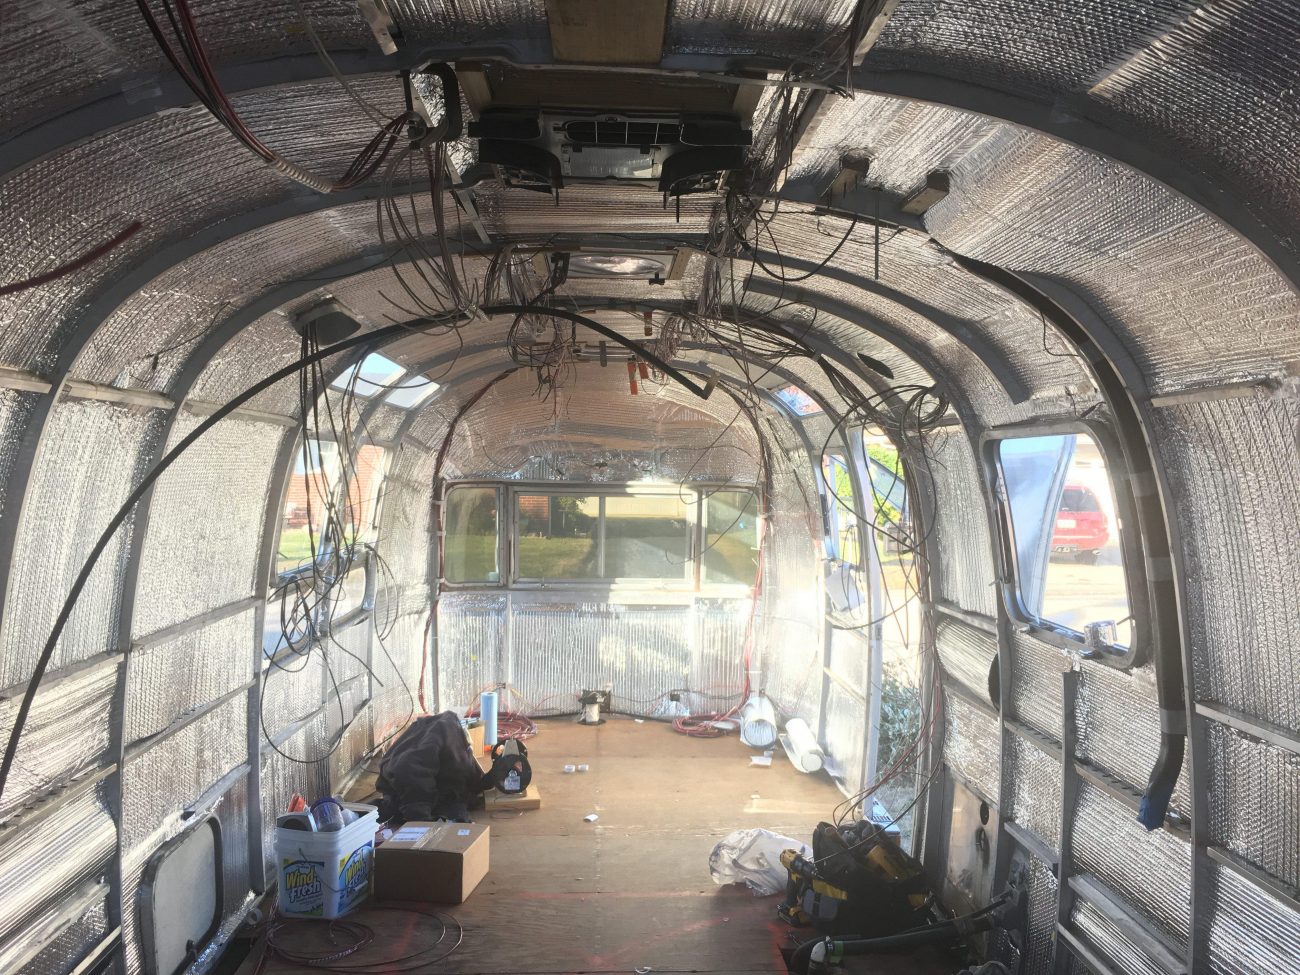
Insulation
Now that your exterior is mostly finished and waterproof, you’ll want to decide on your insulation. There are so many ways to do this - spray foam, fiberglass, denim, Reflectix, rockwool, etc…
Do your research
We aren’t going to tell you how to insulate - but keep in mind that some types are temperature dependent. For instance, we were going to do spray foam, but by the time we got to it the temperature was too low outside. So we switched to a combo of Reflectix and rockwool sound and fire batten.
What we eventually realized is that you have a 1.5” cavity to fill with something. And the R values weren’t different enough to get to stressed about it. So do your research, and do what works for you.
Installing Insulation
It’s time to install! Spray foam will be a whole thing, complete with special suits and lots of expensive gear. Other types will be a lot simpler - maybe some spray adhesive or metal/wood strips to hold up the ones on the roof. You just need it to all stay in place until you get the panels back in.
We’ll get to actually hooking up these wires later, but you’ll need it all planned and installed so you can get the interior panels back on for now.
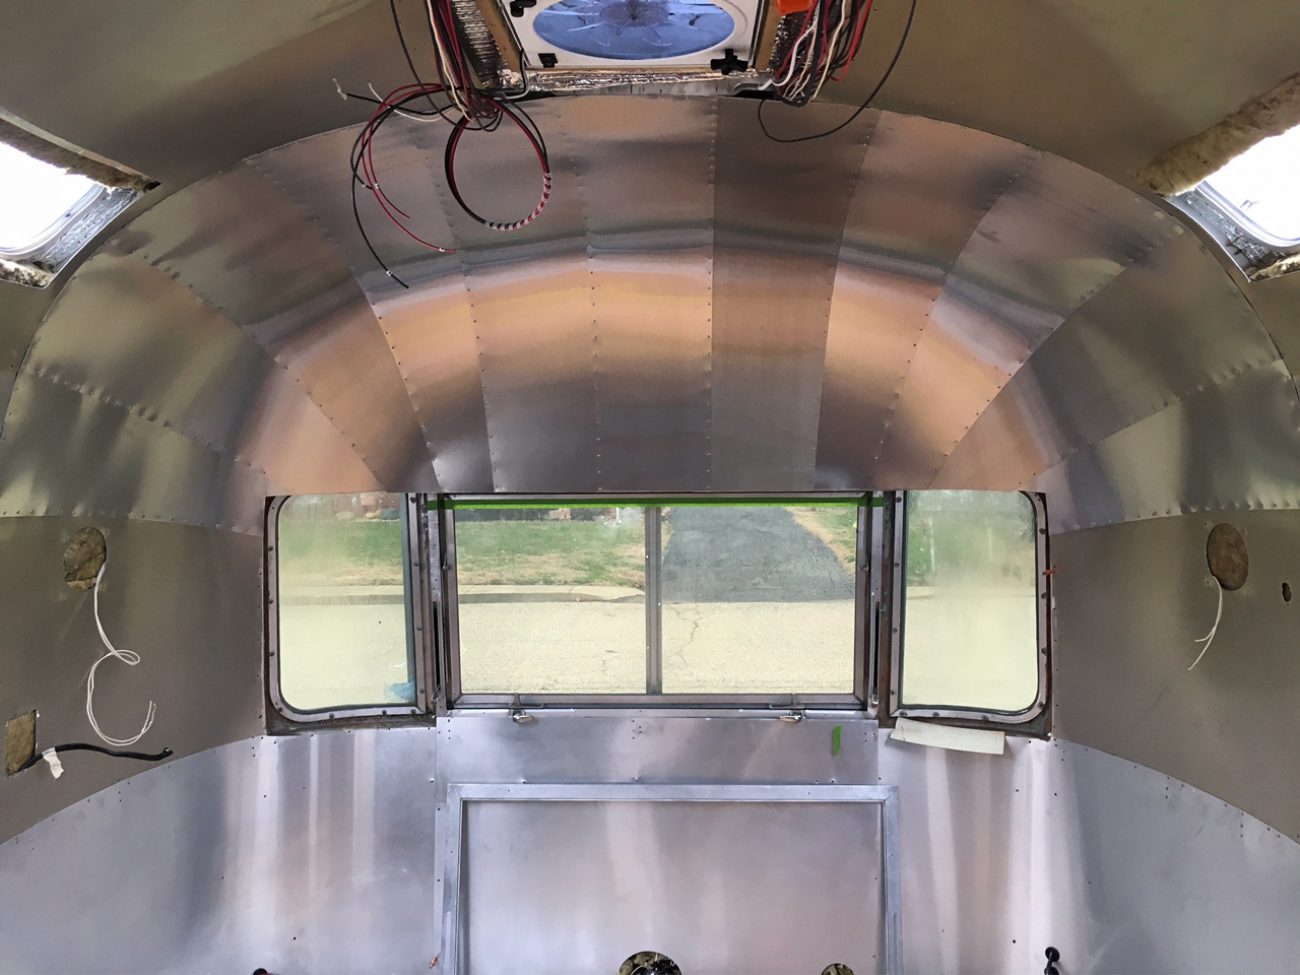
Install interior panels
The time has finally come to put those interior walls back on! Are you excited? I’m excited! This is a huge step forward! Ok, enough exclamation points. Let’s get down to business.
Air conditioner condensation tube
Remember when we covered this during the roofing section? Well it’s just another friendly reminder that you need your air conditioner condensation tube in place before putting your skins back on.
Ventilation for gray tanks
Same idea here. Even if you replaced your tank vents on the roof, you still need to connect to them somehow. Our kitchen sink vent actually had a formed PVC pipe that went behind the skins. Crazy, right?
Re-installing your interior panels
Remember when we talked about numbering each panel and taking lots of pictures? Now is the time to get those pictures and study them. You’ll need to put the panels back in the opposite order you took them out. This is where clecos become your best friend. Also you should have a few friends come over to help because really long panels are impossible to get up on the ceiling by yourself.
End Caps
Oh yeah - by this point you probably already have a good idea of what you’re doing with the endcaps you took out earlier. If you’re keeping them, a nice coat of paint will make them look like new again. We kept our bathroom cap, but threw away our front cap in favor of new aluminum strips. That in itself was a whole process - we got our inspiration from here.
Take a minute to party
I know I said you should be really excited in the last section, but let’s take a breath and really appreciate how far you’ve come. From this point on, it’s all downhill. You’re basically done with the outside, and ready to start your inside build! It’s a huge accomplishment, and a huge relief to switch gears from exterior to interior work.
Ok, party’s over, let’s get back to work.
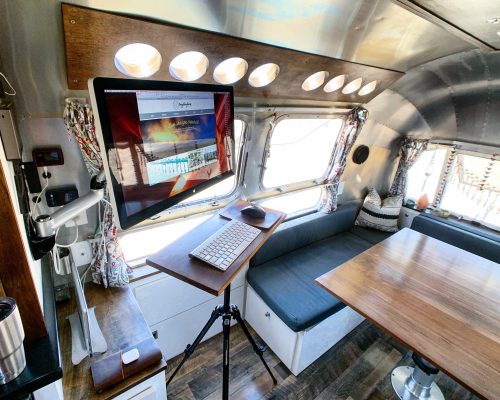
Building the Interior
While you may not have every single detail figured out here yet, you should definitely have solid plans for where each cabinet, structure, and appliance will be.
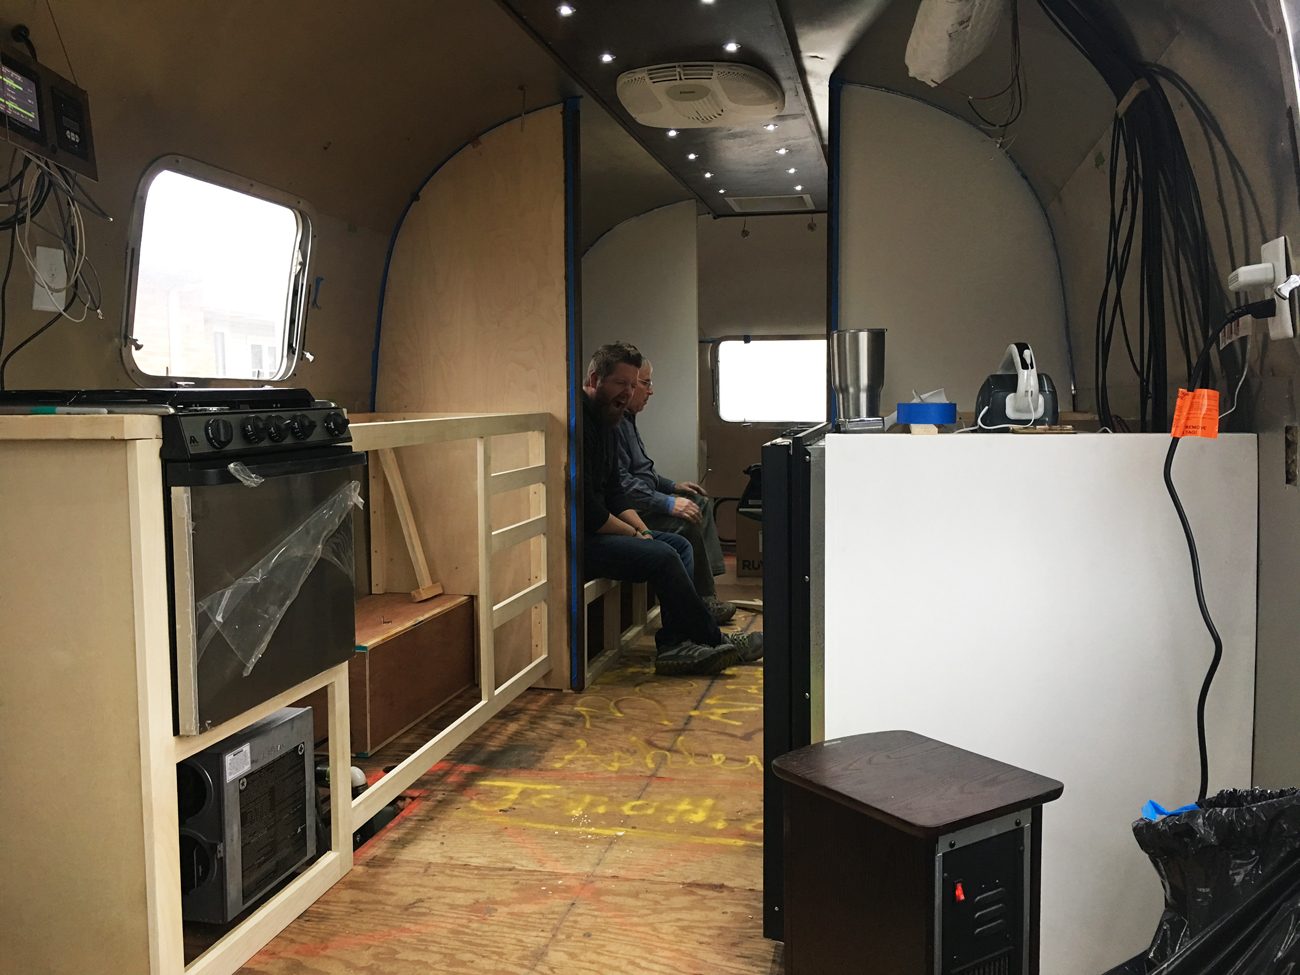
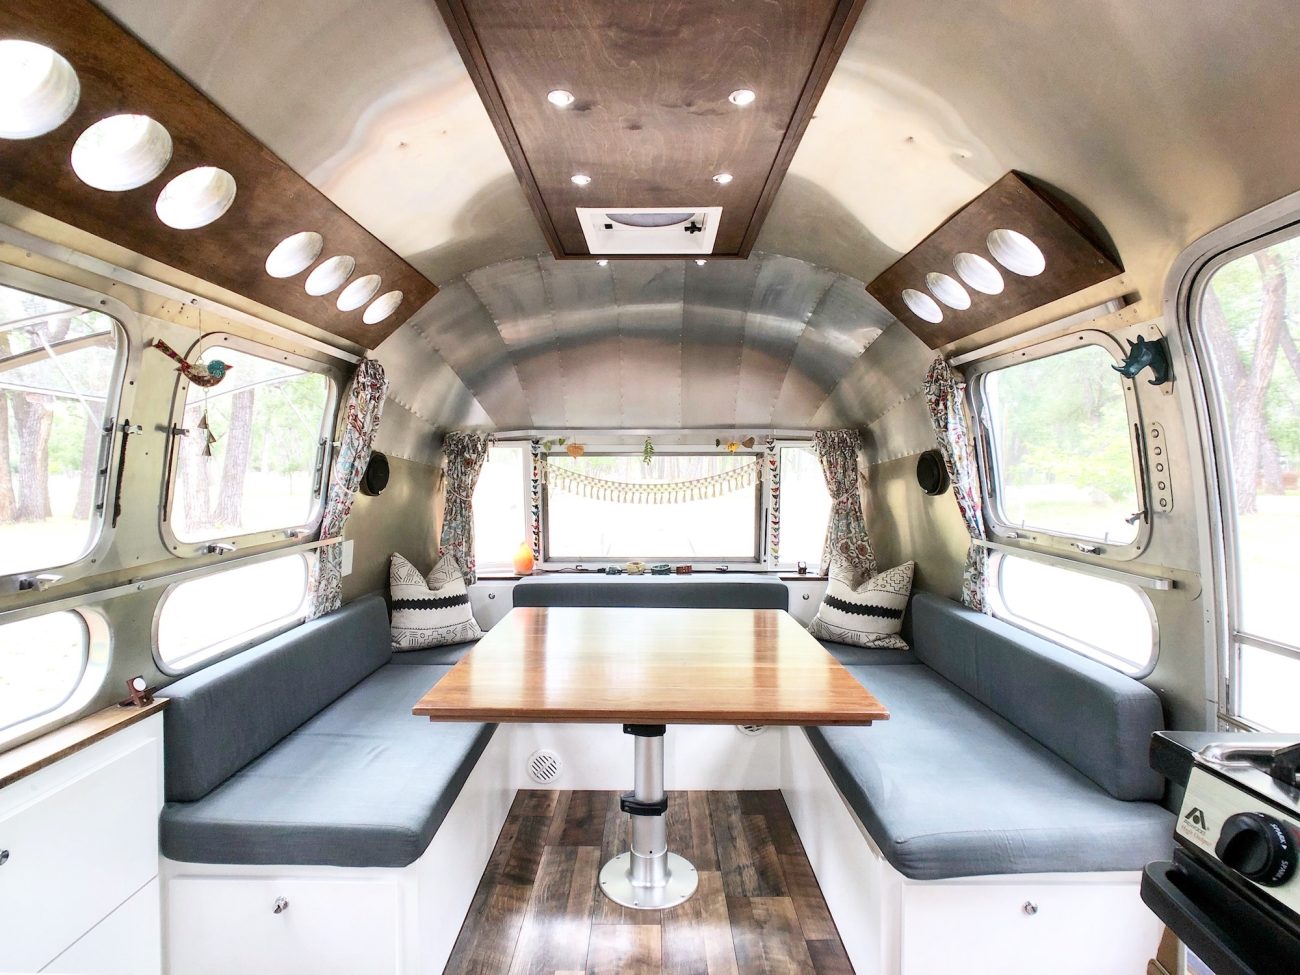
Focus on large areas first
Get your largest areas built first. Dinette, kitchen, beds, and cabinets. We started with our bunk beds because they had to be integrated into the wheel wells. Build these structures around appliances, and keep in mind wiring, plumbing, water lines, and furnace ducts. We used tape on the floor to mark where everything would be to help visualize as we built.
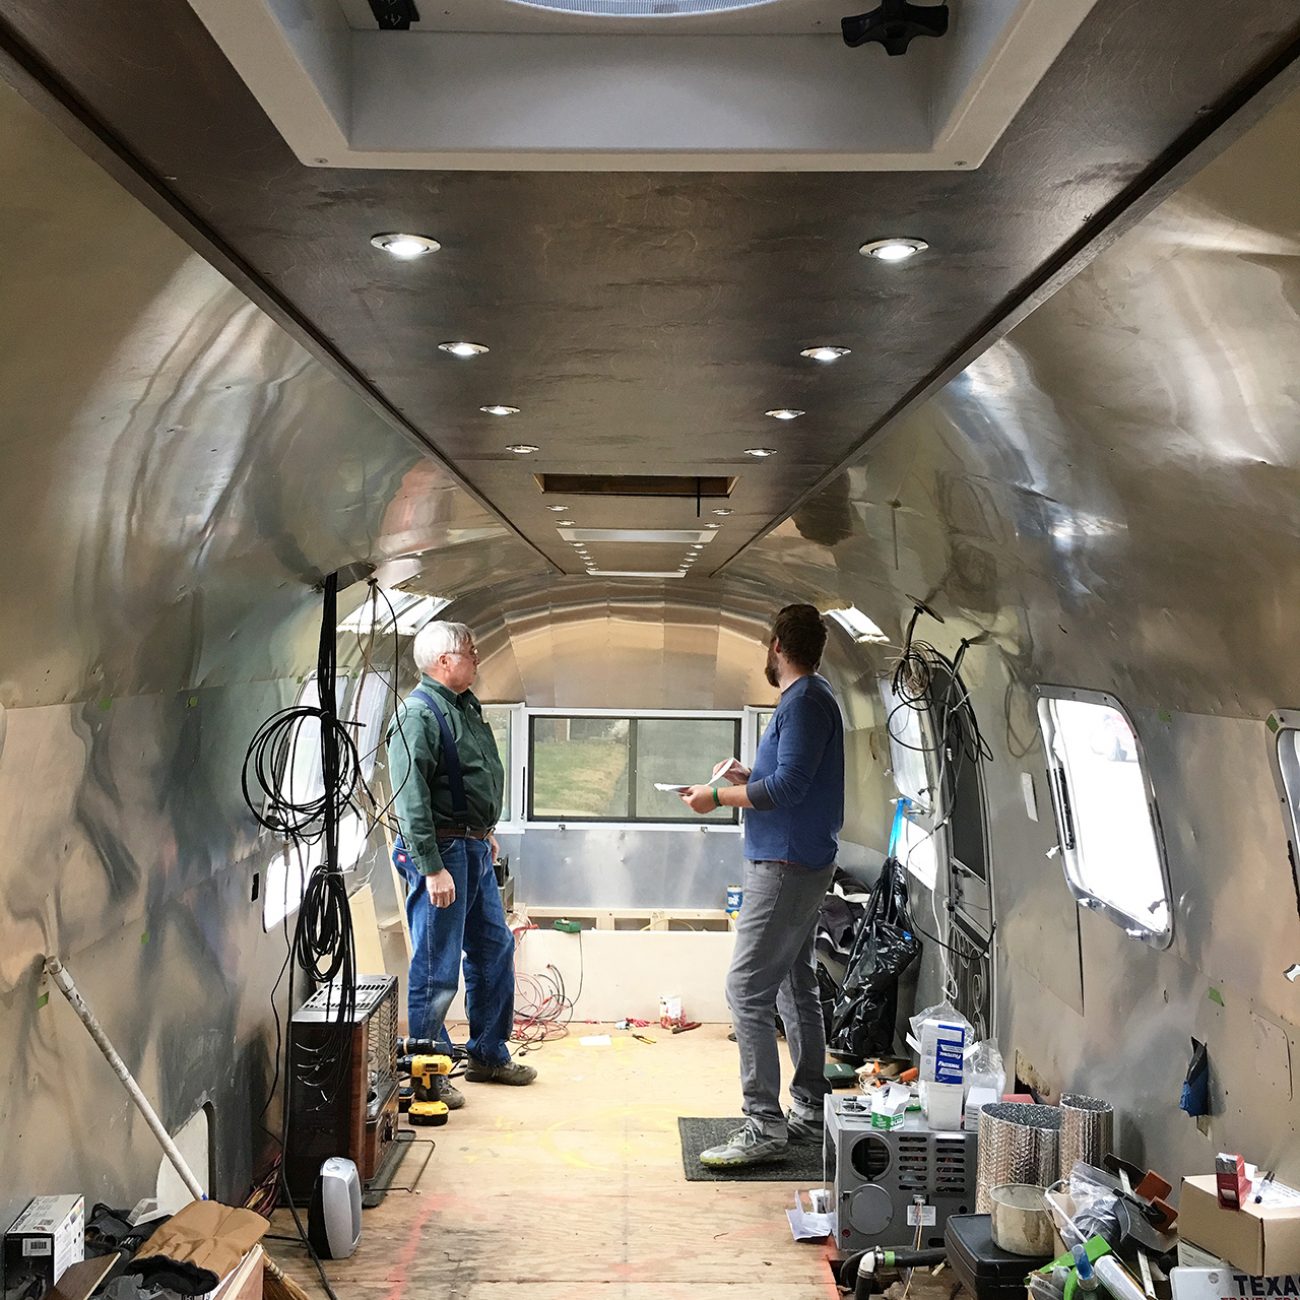
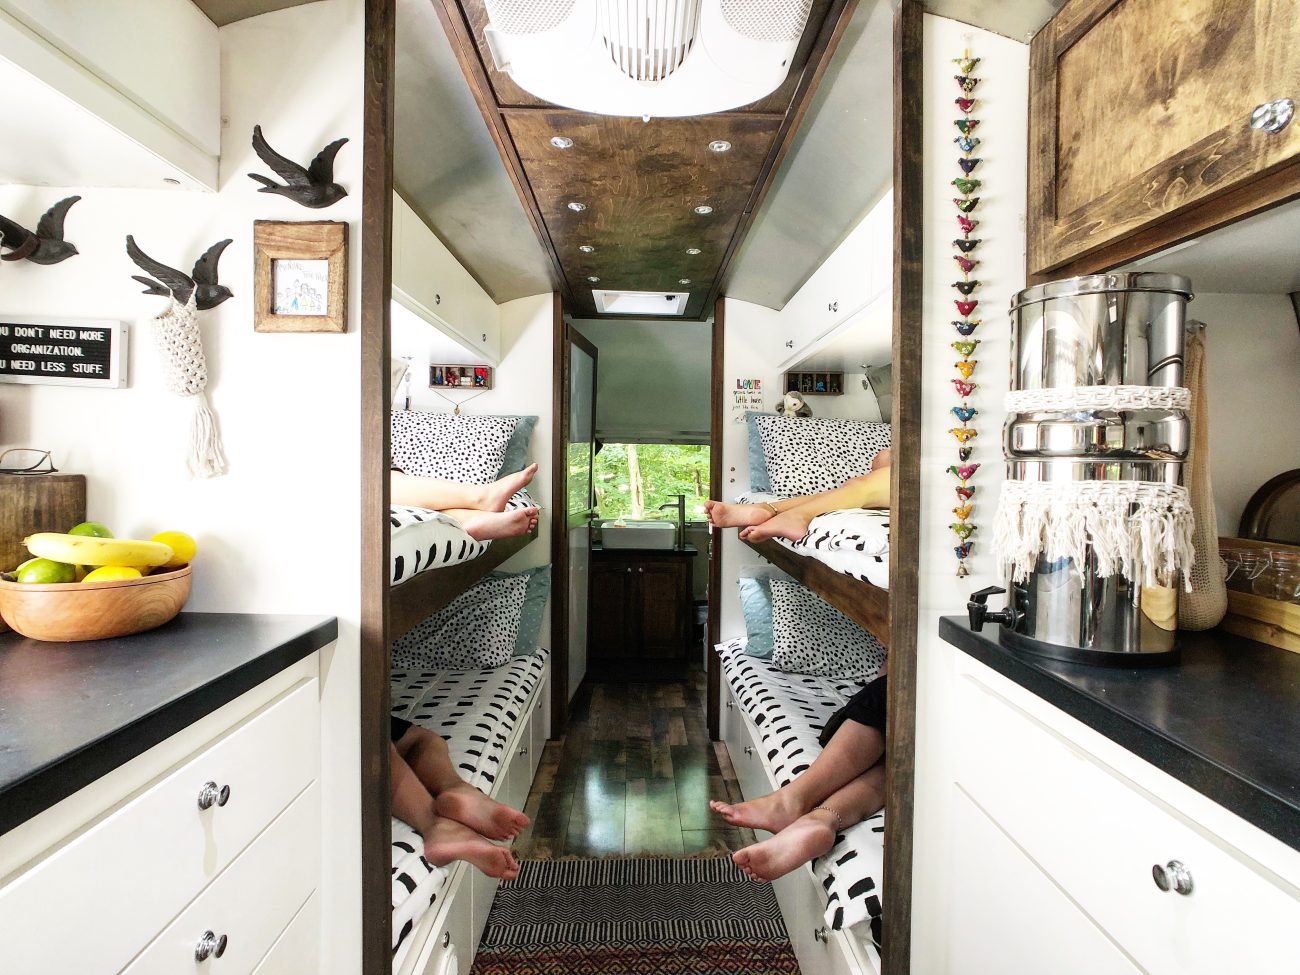
We built everything from scratch with 1x2’s, 2x4’s 1/2” and 3/4” plywood, and custom milled poplar. But we also had Ashley’s father-in-law - a carpentry ninja who could make anything we dreamed of. He even helped us build these awesome fold down bunk beds for the kids.
Leave cabinet facings until later
No need to get bogged down with doors, latches, and hinges right now unless you’re installing something pre-built. For now, you need to get the main structures built.
Wheel Wells
Did I mention wheel wells earlier? In most trailers, the wheels are blow the frame. But with Airstreams, they come into the frame, eating up precious space. When designing and building, try to use them to your advantage.
Mark where your tanks are on the floor
The last thing you want to do is accidentally screw into your brand new water tanks! Use tape or spray paint, and mark where they are.
Use Walls for Integrity
When you demo’d the trailer, you probably noticed how everything was connected together. Walls and cabinets were connected to increase the strength of the whole structure. Try to do the same thing as you re-build your interior.
Walls in particular are great ways to tie cabinets and beds together for extra rigidity. In particular, we used walls between our kitchen, bunk beds, and bathroom that helped support our folding bunks.
Connect to ribs or studs
Wherever possible it’s important to connect you cabinets to an actual rib, and not just into the skins. Ribs function like a stud behind the wall of a house, so it’s good to have the ribs marked on your skins. We recommend self tapping sheet metal screws combined with wood framing that you can then attach your cabinet to.
Furnace Ducts
I mentioned this earlier, wanted to circle back. If installing a propane furnace, it’s important to remember that you’ll need to run multiple ducts to various areas of the trailer. Often these will have to go through the cabinets, so you’ll need to make sure you’ve got room for them.
Counter tops
Once you’ve got all your cabinets and counters built, it’s time to get that counter top on! We custom ordered solid surface tops, but many use butcher block or create their own. Be careful here with weight - most cheaper residential countertops are very heavy.
Batteries/Power
There’s an awful lot of work that goes into installing an electrical system in an Airstream. You’d be doing good to read our thorough breakdowns of how we planned our power and then how we ran all the wiring and connected everything. The explanations below are the high level overview version.
Connecting your Wires
While you should have already run the wires you need before you put your interior skins back on, you probably haven’t connected them to anything yet, and that’s ok! Now that you have cabinets to install appliances into and hide wires, it’s time to start making those connections.
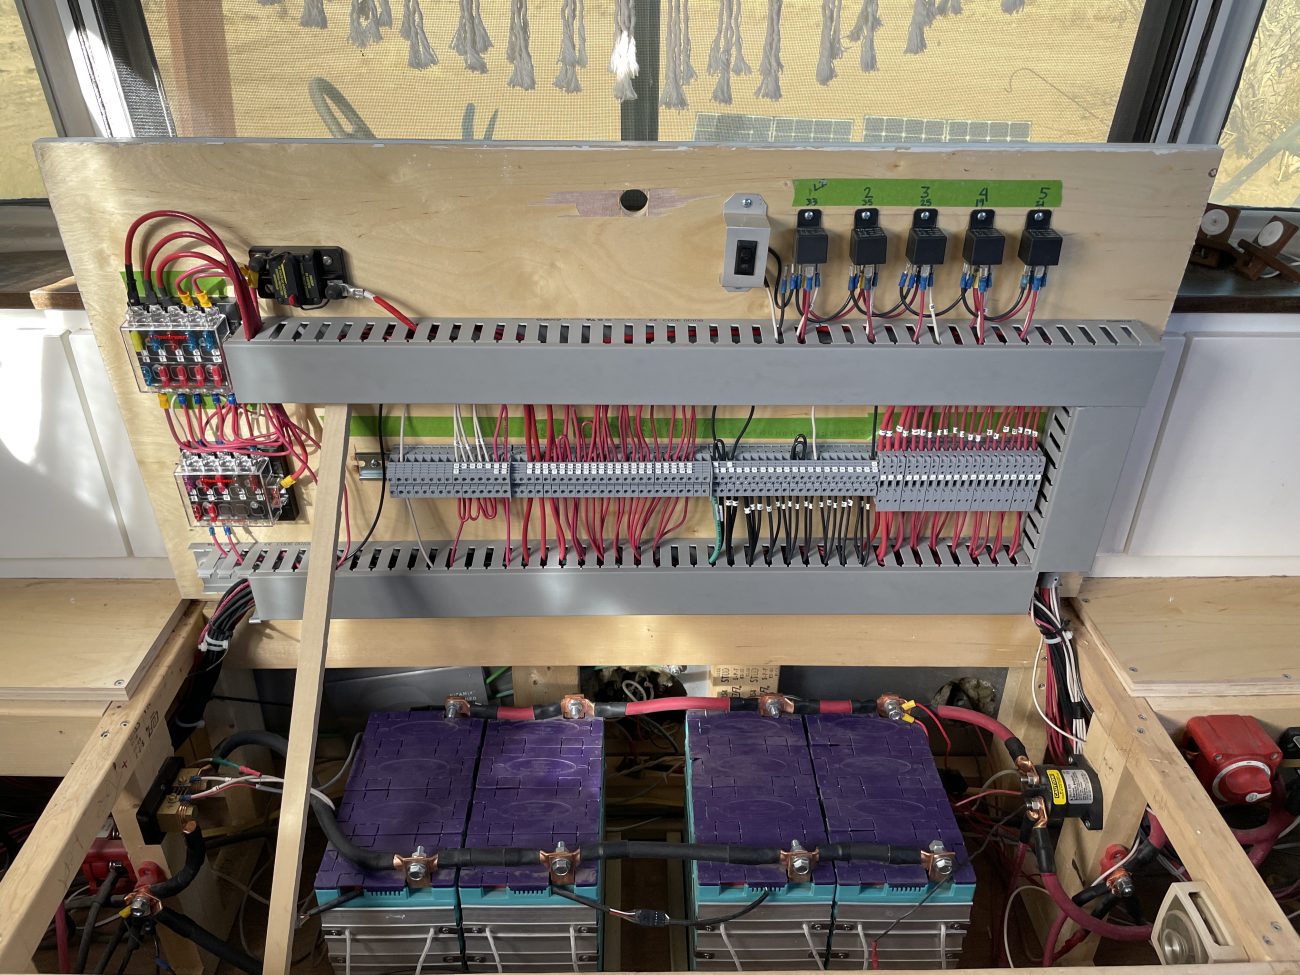
We recommend DIN-Rail Terminal blocks for cleaner, safer junctions at both your appliance end and power center end, but you’re free to make your connections however you like.
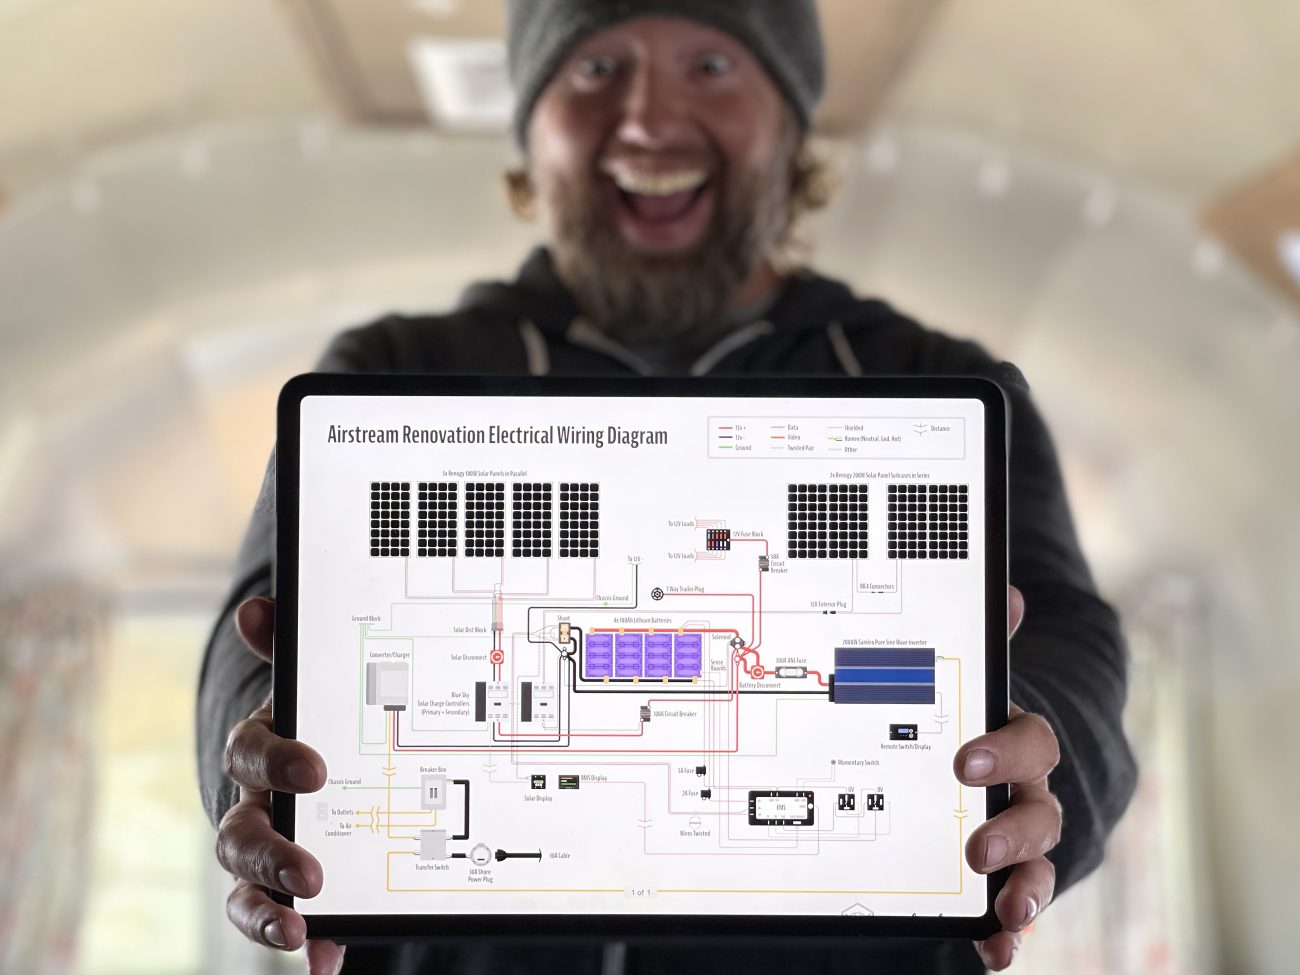
Download our Electrical Diagram
Get up close and personal with this super detailed, impeccably illustrated hi-res PDF of our full off-grid power setup. Get a visual schematic representation of how an entire 12V and 120V system connect together.
Fusing and Grouping Circuits
During this phase you’ll be grouping lines onto fused circuits. Large appliances should be on their own fuse, but smaller loads like LED lights or 12V charges can be grouped together.
Create a Wire List Guide, and number every line so you can track down what you’ve done later. It will also help you plan how to group smaller loads and what fuse size they will need.
Install Batteries & EMS
Now that your power center is grouped and fused it’s time to add some power! Install your batteries, and make any connections necessary for sense boards, Energy Management Systems, and more. Running solar? Connect your solar panel lines to your solar charge controller, and program it for your batteries to start charging them.
Install Inverter, Converter, & Transfer Switch
With your batteries connected, it’s time to start adding the other important pieces. Connect your Inverter and Converter, keeping in mind you may need a transfer switch for your shore power connection to avoid power conversion loops. Oh, and don’t forget to add circuit breakers for each major line.
These will all connect to your 120V wires, and be sure to make any junctions inside a sealed box.
Testing 12V
Begin testing any appliances that run off your batteries. Do the lights turn on? Do USB chargers work? Do your internet boosters or propane alarms turn on? Does your Inverter power your 120V receptacles?
Testing 120V
Now plug up to shore power. Does your converter charge your batteries properly? What about when they’re full - does it float properly? Does the transfer switch turn your inverter turn off? Do all the plugs and 120V appliances work properly?
Testing Solar
Is your solar charge controller programmed properly for your batteries? Are the panels outputting the correct amounts of voltage or amps?
Remote Monitors
As part of your charge controller or EMS install you’ll likely have some kind of monitoring panel. Really study what you’re seeing on these as you do all these tests and begin to get familiar with how everything should work.
Lighting
Switches
Part of your light grouping will be connecting switches to turn them on and off. There’s a good chance you’ve done this already, but if you haven’t now’s the time.
Overhead Lights
Now that your power is setup, finalize any overhead lighting and grouping, and get your ceiling closed back up. FYI, this is a very exciting day!
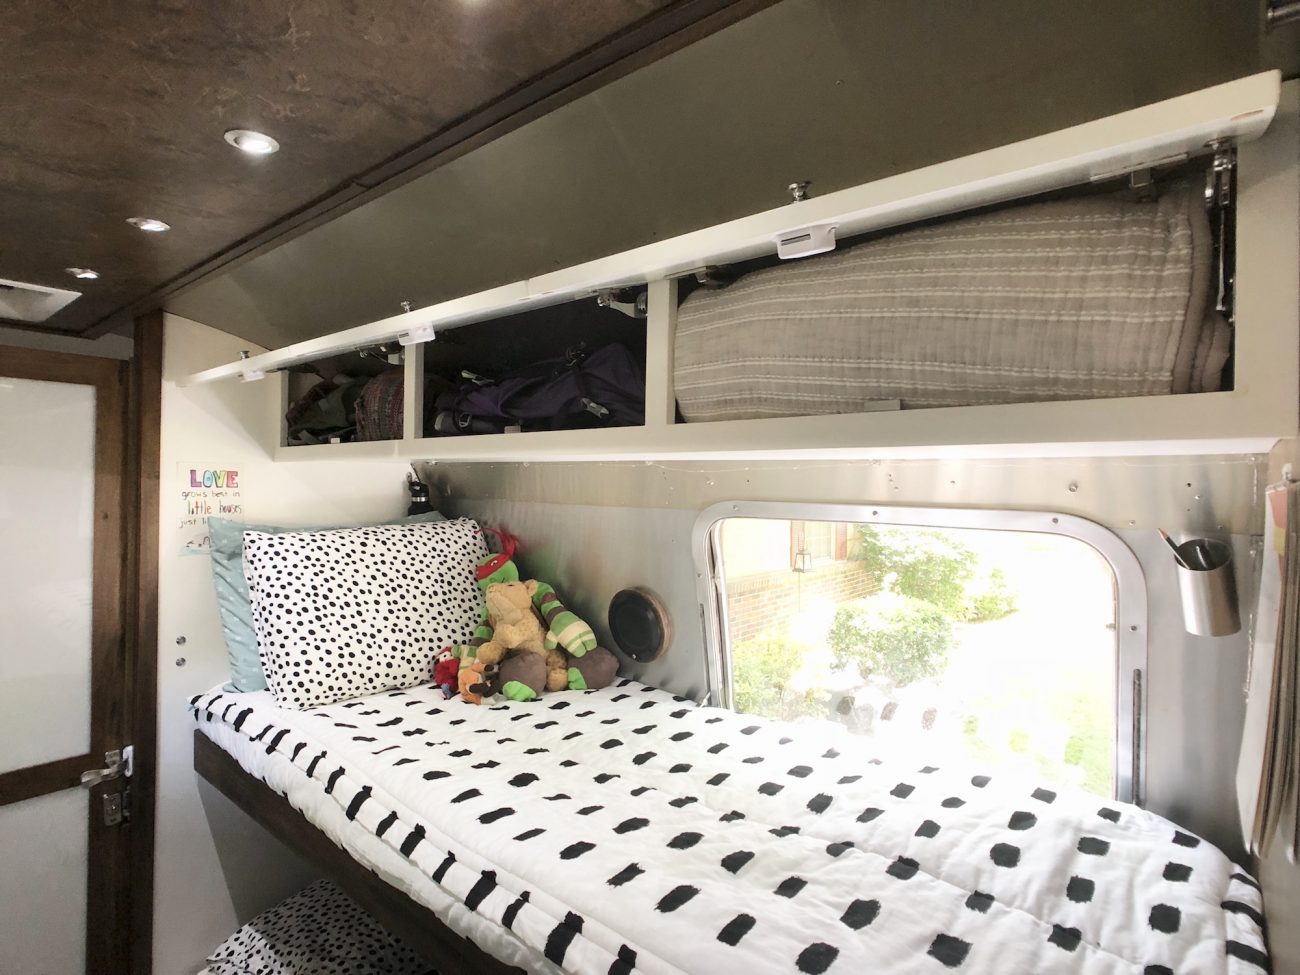
Overhead Storage
We found it was best to start building floor level cabinets first because they were so structural, hid wring, and enclosed appliances. Once you’re done there, it’s time to build upper level cabinets.
Size and stability are the key here. You’re working with a very rounded roof and limited mounting opportunities. Making these small enough that you don’t hit your head on them, but large enough to actually store stuff is a tricky balancing act.
For mounting we recommend a few ways to stabilize:
- Install a wooden rail that runs the length of the cabinet and is secured to the wall via self-tapping sheet metal screws that go directly into the ribs. Hopefully you still have those marked, right? Screw in every rib you can, and use the rail to install your cabinets onto
- Create riveted brackets near the top of the cabinet for additional stability. You probably saw these when you demo’d, and can even reuse them if you want.
- We talked about walls earlier, and upper cabinets benefit tremendously from their additional support. Secure your cabinet horizontally into the walls with screws.
Propane Lines
Propane is one of those parts of the renovation that is a “whole other thing.” Learning how to cut, flare, and connect copper lines, add shutoff valves, and mount everything can be a lot to take in. All in all it shouldn’t be too bad, though.
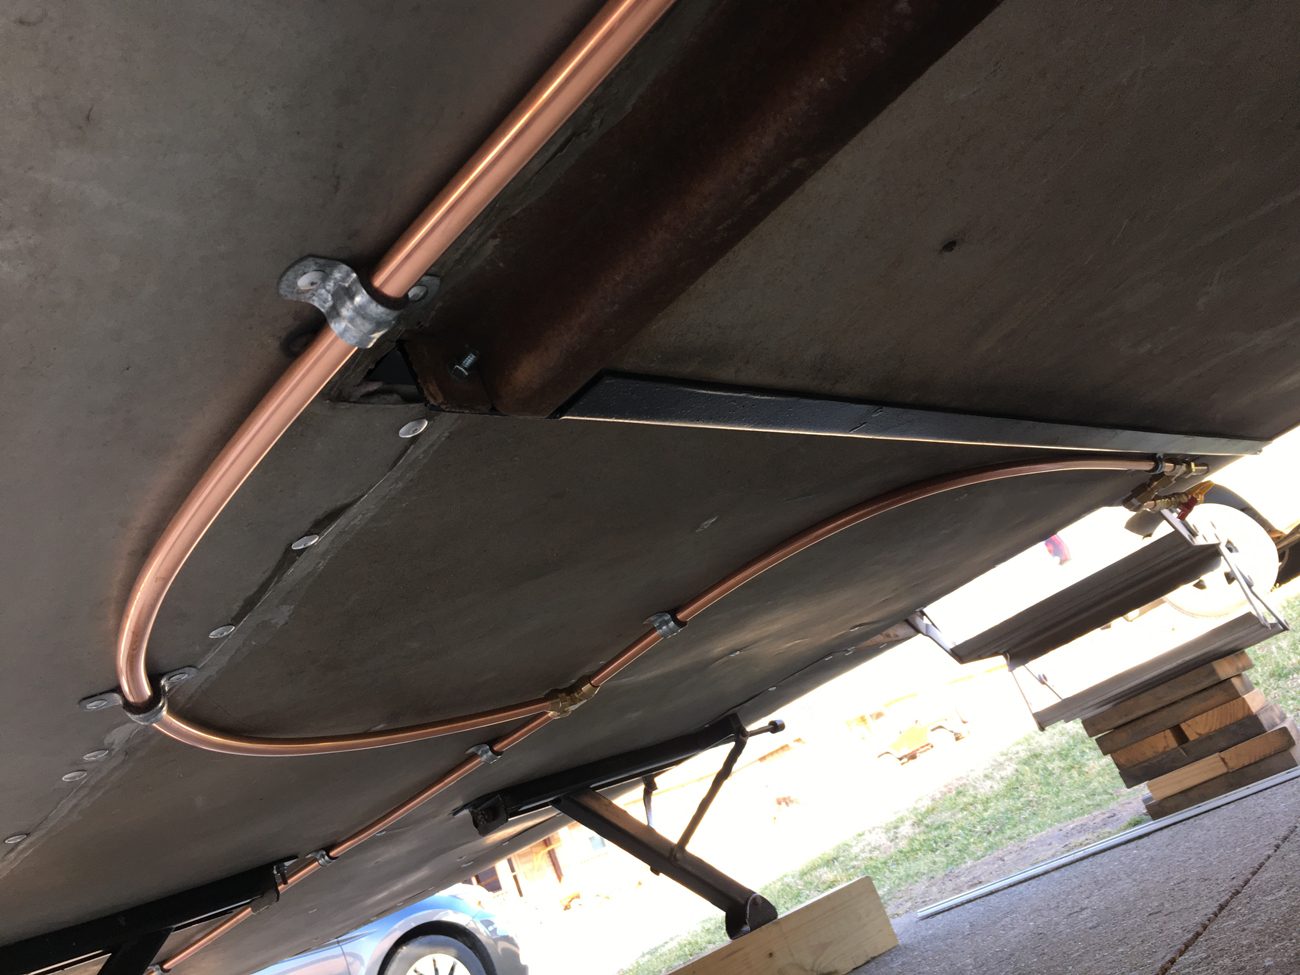
Installing Propane Lines
There will be lots of planning here as you figure out how to take your trunk line and split off to all the other appliance lines you need. Especially in the fittings needed for these connections. Get yourself a cutting, de-burring, and flaring tool as well.
Propane lines are usually run on the underside of the trailer for safety and access reasons. Keep in mind that if you’re doing a lift you may have to re-route them above the axles.
Install Shut-Off Valves
It’s always a good idea to add a shut-off valve for each appliance under the trailer. This way if a leak develops at your stove (which totally happened to us after a year of travel), you can shut off the propane to it and work on making fixes safely.
Install a new Regulator
Chances are your original regulator is old and should be replaced. Thankfully they’re cheap! Go ahead and invest in this now while you’re running new lines.
Re-certify propane tanks
Do you have shiny vintage aluminum propane tanks? Don’t throw them away! You can get them re-certified for a fee. It took us a while to find somewhere that would do it, and you may need to get new valves put in. Of course you can always buy new ones, too.
Test for Leaks
Many folks are wary of propane for good reason. A silent leak could be deadly. Thankfully, testing propane lines is pretty easy. Get some soapy water and wipe it on all connections while you’re using a propane appliance and creating pressure. Bubbles mean you have a leak so you’ll need to re-make the connection.
Of course, you should also have a propane/CO2 detector hardwired to your batteries that is constantly checking for those things in the air. And make sure any time you run a propane appliance that it’s vented to the outside. For instance, when running our oven or stove we turn on our vent to suck those fumes out.
Appliances
While you’ve likely already installed the majority of your appliances, here are a few other things to keep in mind before you start finalizing your interior.
Finish all appliance installation
This is where you finish everything up. Physically finalize your appliance installations, thinking about those vented to the outside like your furnace, water heater, and fridge. Make sure they’re all level and have the appropriate amount of space around them.
Connect Propane & Power
Finish making your propane connections inside if you haven’t already. Also, finish making any power connections to your appliances as well.
Connect Additional Wiring
Many appliances will need more than just power. Things like thermostats, tank sensors, and speakers all need to be connected for things to work properly. Thoroughly test each one to make sure it’s working as expected.
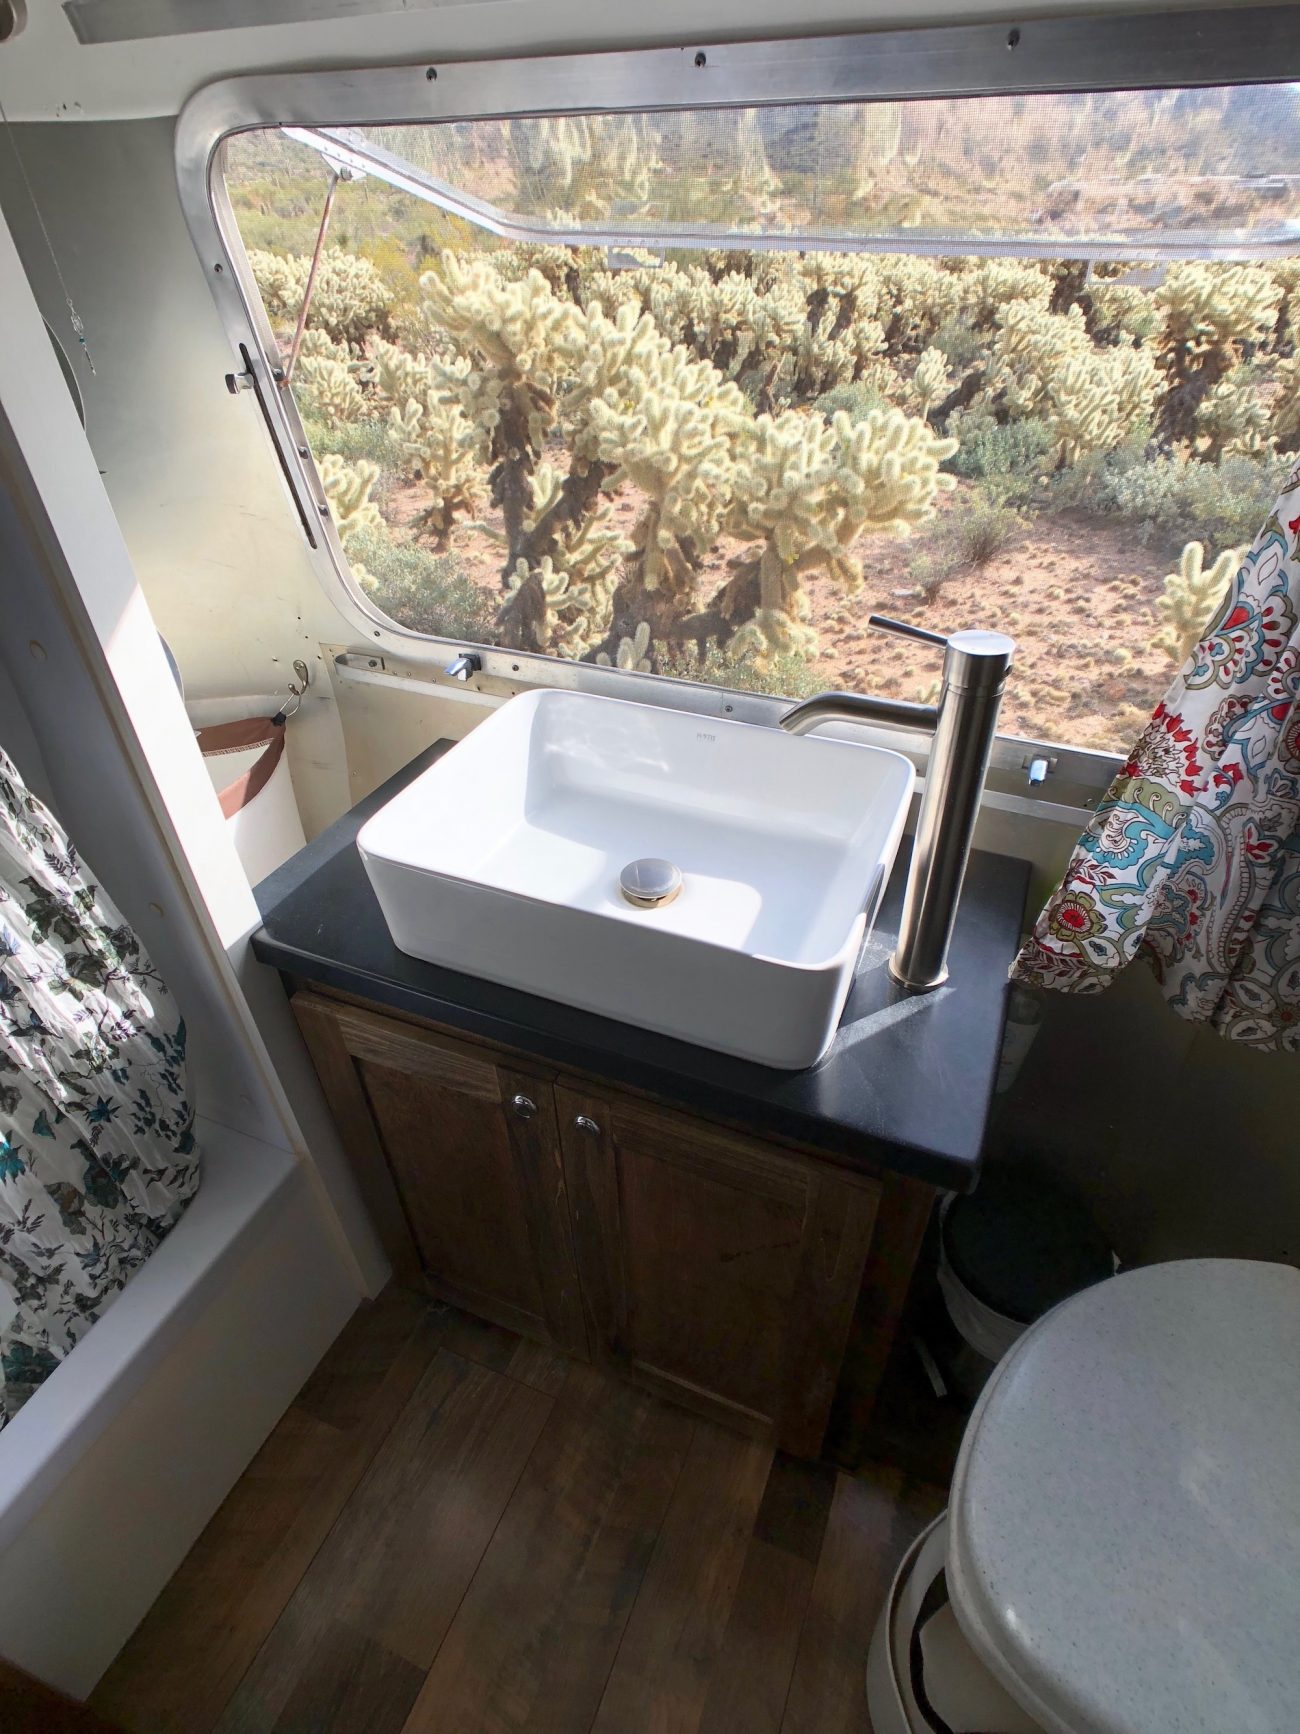
Bathroom
Hey! Time for that bathroom! After you’re over the initial shock of just how small this space will actually be, let’s get down to the basics.
Install your Toilet
Decide on the toilet. If going the traditional flush toilet route, you’ll want to make sure your tanks are in the correct places and lined up to be plumbed to the toilet. I know, I shouldn’t have to say this, but we know renovators who have failed to actually hook up the toilet to the black tank. It’s a bit ridiculous.
If going the composting toilet route (like we did) it makes things a little easier. Just make sure to leave room for the plastic throne. They’re bigger than a normal toilet.
Install your Shower
Installing a shower or tub can be complicated, but it doesn’t have to be. Many renovations out there have some beautiful tile work and fancy fixtures, but you could go our route and choose function over fashion. You just need to know how you plan on using this RV. Will you be traveling full time? Will you be primarily boondocking down crazy bumpy roads? Staying at RV parks all the time? Are you stationary and not so worried about the weight of the final build? You’ll need to know most of this before you even begin your renovation, especially before you begin installing a nice tile wall back there :)
When plumbing the shower/tub you’ll need to keep a few things in mind. You’ll want full access to all the pluming. Even if it’s a tiny 4 inch ‘closet’ like what we have, we know we can at least get our hands back there to turn off the water should there ever be a problem. Make sure you take in consideration the ventilation pipes that will come from your gray tanks or plumbing lines. And that P trap, make sure you have plenty of room for that under your tub or shower. You may have to get creative and raise the tub up a bit to accommodate it, but it’s a necessary step that needs to be thought about.
Bathroom Door
Lastly, what about a door to shut off the bathroom? If you’re traveling alone, perhaps this is less of an issue, but for us, a family of six…we needed that door :) Will it swing into the bathroom? Will a pocket door work better for you? Lots to think about. You just don’t want to get in a situation where you install a door only to realize that when the door swings open, it’s running into your shower curtain rod.
Countertops, Tables & Sinks
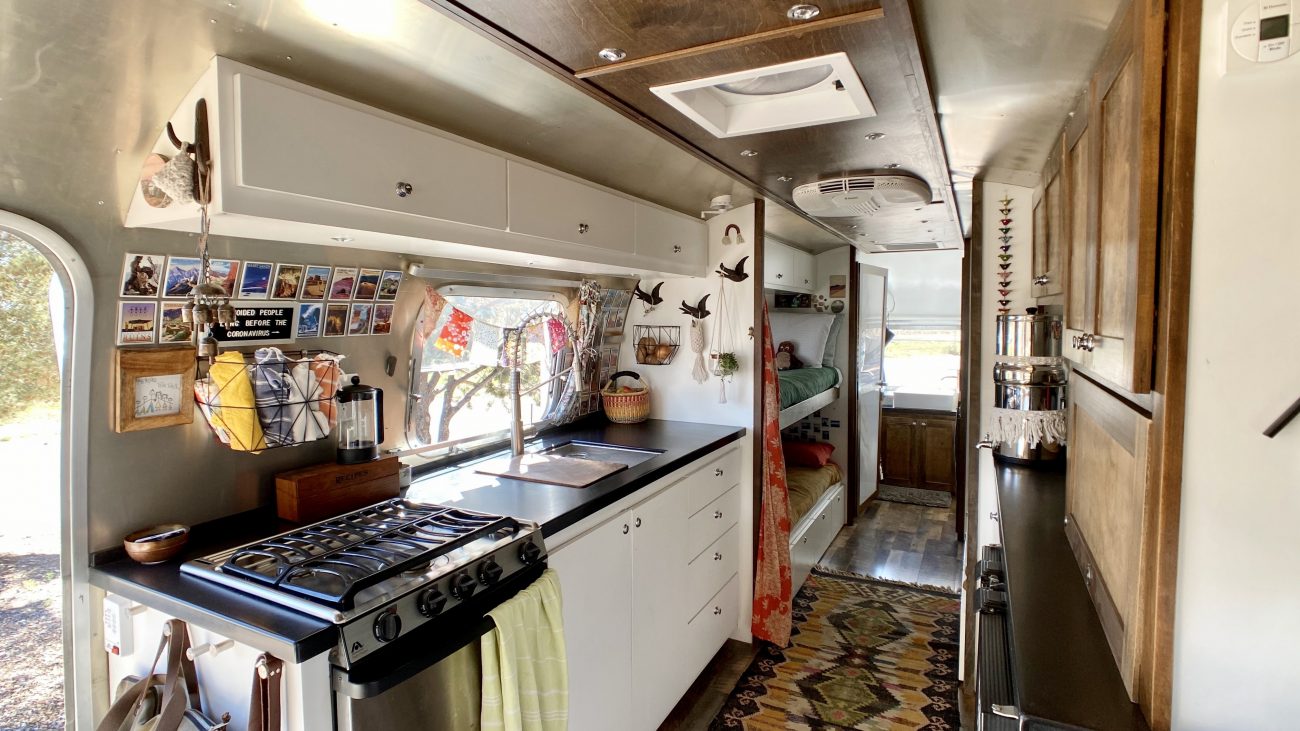
Time to start thinking about countertops and sinks! That’s a very exciting step and really makes your trailer begin to feel more like a real home. But let me tell you what I wish we would have done differently. Our kitchen sink! Guys, we bought a really nice Ruvati stainless steel kitchen sink, but we wanted an undercount sink. If you listen to nothing else we say, please listen to this. Do not do an undermount sink UNLESS you plan on reinforcing it from the underside. Huge mistake on our part. Let us say it again, a trailer is nothing like a normal home. You’re hauling this trailer down the interstate at 65MPH things will rattle loose. We promise you. Some things will break, don’t let it be your kitchen sink.
Ours came loose on our second trip, probably because we were storing our Berkey in the sink while we traveled so that’s another no-no. It never occurred to us that we would need support under the undermounted sink. Thankfully we still had room and some scrap wood that we could make some bracing underneath, but let that be a lesson to you :)
Of course you want to make sure all your sinks are plumbed to your gray tanks, but you know…we’ve heard of this step being forgotten. Don’t forget your vents for the tanks.
As for countertops, there are so many different options out there. We went with an acrylic solid surface and have been pretty happy with that. Just wish we could have found a lighter weight option when we were in that stage.
If you’ll have a dinette table or a table of some sort, nows a great time to get on that, too.
Cabinet Facings, Latches, Hardware, Doors
Hey, it’s really starting to look finished in here! Don’t give up now, though - we still have more work to do. Assuming you built your own cabinets, now’s the time to get the door facings on.
This turned out to be way more time consuming and expensive than we thought. By the time it was over we had nearly 50 cabinet door facings to make, paint, and install hardware onto. Woah!
Building Cabinets and Drawers
Now is the time to build those drawers and cabinet doors. There are so many ways to do this, so no crazy details here. Just be consistent in your style and sizing.
Hinges and Drawer Slides
Install each drawer slide hardware on the opening and drawer itself. And install hinges on each facing. We highly recommend soft-close mechanisms, and a tool like this to help make mounting 100+ hinges faster.
Locking Latches
One of the most important pieces of hardware in your trailer will be locking latches for every opening. When you start driving, you want every single one locked down so things don’t start flying everywhere when you hit a bump. The final stage of the cabinets will be installing these. We recommend going with high quality metal ones that will last.
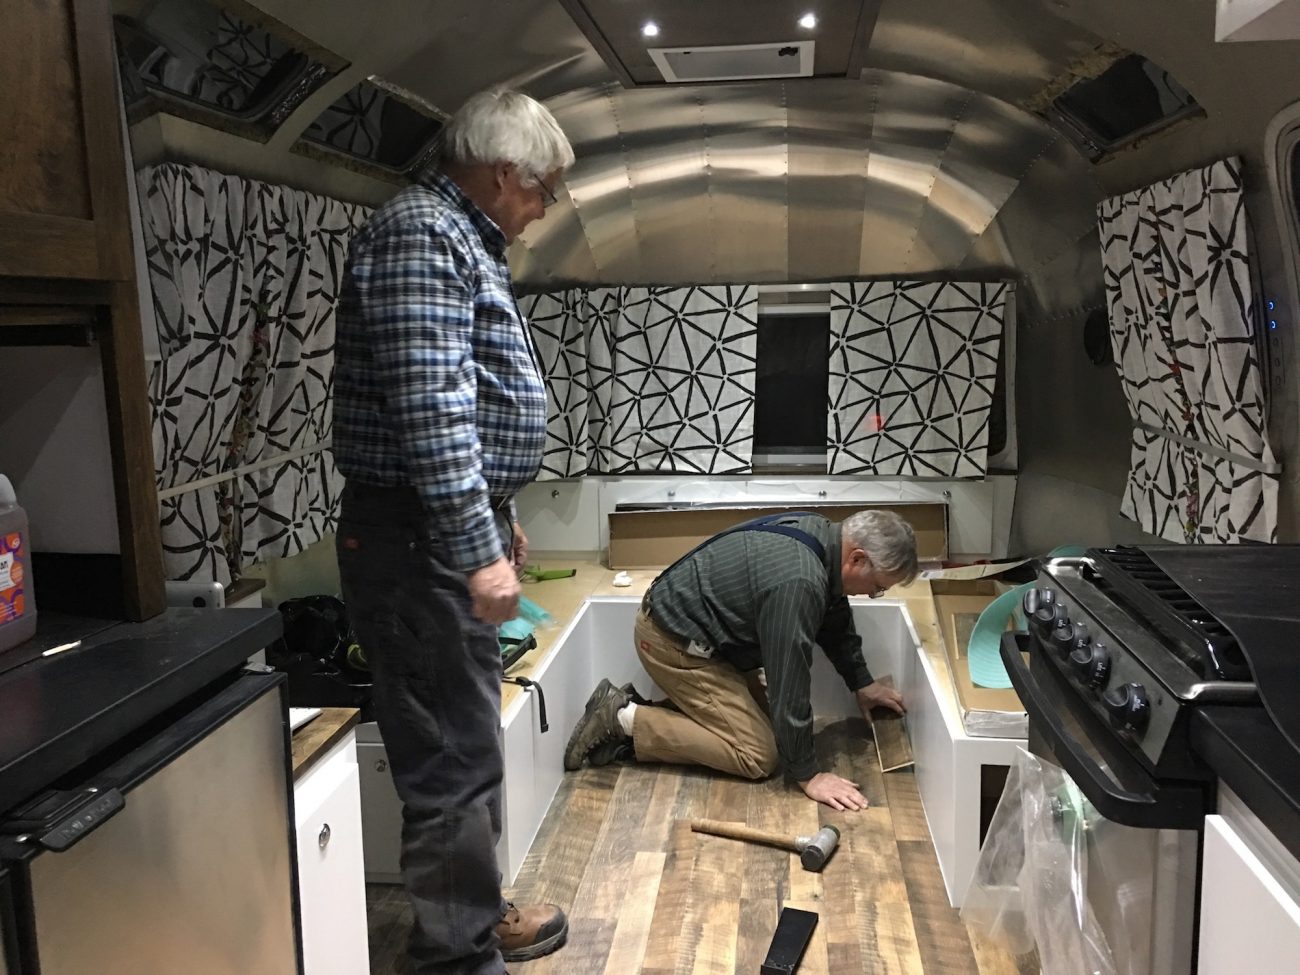
Floor Installation
Oh, the great floor debate. There are so many ways, materials, and opinions on what’s the best option for flooring in your Airstream. I’m not here to tell you exactly how you should do it, but I kind of am :)
Why we Recommend a Floating Floor
We really, really, really suggest you do a true floating floor if you plan on hauling your trailer. Yes, it looks pretty on Instagram when you see an empty trailer and the subfloor covered up by the latest trends in vinyl planks or marmoleum - but from experience, you really want to be able to see that subfloor around the edges of your trailer. Around all the edges is where you’ll likely see leaks. And if it’s covered in new flooring it can be difficult to see where the leak is affecting your subfloor.
Installing your cabinets first and your floor last will not only save you money on the cost of the flooring, but it will also save on over-all weight of your build. Flooring is not light.
Installing it last will also allow you to change it out should you ever have a major problem. We know folks who traveled with a full fresh tank, the kitchen sink came on, filled up their gray tank as they were driving and overflowed the kitchen sink onto the entire floor messing up their new hardwood floor they just installed. However, because they installed the flooring last, it was easy to remove it, dry out the subfloor, and replace it. Not so easy if your flooring extends under all your cabinetry.
Some people don’t use underlayment, but we’ve found it adds a bit of cushion to your step and a bit of insulation to the floor. We get several comments about how nice it is that our floor isn’t freezing cold in the winter, compared to theirs. Yeah, it adds a bit of height to the floor, but not enough to make a huge difference.
If you do a true floating floor and are worried about what the edges look like, add some quarter round, trim, or even just caulk around the edges. It’s easy to remove and doesn’t cost as much as trim.
The only thing we screwed into our floating floor was our pedestal for our dinette table and our composting toilet.
Finishing Touches
Can you believe you just rebuilt your trailer? I mean, what an accomplishment. The hard work was worth all the blood, sweat and (so many) tears. Now you have this incredible space that you get to decorate and live in. Obviously I’m not going to tell you how to decorate the inside of your trailer.
You may want to stuff it with camo colored roosters for all I know!
But there are a few things to consider when adding the finishing touches. If you can, live in the trailer for a week or so before you commit to any permanent mounting of shelves or decor. It really helps to know exactly how you’ll end up using the space before you make anything permanent.
Mounting Tips
The last thing you may want to do is put holes into your brand new walls. In that case, you need to know about Command Strips and Command Hooks. They make some really great options for hanging things as well as fastening things to the wall that will withstand all the jostling around that towing your trailer will cause.
They’re easy to remove and don’t leave a sticky residue on your walls. They also make Velcro versions of their mounting strips and that makes things even easier!
Of course there are some things you’ll likely need to mount that are more permanent like a shower curtain rod, knife rack, mirror, etc. We really liked to keep it simple. Our bathroom has one tiny mirror mounted from Ikea and our retractable shower curtain is a huge space saver. With an already extremely tiny shower, having the ability to push that shower curtain out a bit further makes it feel so much bigger than it really is. Then being able to push the shower curtain rod back into the the shower space when not in use makes the tiny bathroom feel just a bit bigger. Little things like that make all the difference when living in a tiny space.
Paint, Backsplashes, & Wallpaper
The aluminum walls of your Airstream make for easy clean up. I can’t speak to if you have decided to paint them, but for us with bare metal walls, it’s super easy to just wipe down. However, you may be wanting more finishing touches like a backsplash or wallpaper. All of that can be done and done really easily. Just do your research if you decide to tile and opt for a flexible grout if you plan on traveling full time.
Backsplashes, wallpaper, and paint are also great ways to make the inside of the trailer feel like your own. You probably already did your painting or staining while creating your cabinets, but backsplashes and wallpaper are easy to add after the fact.
Cushions & Mattresses
One thing I’m sure you’re wondering about - cushions and mattresses! Yes, you’ll probably need something custom created so unless you’re great at fabrication this can get tricky.
Our first attempt was to order custom sized foam and have someone create covers for our dinette and kids beds. We used this for many years until the foam started to wear out. Then we replaced with organic, natural wool-based cushions. This was waaaay more expensive, and we’re not sure if it was worth it. You’ll have to find that line between affordability, comfort, longevity, and health for your own renovation.
Curtains
You’ll also want to think about curtains to cover your windows. These will likely need to be custom, though we have had luck taking existing curtains and making them shorter ourselves. We highly recommend these simple curtain rods to keep them in place.
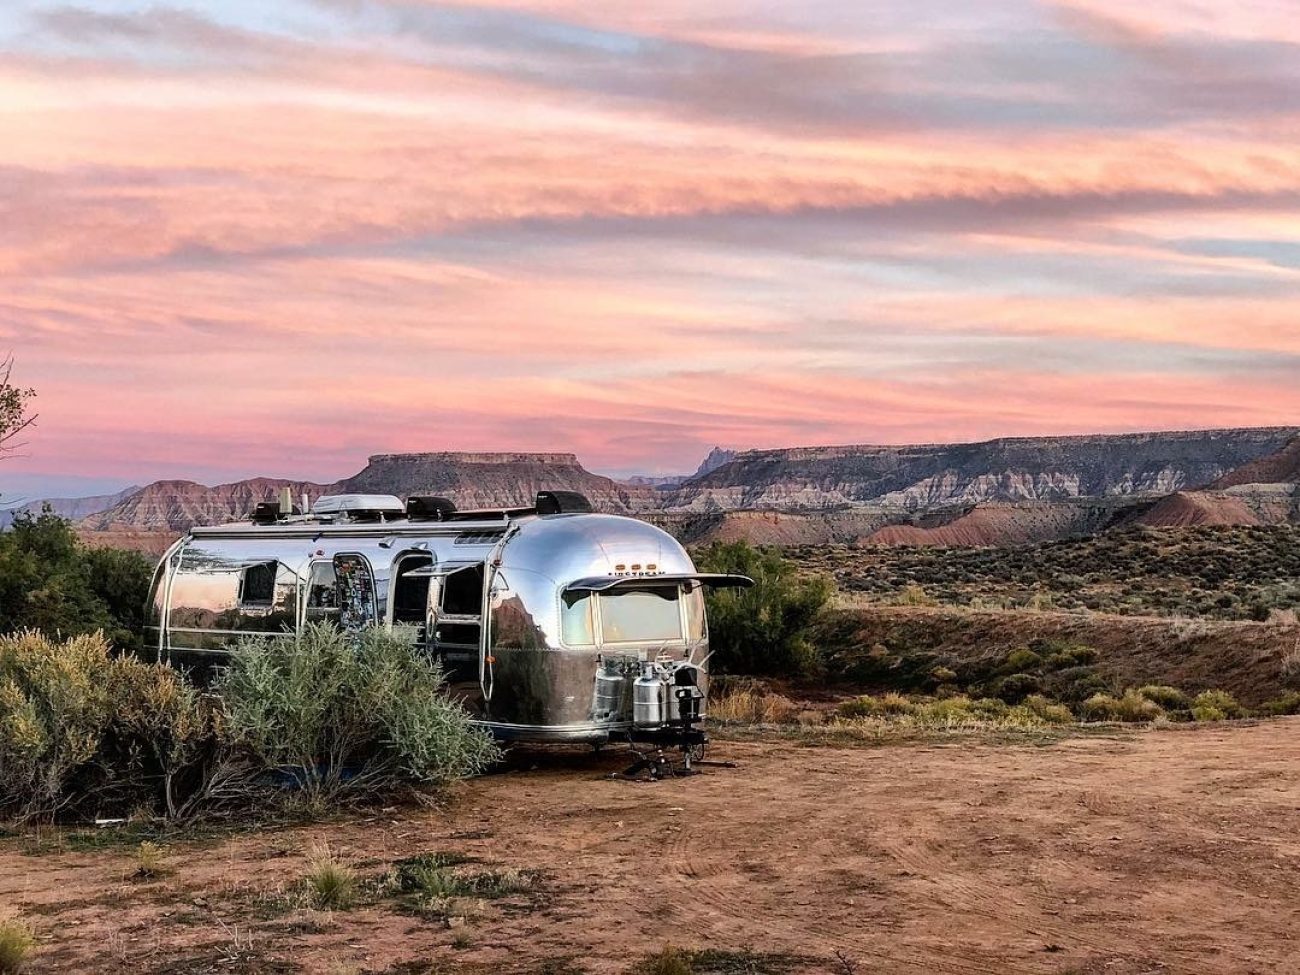
Live Like You Mean It
Well then. If you’ve made it this far it’s obvious you had deep motivations for renovating a vintage trailer. And likely you’re going to use the dang thing, right? So now’s the time friend! You’ve put in the work, and created something amazing. It’s time to get out there and live like you mean it!
We hope this exhaustive look back at our renovation helped you a little bit, and we’d love to know if you have anything to add. As a companion piece to this article we’ve created an Airstream Renovation Checklist you can print out and check off as you work. If anything its sheer size will give you a better idea of everything you’re getting into with a vintage trailer restoration.
Grab yourself a copy, and get to it!
Download our Renovation Checklist
Get an exhaustive overview of everything you'll need to think about for each step of planning your Airstream renovation. It's a simple way to start a complicated project.
Get Access for Free!Additional Resources
We have plenty more Airstream renovation resources available if you still have questions!
- Airstream Renovation Tour: Before and After
- Airstream Renovation Cost Breakdown
- Airstream Cost Calculator
- Planning Solar & Electrical
- Installing Off-Grid Solar & Electrical
- Airstream Electrical Diagram
- Airstream Wire List Guide
- All Articles of our Process
And you can always give us a shout in the comments below.
Become a Tiny Shiny Homie!
Subscribe to our patreon-style community & help support our family so we can keep making things for you! Get early access to ad-free videos, special behind-the-scenes updates, & goodies like exclusive stickers and name drops in our videos.
Signup & Become a HomieApparel
Grab a fun, comfy t-shirt & help support our family.


About the Author
Jonathan Longnecker is the strongly opinionated tattooed and bearded half of Tiny Shiny Home. He loves making music, figuring out nerdy solutions, exploring the outdoors, and living off-grid.
comments powered by Disqus