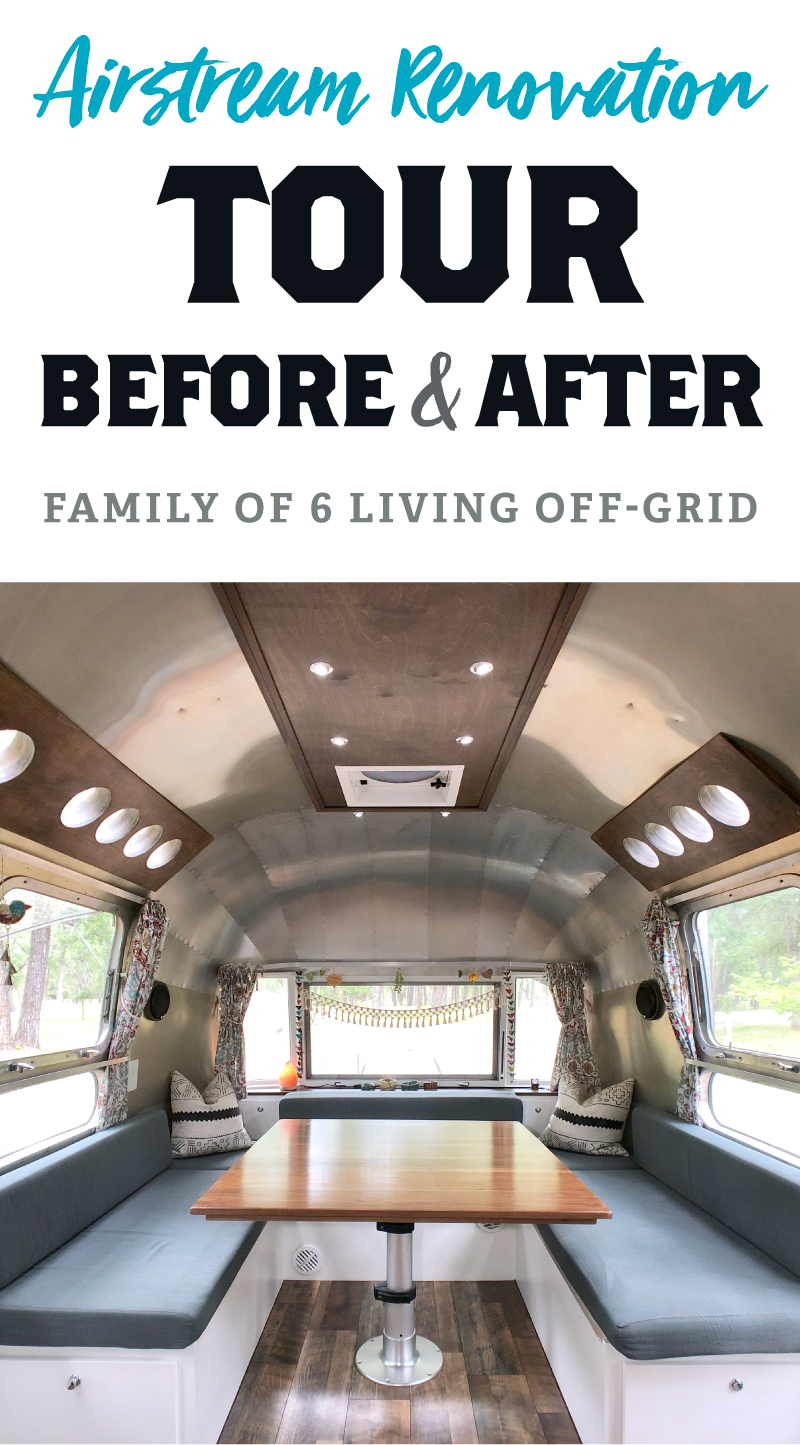
Airstream Renovation Tour: Before and After
After months and months (and months!) of pouring our days and nights into this renovation we are finally finished!
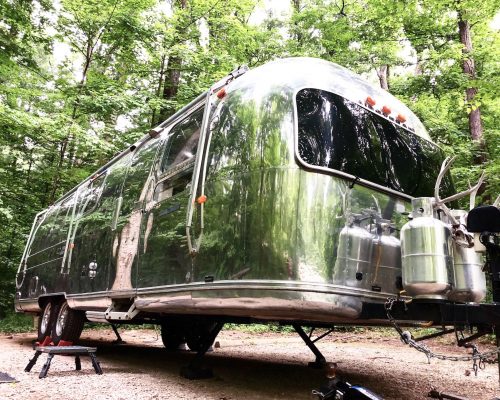
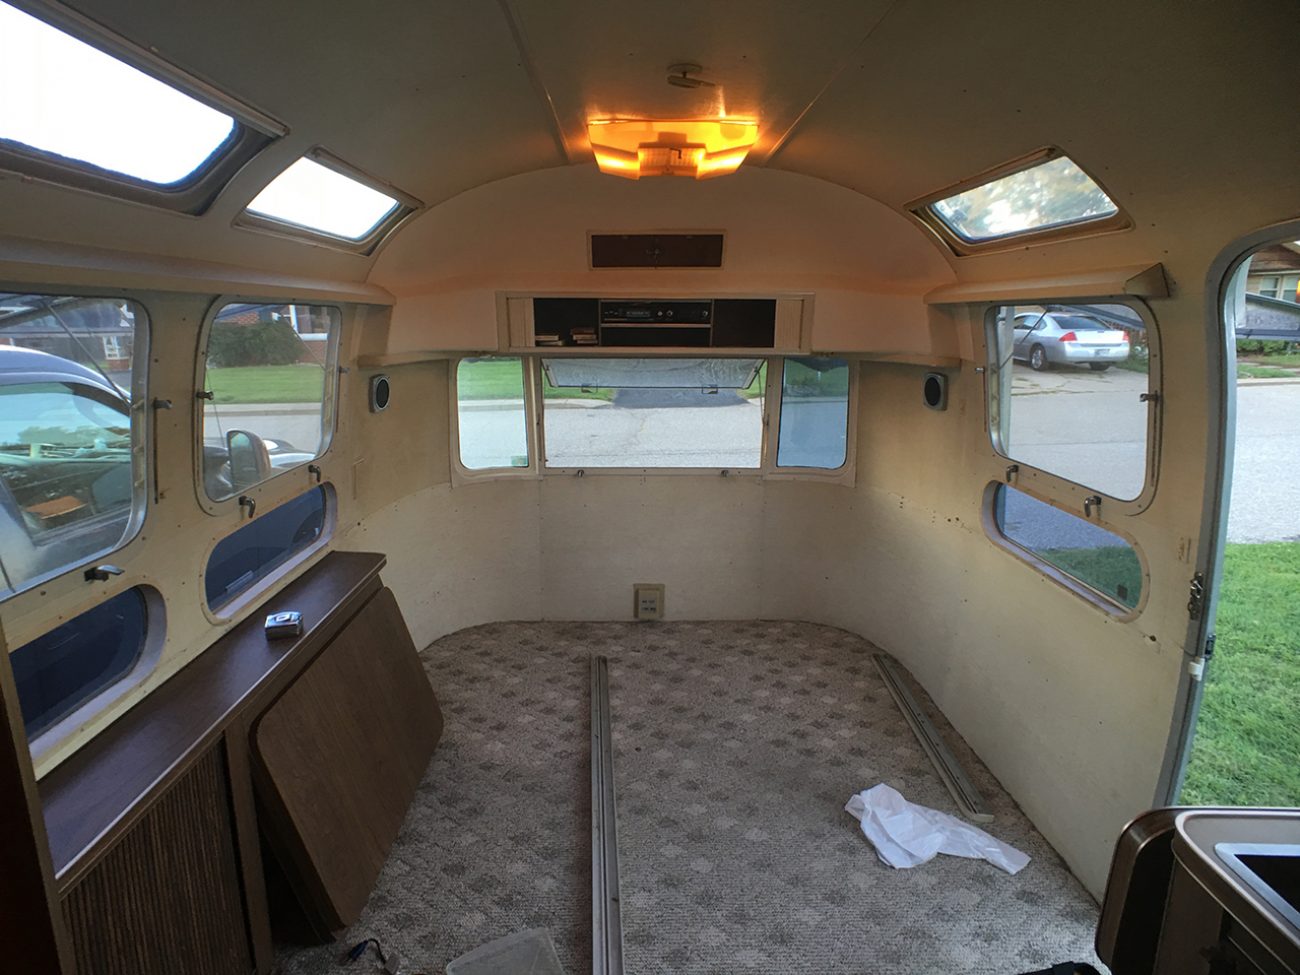
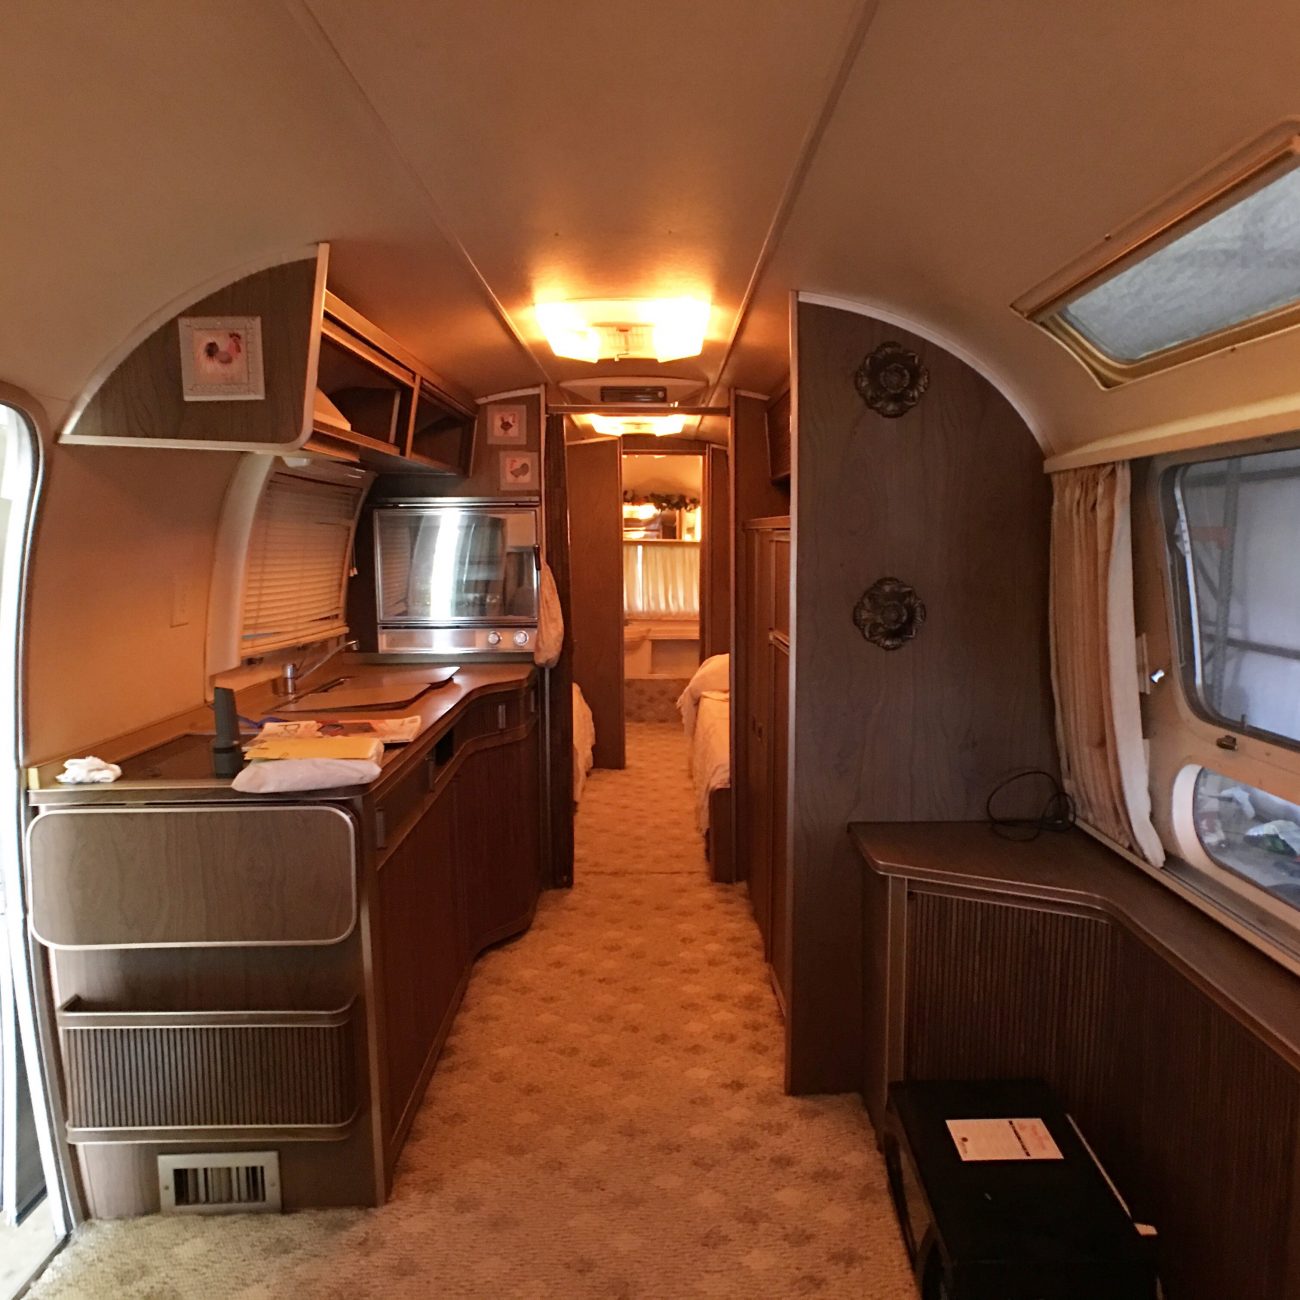
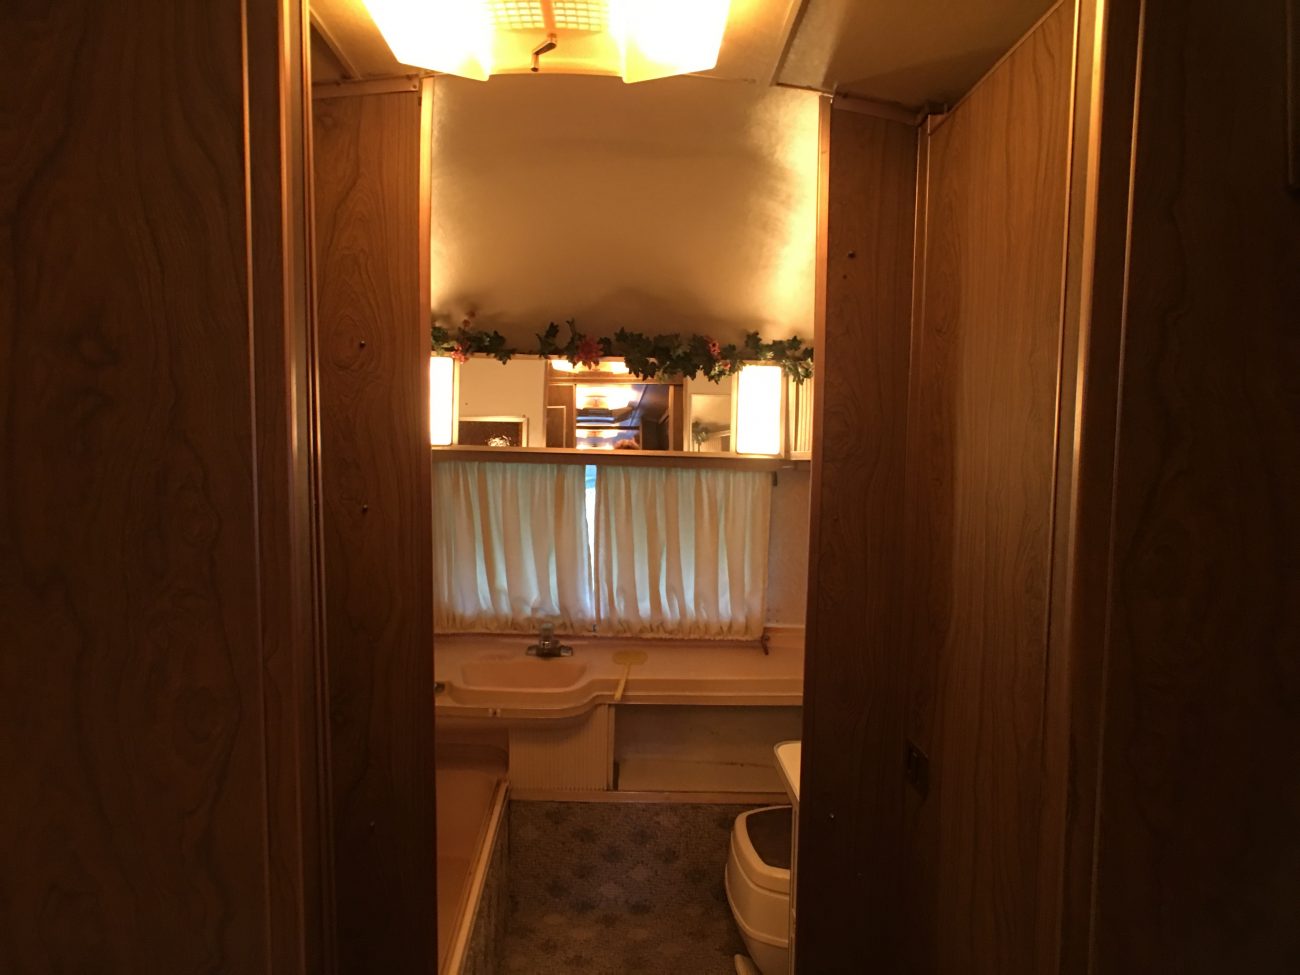
Both the interior and exterior of our 1972 Airstream Sovereign Land Yacht came to us in pretty pristine shape - eight track and all!
It was so loved and taken care of by the family that owned it before us that we wanted to make sure we did the renovation right. We owed that much to them at least.
As we’ve talked about before, we had lots of reasons for downsizing from our 37’ 5th wheel to a vintage Airstream. The biggest being that we fell in love with boondocking (camping without hookups) and wanted an RV that was built from the ground up with that in mind. I think it’s safe to say that Airstreams have always been built with the goal of exploring off the beaten path, even if ours did need some upgrades for true off the grid living.
We also wanted to make a legitimate family home out of this trailer. Something that all 6 of us could live comfortably in full time and that would last another 45 years. Not just a showcase of beautiful interior design without practical functionality. Afterall, this is our HOME, not a showroom.
This drove us to spend hours upon hours of research on everything from solar panels and lithium batteries to water heaters, gray tanks, cabinetry latches, hooks and internet boosting antennas. Every single part of this Airstream has been thought and re-thought through so many times I am just happy not to have to think about all this stuff anymore.
Before we show the final results, you may want to read through the process.
- Week 1
- Week 2
- Weeks 3 & 4
- Weeks 5 & 6
- Weeks 7 & 8
- Weeks 9 - 13
- Weeks 14 - 17
- Weeks 18 - 19
- Weeks 20
- Week 21 & 22
- Weeks 23 & 24
- Weeks 25 & 26
- Planning Solar & Electrical
- Installing Solar & Electrical
- Cost Breakdown
Now that you're all caught up - here we go. The official Airstream renovation tour. Or as we like to call him - Metalhead (we’re Teenage Mutant Ninja Turtle nerds).
How much will your Airstream renovation cost?
Get a better understanding of what your project will cost with our renovation calculator!
Besides the intelligent spreadsheet, it includes includes links to everything we bought for our renovation + over 20 short videos where we share behind the scenes thoughts, details, & tips!
Dinette + Master Bedroom
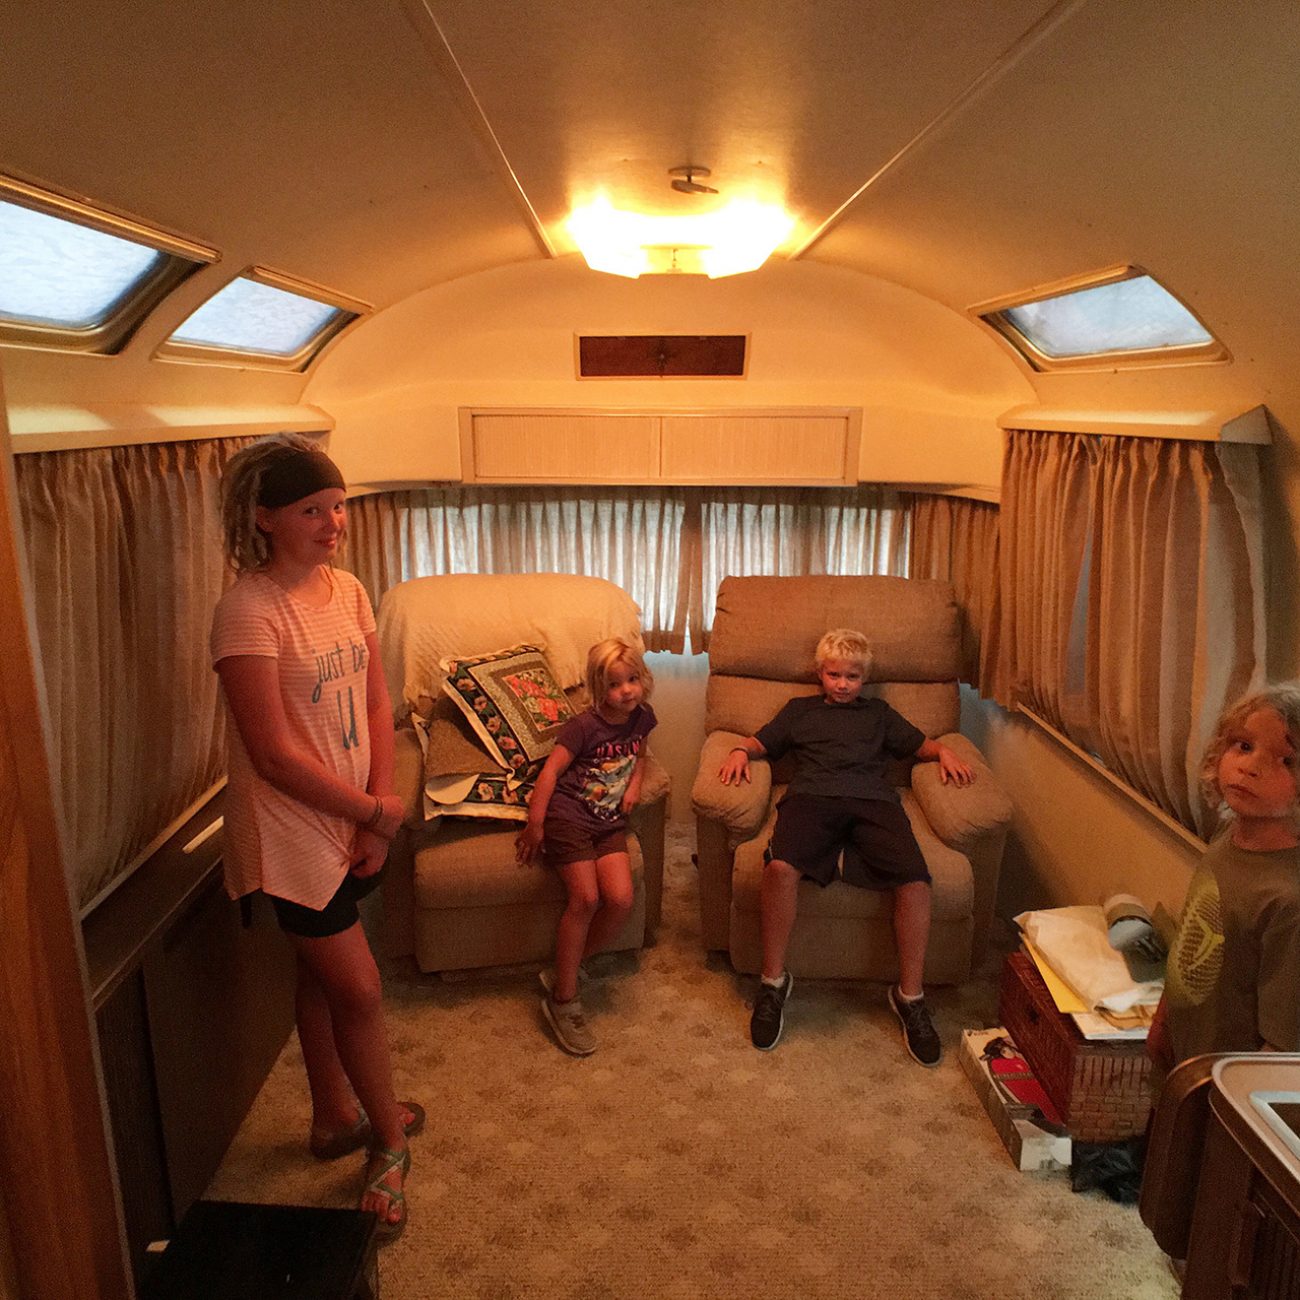
I'll never forget the look on the kids' faces that first time we went to go look at the trailer! They didn't have to say a word. They were not impressed. We kept trying to tell them our plans but they lacked the ability to see past the yellow lights, oak laminate cabinets and carpet. Just have faith little ones! We're about to make a major transformation.
If you have 6 people in a 31’ trailer you are going to have multi-use spaces. There is no way around that. The original floorpan had a couch up front, but when we bought it there were two recliners and not much else. A small table folded up from the wall, but it was only big enough for a couple of people. It all had to go!
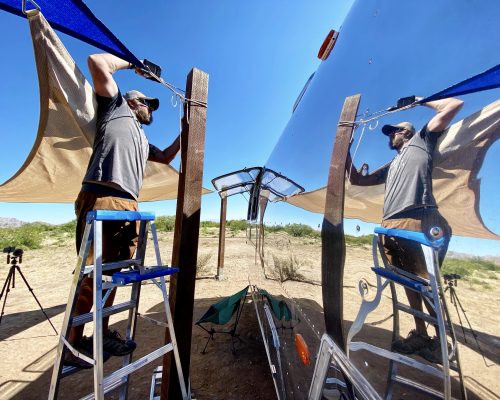
Removing the original end cap and replacing it with aluminum really opened up the headspace in here.
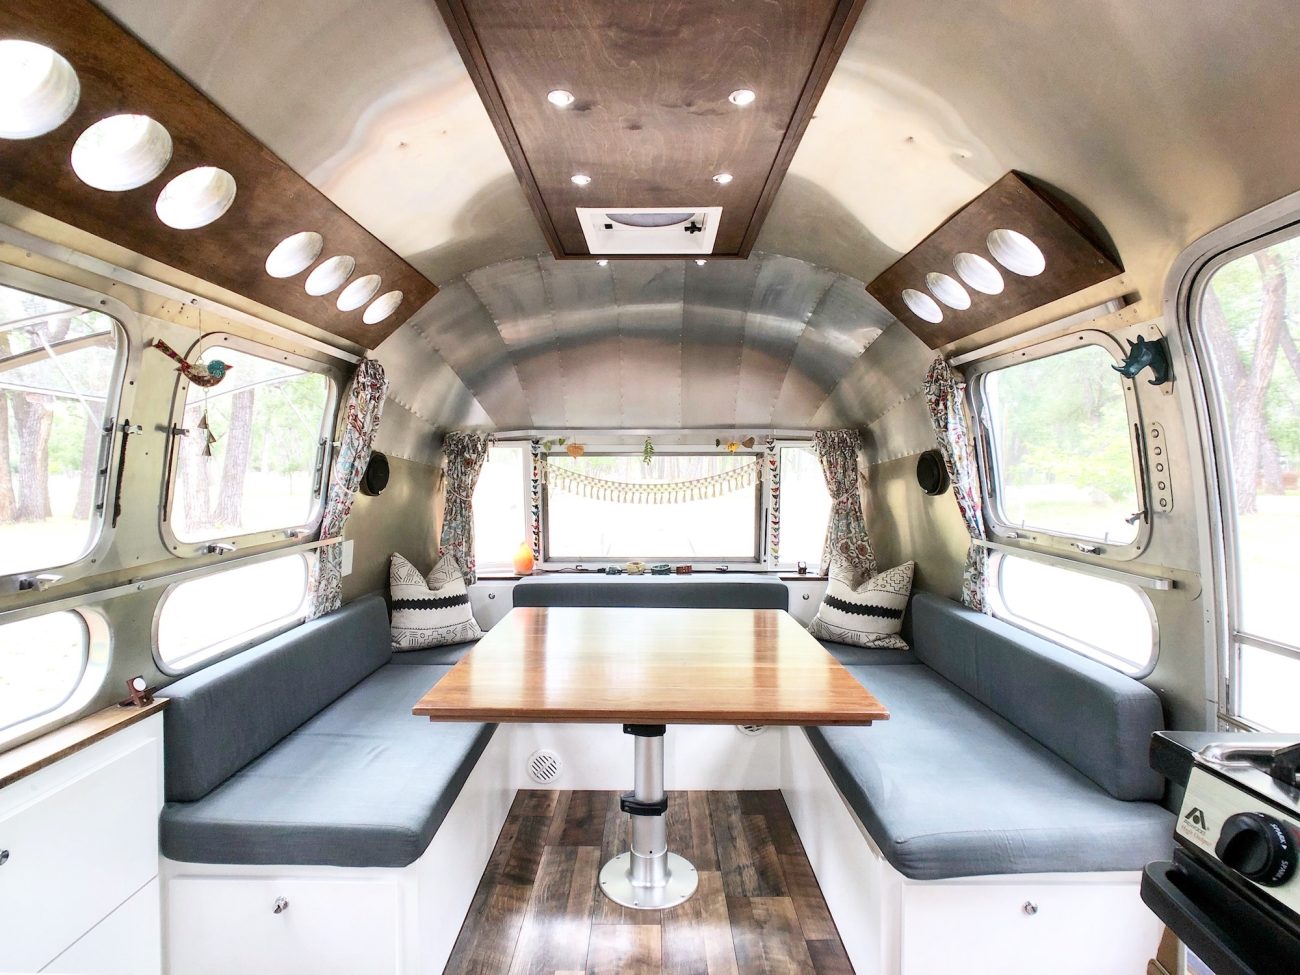
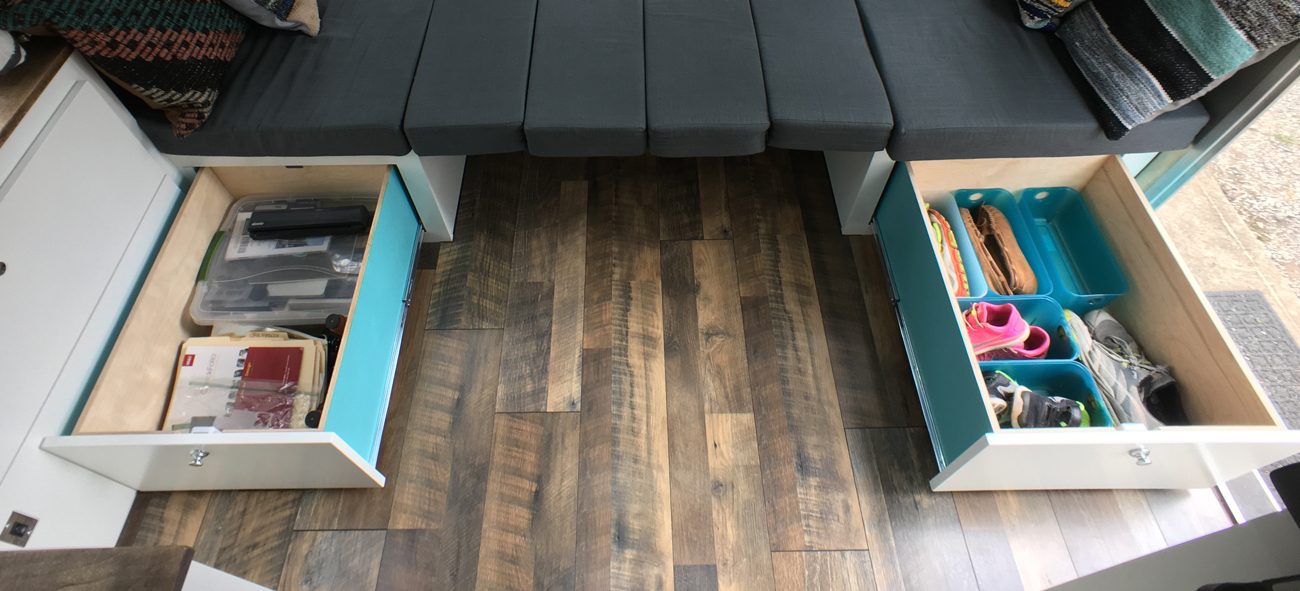
We built the seating from the door all the way back to the nose. Every inch of the area underneath the seats is storage, with our massive lithium battery bank setup in the front...
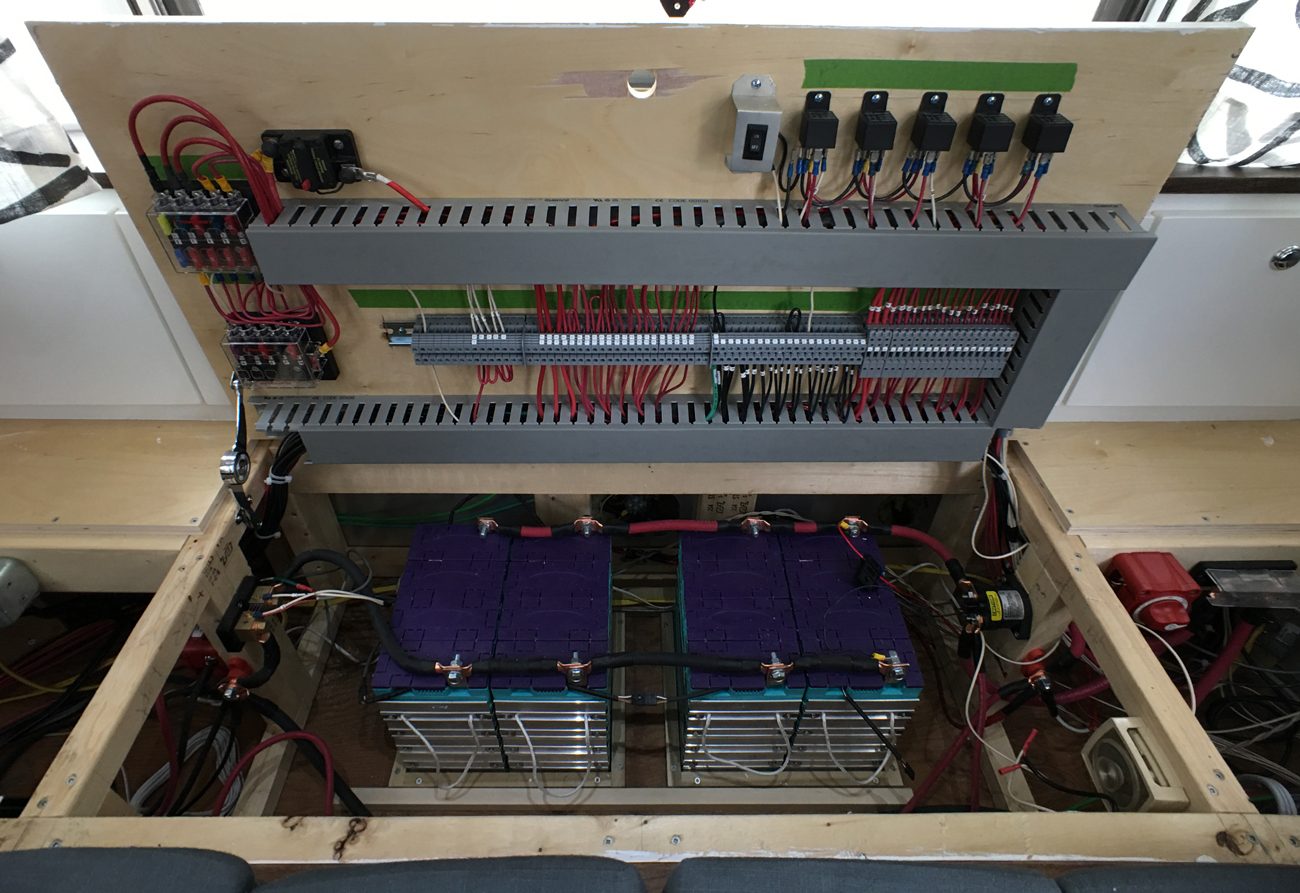
Download our Electrical Diagram
Get up close and personal with this super detailed, impeccably illustrated hi-res PDF of our full off-grid power setup. Get a visual schematic representation of how an entire 12V and 120V system connect together.
...two lid based storage areas on the side, and drawers that pull out on the end. One holding Jonathan’s work and photography gear and other for all of our shoes!
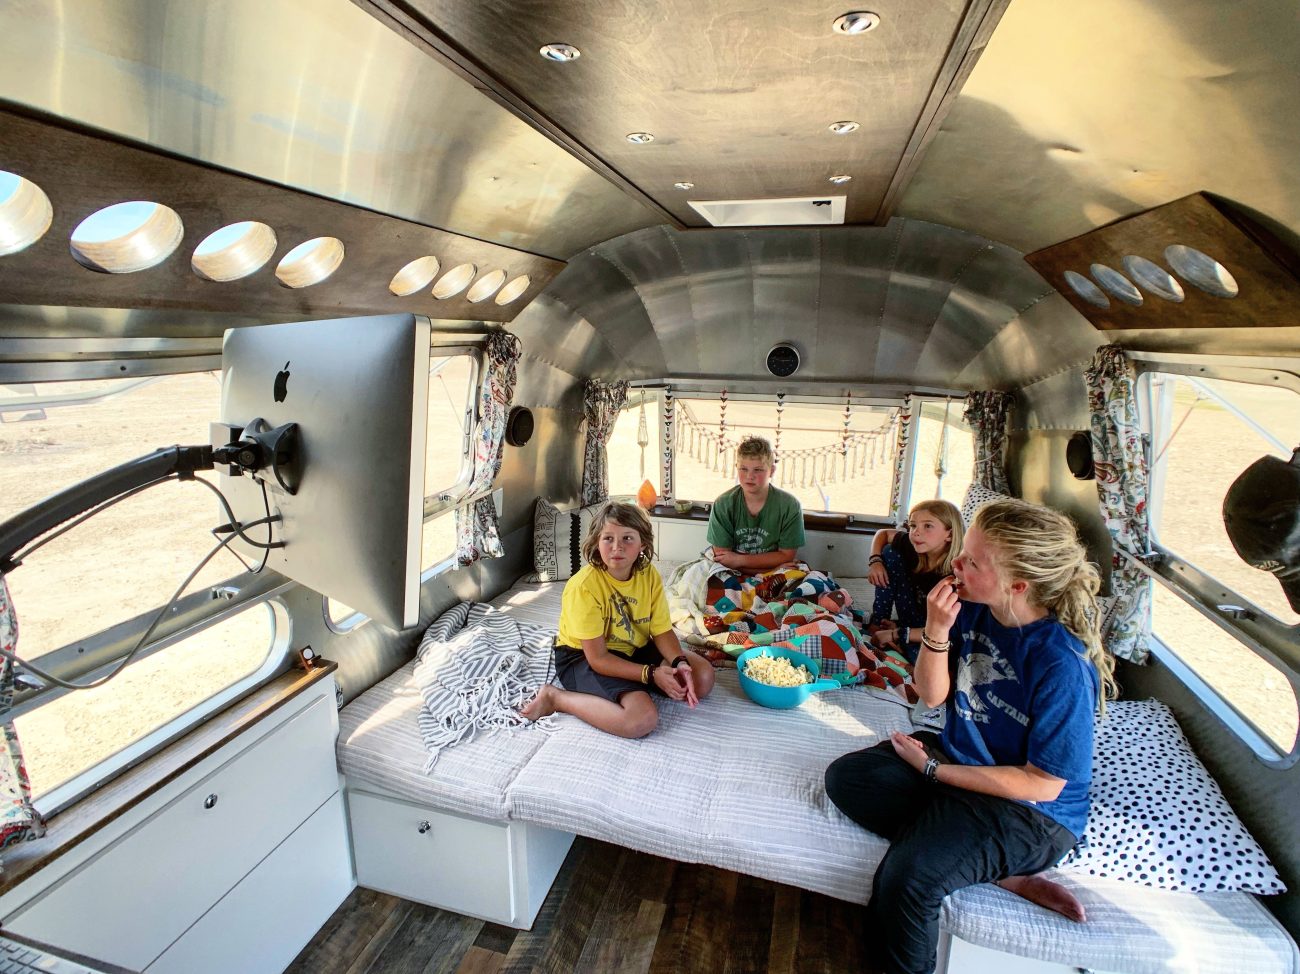
In the middle is a beautiful solid walnut table made by hand to fit the notches in the seating just right so that the marine pedestal lets it set gently down as we transform it from our eating and work area into...the master bedroom!

Or as we call it - a really, really big bed! The surrounding cushions rearrange to fill the entire space. A couple of blankets, sheets and pillows and you’re ready to hit the sack or pile on for family movie night. Yeah, the frame of this thing is built like a tank.
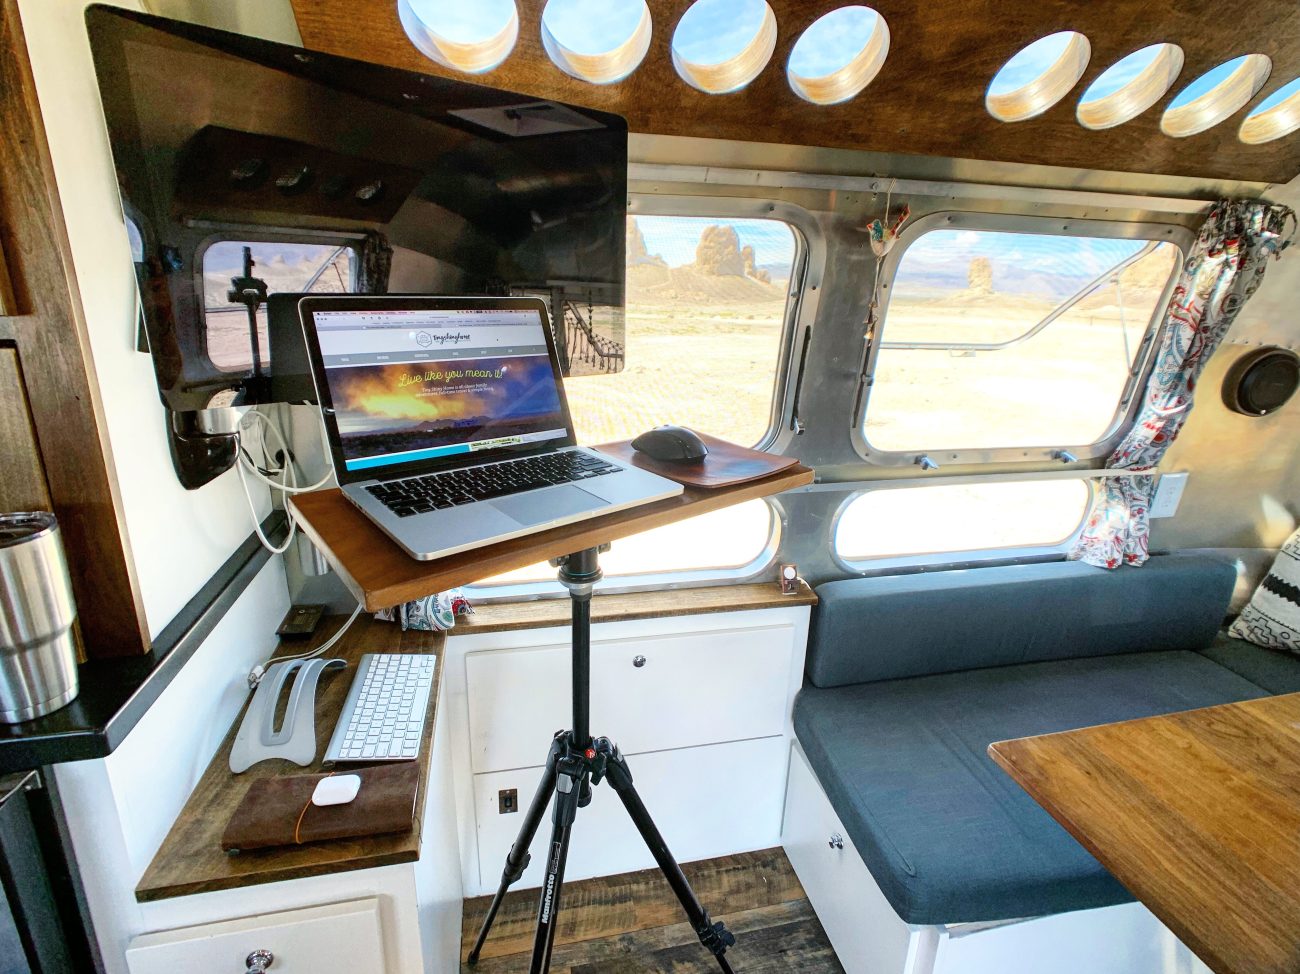
Standing Desk Workstation
Directly across from the front door is Jonathan’s standing desk area. A thin cabinet chase covers solar wires we needed to run from the roof and provides a small bit of storage. Next to that is our slide out trash can - the top of it doubles as a mini-desk to hold the laptop, keyboard, mouse and other items.
We mounted Jonathan’s Apple Cinema Display with a Newer Technology NuMount Pivot Wall Mount. This thing is amazing. The range of movement is so helpful in this tiny space. We can get it back up against the wall so it doesn’t stick out at night, or bring it all the way around the other side of the wall (into the kitchen) if he needs to work while everyone is at the table.
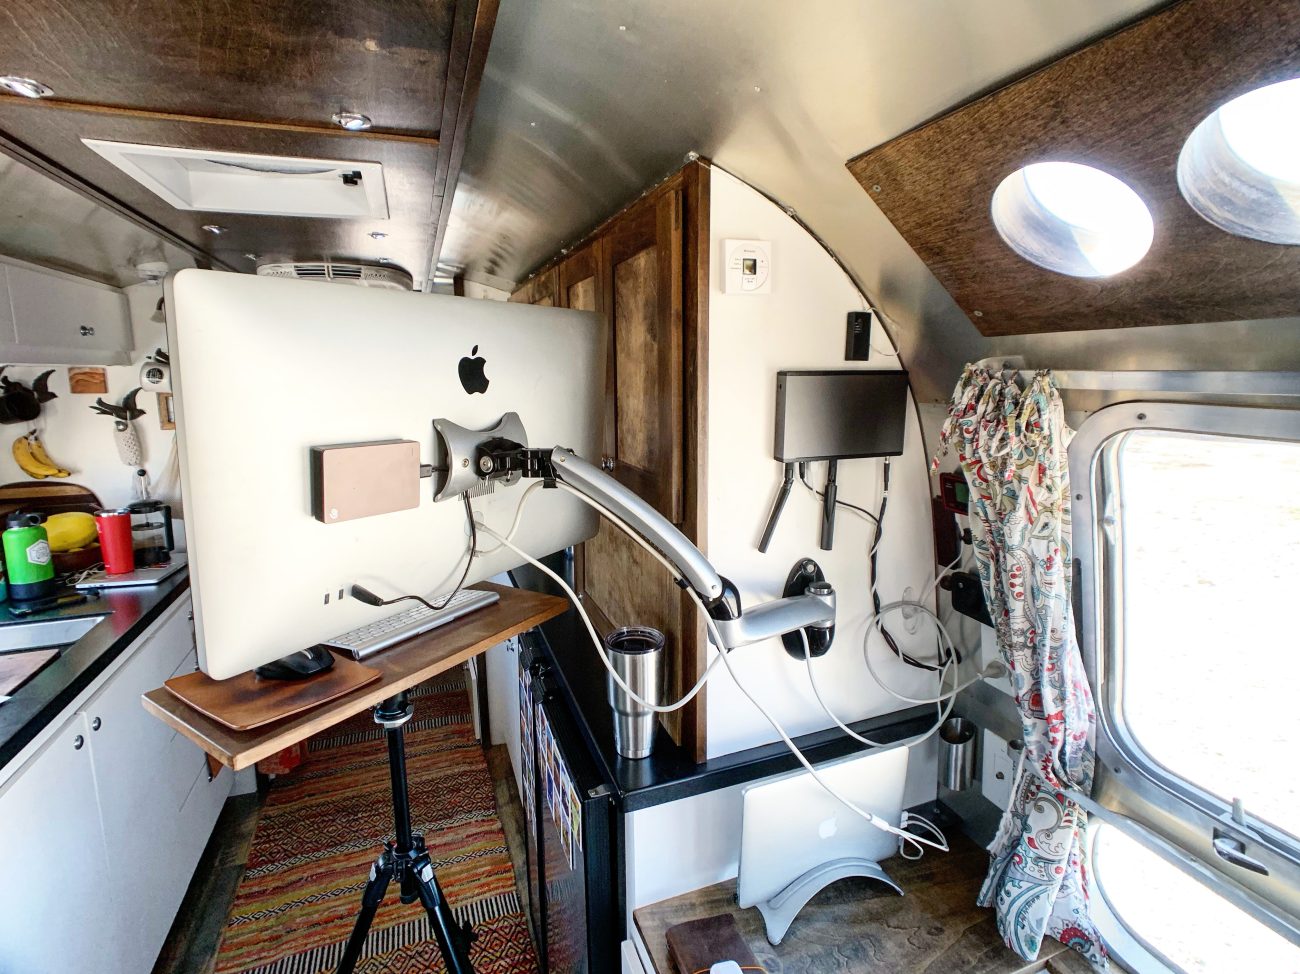
Remember I mentioned piling on the bed to watch a movie? The mounted monitor can extend at least 18” and moves up and down so we can use it as a TV. High five for multi-use!
The other piece to this puzzle was a small desk that the keyboard and mouse would go on that would be standing height. We looked at all sorts of options - even considered buying a second Numount Pivot Wall Mount. The difficult part was that this whole standing desk needed to be out of the way when not in use. And sturdy enough to withstand banging on a keyboard and using a mouse.
Someone jokingly mentioned that Jonathan should use a music stand - remember those from music class in school? But the idea of a stand stuck with him. He searched and searched and searched the internets for a pre-built solution and came up with nothing.
Finally, he found a company that made computer tables for camera tripods. He didn’t really like any of their specific products, but they sold their mount separately so he grabbed one of those, used the same walnut from our kitchen table and made his own. Their mount had 4 screw holes in the top so we had to match those up and get some longer screws, but it works perfectly, and this gives him multiple options.
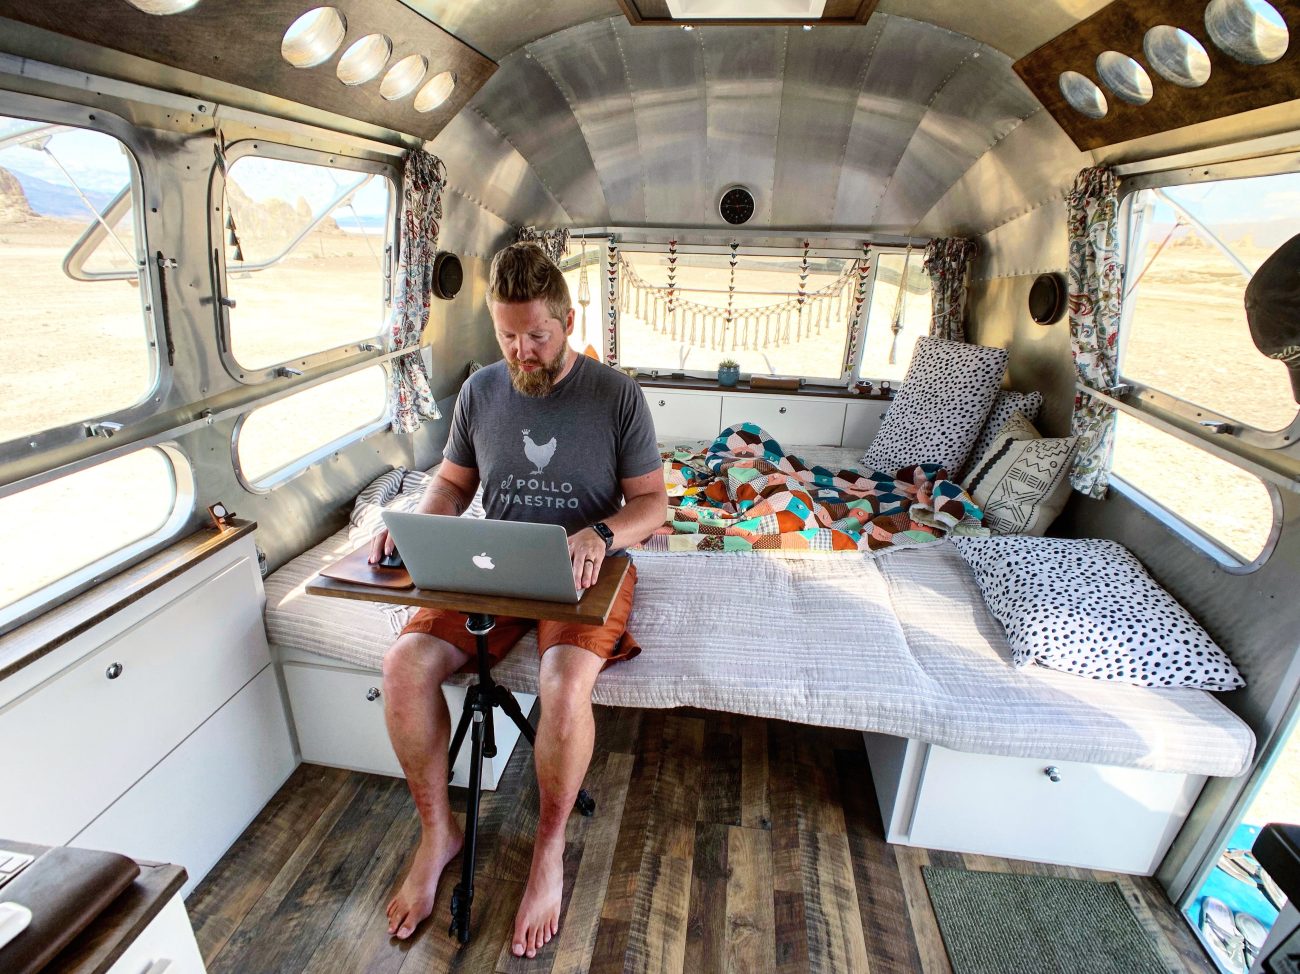
He can slip the table off, compact the tripod and stick it in a drawer at night when not in use. Plus, he can put his laptop and mouse on it if we don’t want to use the inverter and run the monitor. Having the “table” part of his desk easily movable makes it simple to adjust depending on what the rest of the family is doing - and it only takes a few seconds to move things around.
The wall behind the monitor houses a lot of nerdy internet boosting gear that you can read about later :)
Need a reliable, boosted internet setup?
In this beautifully designed PDF, we cover our exact internet setup - from carrier plans to boosters to routers to antennas.
We'll even tell you how we installed it and how it all connects together.
Get Access for $19Kitchen & Pantry
We ended up keeping basically the same 1972 kitchen layout, but made it much more usable. Everything was so dark and cluttered in here before, so my goal was to open up the space and make it functional for full-time living. Let's take a peek at what it looked like before.
When we designed our kitchen, I wanted to have as much counter space as I could have since we do cook most of our meals in here. Right next to Jonathan’s office area is our ‘pantry’ side of the kitchen. We have a small NovaKool fridge/freezer combo that is plenty big enough to store a weeks worth of food for all 6 of us. Most of the items that we use on a weekly/daily basis are in the upper pantry cabinets.
Below we have baking items, bowls and our pots and pans and still have room for extra food storage. I wanted to leave a good portion of this side of the countertop usable. We opted for one side to have a barrister door to close off the clutter of charging devices, and one side to remain open for optimal food prep space. I especially love ‘the drawer’ as we call it. It is huge and can hold a lot of commonly used items.

Across from the pantry side is the 'kitchen' side. The original plan was to not have an oven and just use a double burner stovetop. I am so glad we changed our minds. I love my stove/oven! We went with an Atwood because I just couldn’t shell out the cash for the marine stove I really wanted. Still looks pretty nice, though! But most importantly it works great!
One of my favorite things about the kitchen is that we ended up having to raise the countertop height so that we could clear the fridge on the other side. I didn't want it to feel unbalanced so we raised both sides in the kitchen. A higher countertop just means more storage underneath and I love the extra height! Win/Win!
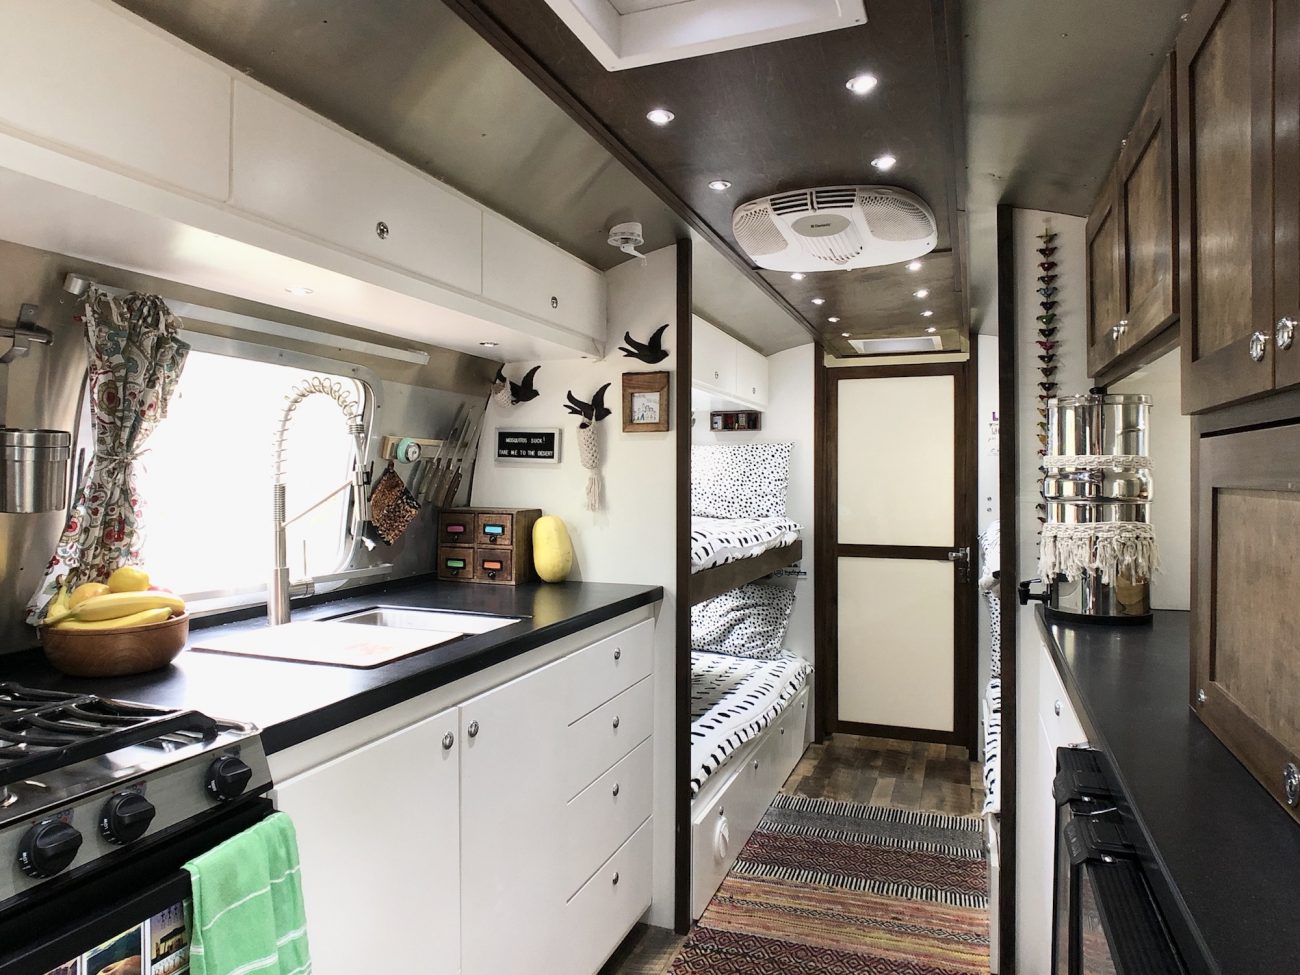
When looking for a sink I knew I wanted one deep bowl. I am in love with this Ruvati sink. The 16 gauge steel sink is a beast and came with a rack in the bottom to prevent scratching. It is the perfect size for an IKEA dish drain we got on a whim. I was so excited when it was a perfect fit!
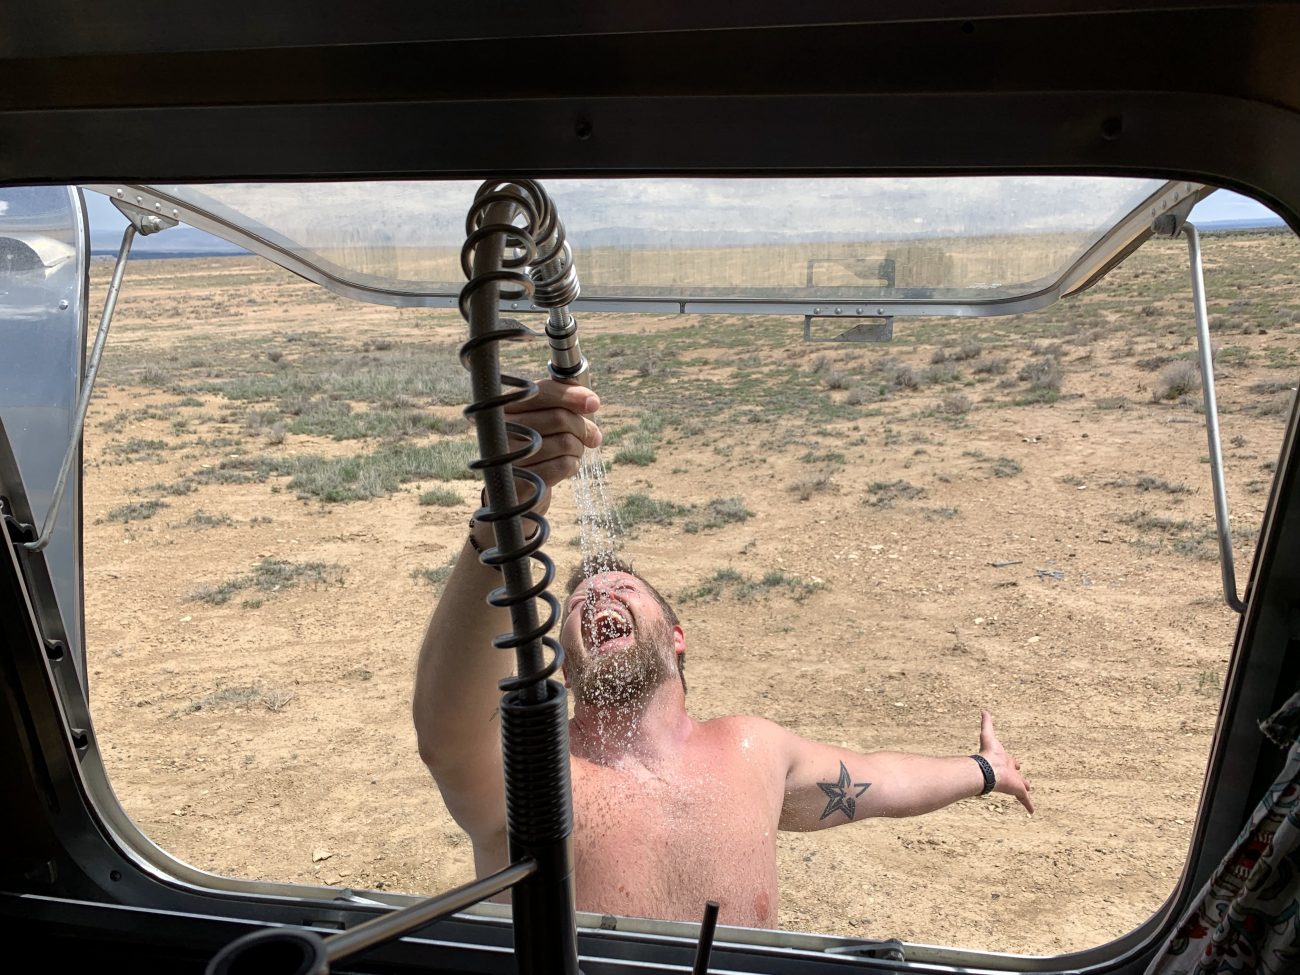
The Kraus faucet we picked goes so perfectly with the Ruvati sink. I wanted something that could swivel 180 degrees so that when we are in the middle of nowhere we can just open the kitchen window and turn the faucet for a quick outdoor shower! Again...multi-use for the win!
As for the countertops. I have a love/hate relationship with them. I love the look of them, but I hate the fact that they scratch so easily. Think twice before you go with a solid surface, especially a dark color like ours. They are ridiculously heavy as well. If I had to do it over, I think I would have done butcher block top. Still heavy, but way less maintenance. Granted, the scratches do buff out, but should sliding a Kleenex box on a counter really scratch it?
You may have noticed these bird hooks I have in our kitchen!

I had picked those out long ago and knew I wanted to incorporate them into our design. I get asked so many times about where they are from. I got them from a company called At West End, but they are also available on Amazon!
Download our Renovation Checklist
Get an exhaustive overview of everything you'll need to think about for each step of planning your Airstream renovation. It's a simple way to start a complicated project.
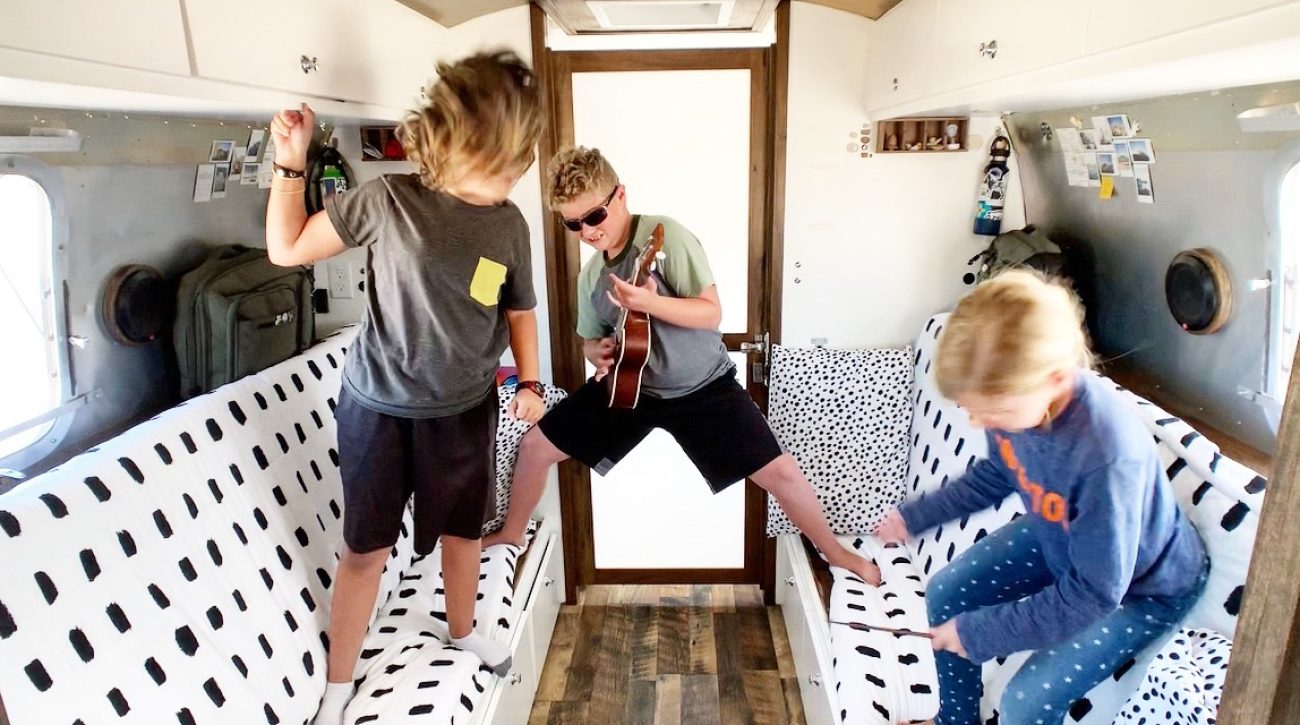
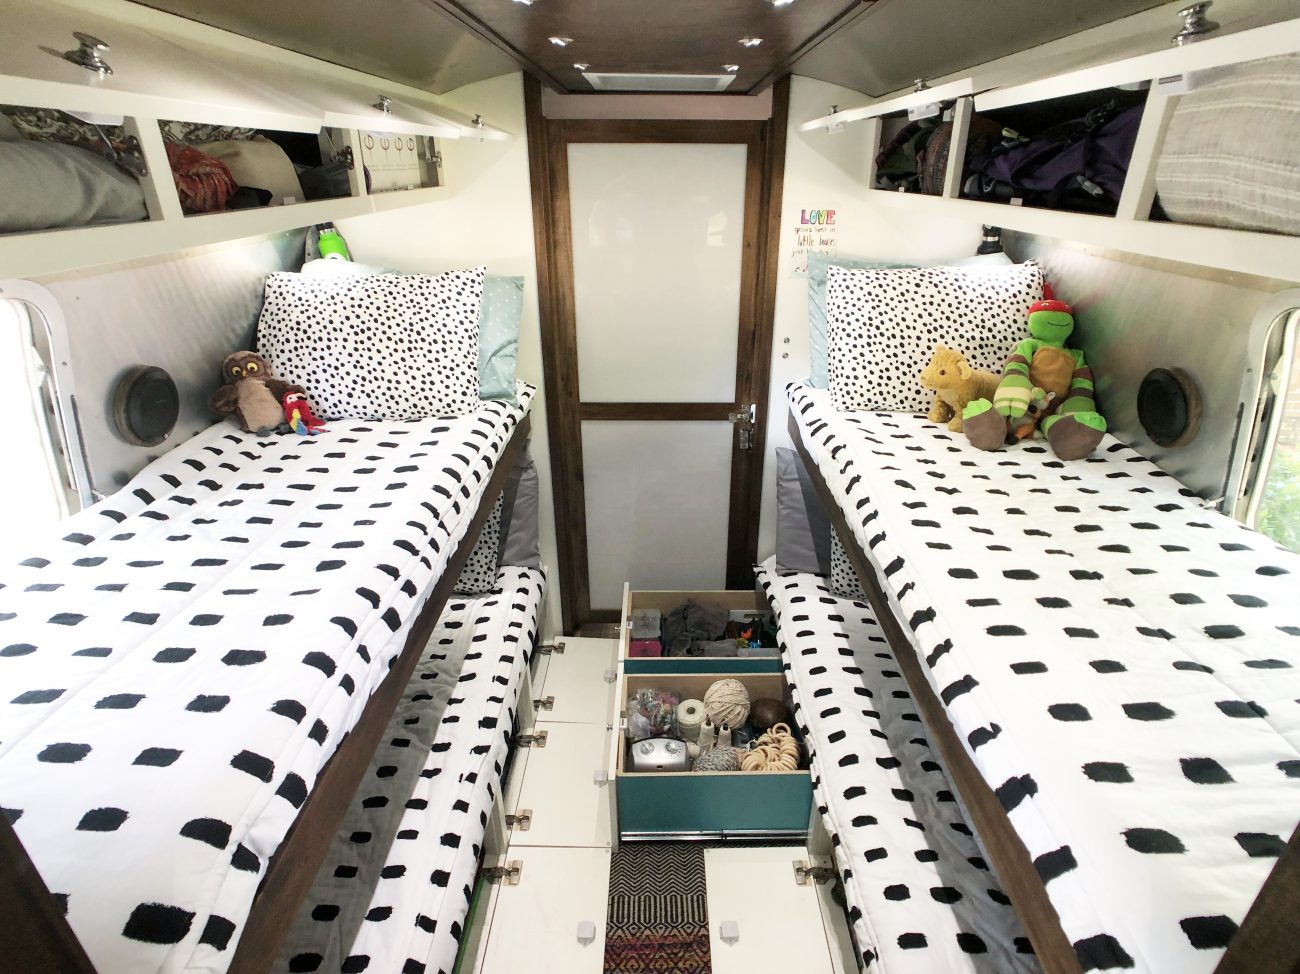
Get Access for Free!Kid's Room
I love our kids room!
We started out with the twin beds on each side from the original floor plan.
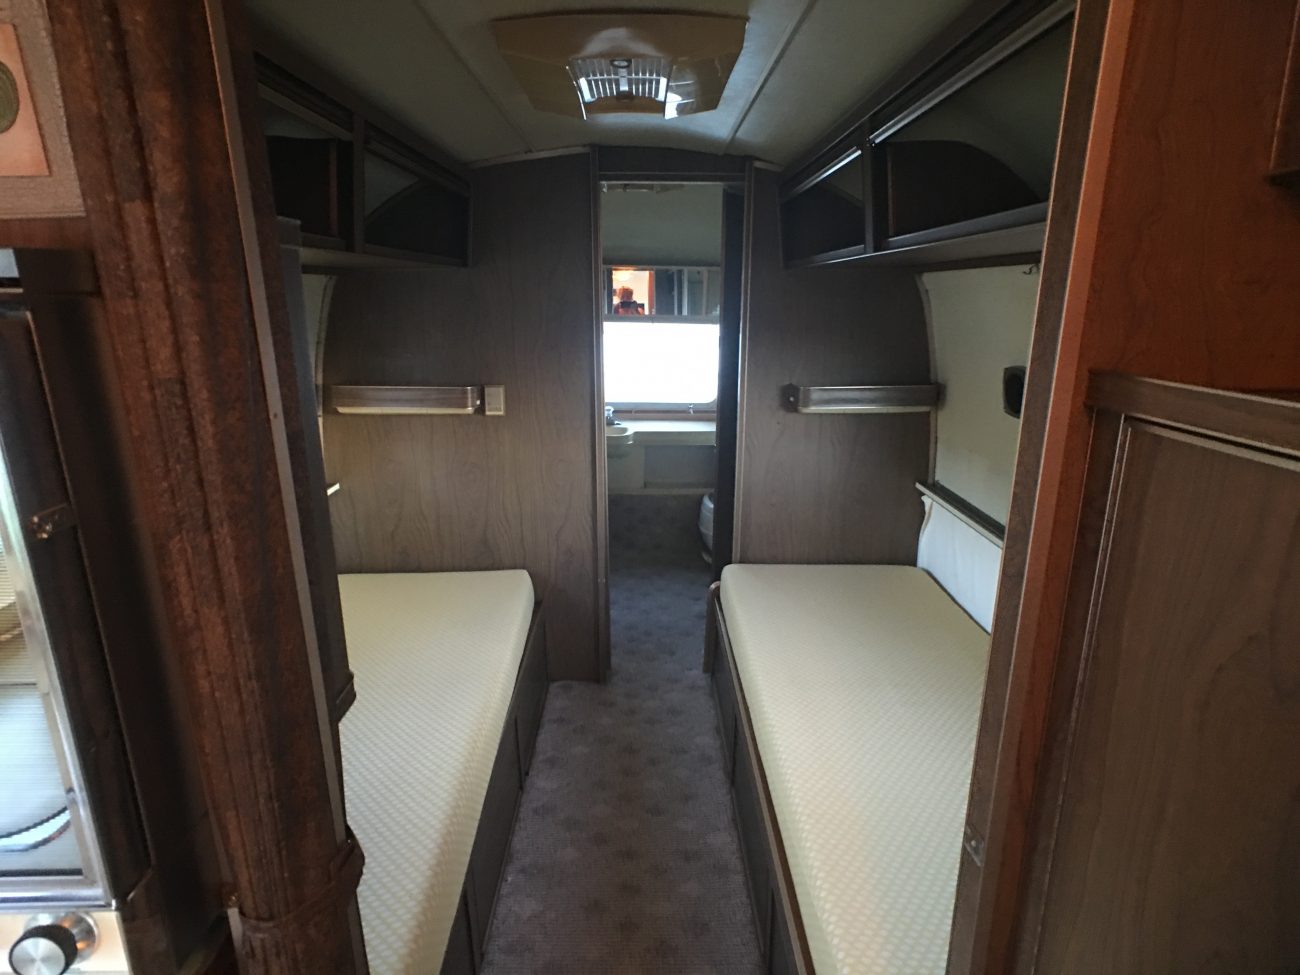
But we wanted to open that space up and have more than a 12 inch walk space. We went with narrower beds and more storage! At first, we considered moving the bathroom to the middle so that the kids could have the back of the Airstream all to themselves, but I am glad we didn’t do that. Moving the bathroom drains and plumbing and figure out support for the beds along the curve in the back would have been too complicated.
Turns out my sister is a tiny house genius and had a great idea to make bunk beds that could be fold down into couches during the day. The tricky part was getting the height right and working around the wheel wells and windows. We turned to my dad and knew he would be able to come up with a plan that would work. And he nailed it!
We braced around the the wheel wells to support the lower bunks and the walls on either side and ribs in the frame to support the top ones. They are so sturdy and each kids has plenty of room for sleeping. The big kids took the bottom bunks and the little kids finally got their turn on the top bunks! They are all happy which makes us happy.
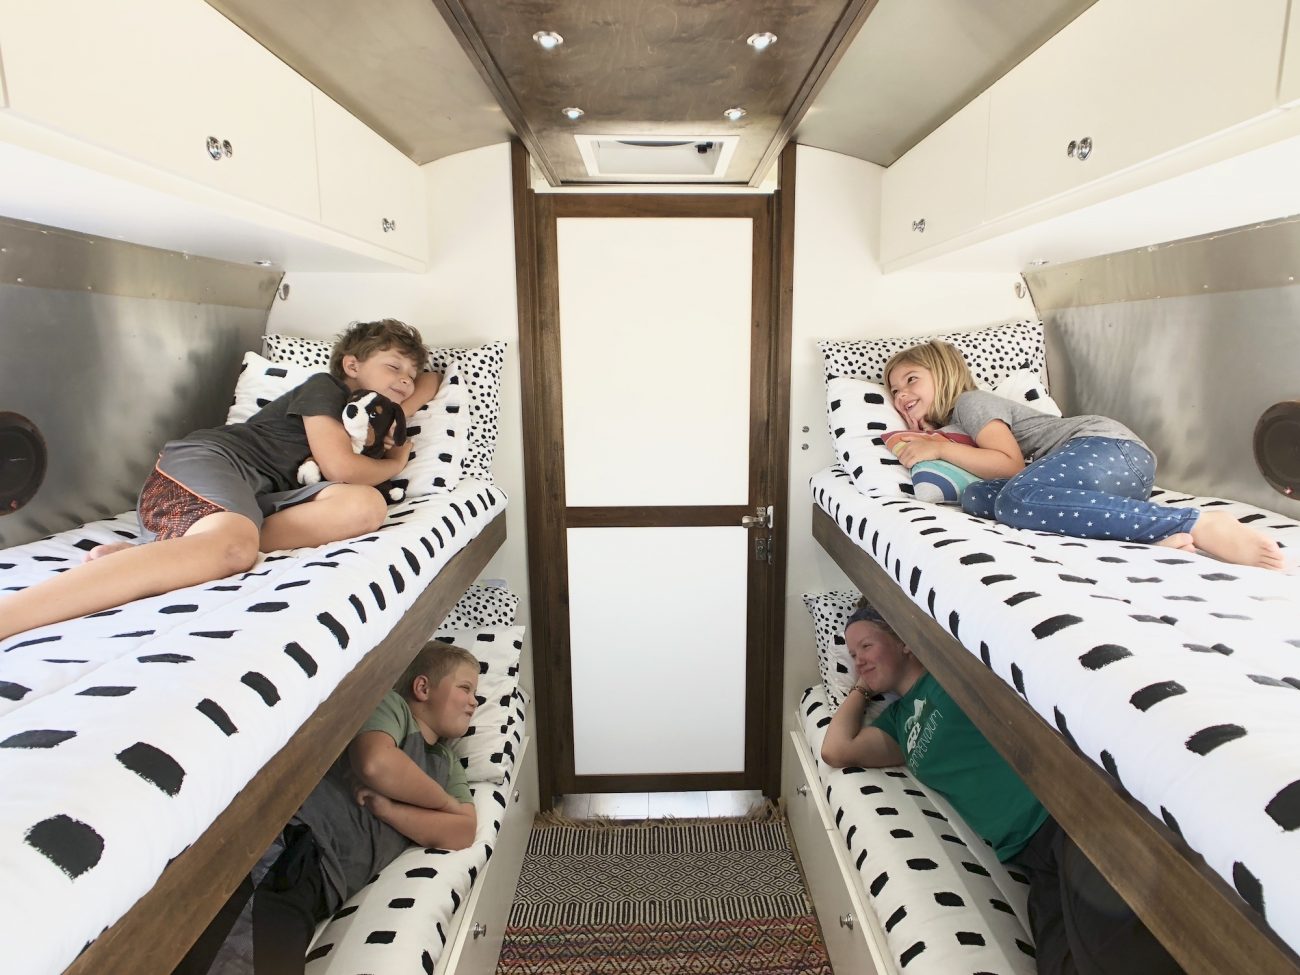
It's just an added bonus that we can flip the top bunks down to make the beds into couches for the ultimate party room!
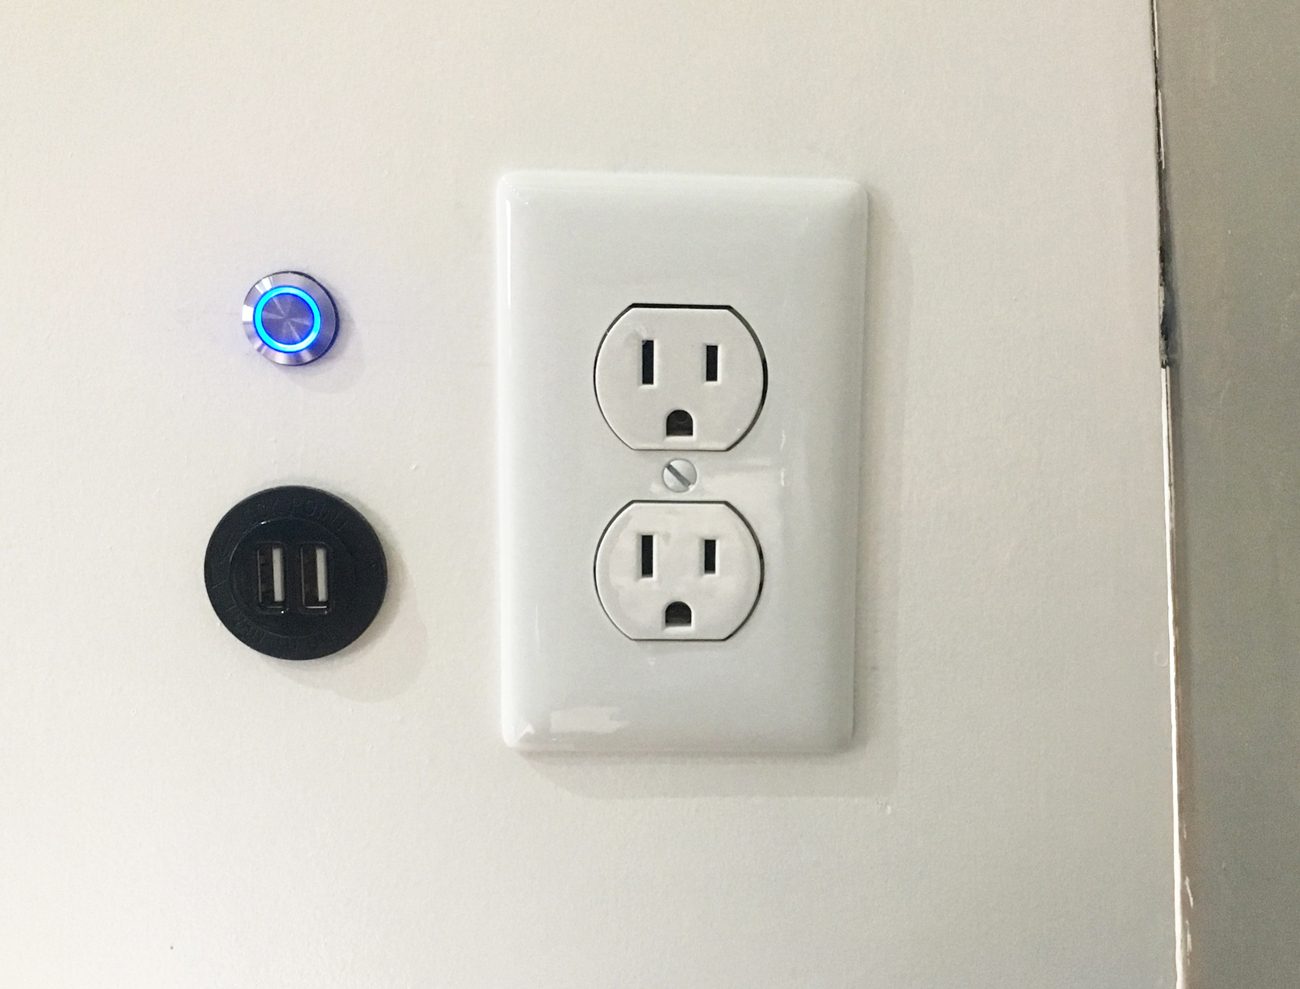
Each bed is equipped with Beddy's bedding (to keep things nice and tidy), their own LED reading light as well as their own 120v plug and a 12 volt plug with USB insert. This means they can charge their own devices without hogging all the ports and they are loving their own spaces.
Above the top bunks and below the bottom bunks we crammed as much storage as we could - 14 cabinets and drawers all together! Working around the wheel wells and outside storage compartments was a little tricky, but we figured it out.
We did install two hooks on the kids side of the kitchen walls so that we can put up a curtain to divide the space for a little privacy.
Bathroom
I am so happy with the way our bathroom turned out seeing as we didn’t have a plan for it until the week we began building it. We knew we wanted to get as much storage in there as possible. What we started with felt so cramped, but we knew we didn't have much space to work with. Hopefully with cleaner lines and a simpler design, we could achieve the feel of it being bigger than it actually is.
First we put in a huge storage cabinet to the right that houses all our clothes and extra towels. The lower section is where our water heater and electrical wiring comes into the trailer so really we are only able to use two-thirds of it - but it’s a huge cabinet and really stores a bunch of useful items.
Keeping our clothes inthese eBags packing cubes has been a game changer! Everything has a place and it's super easy to keep our clothes to a minimum and organized.

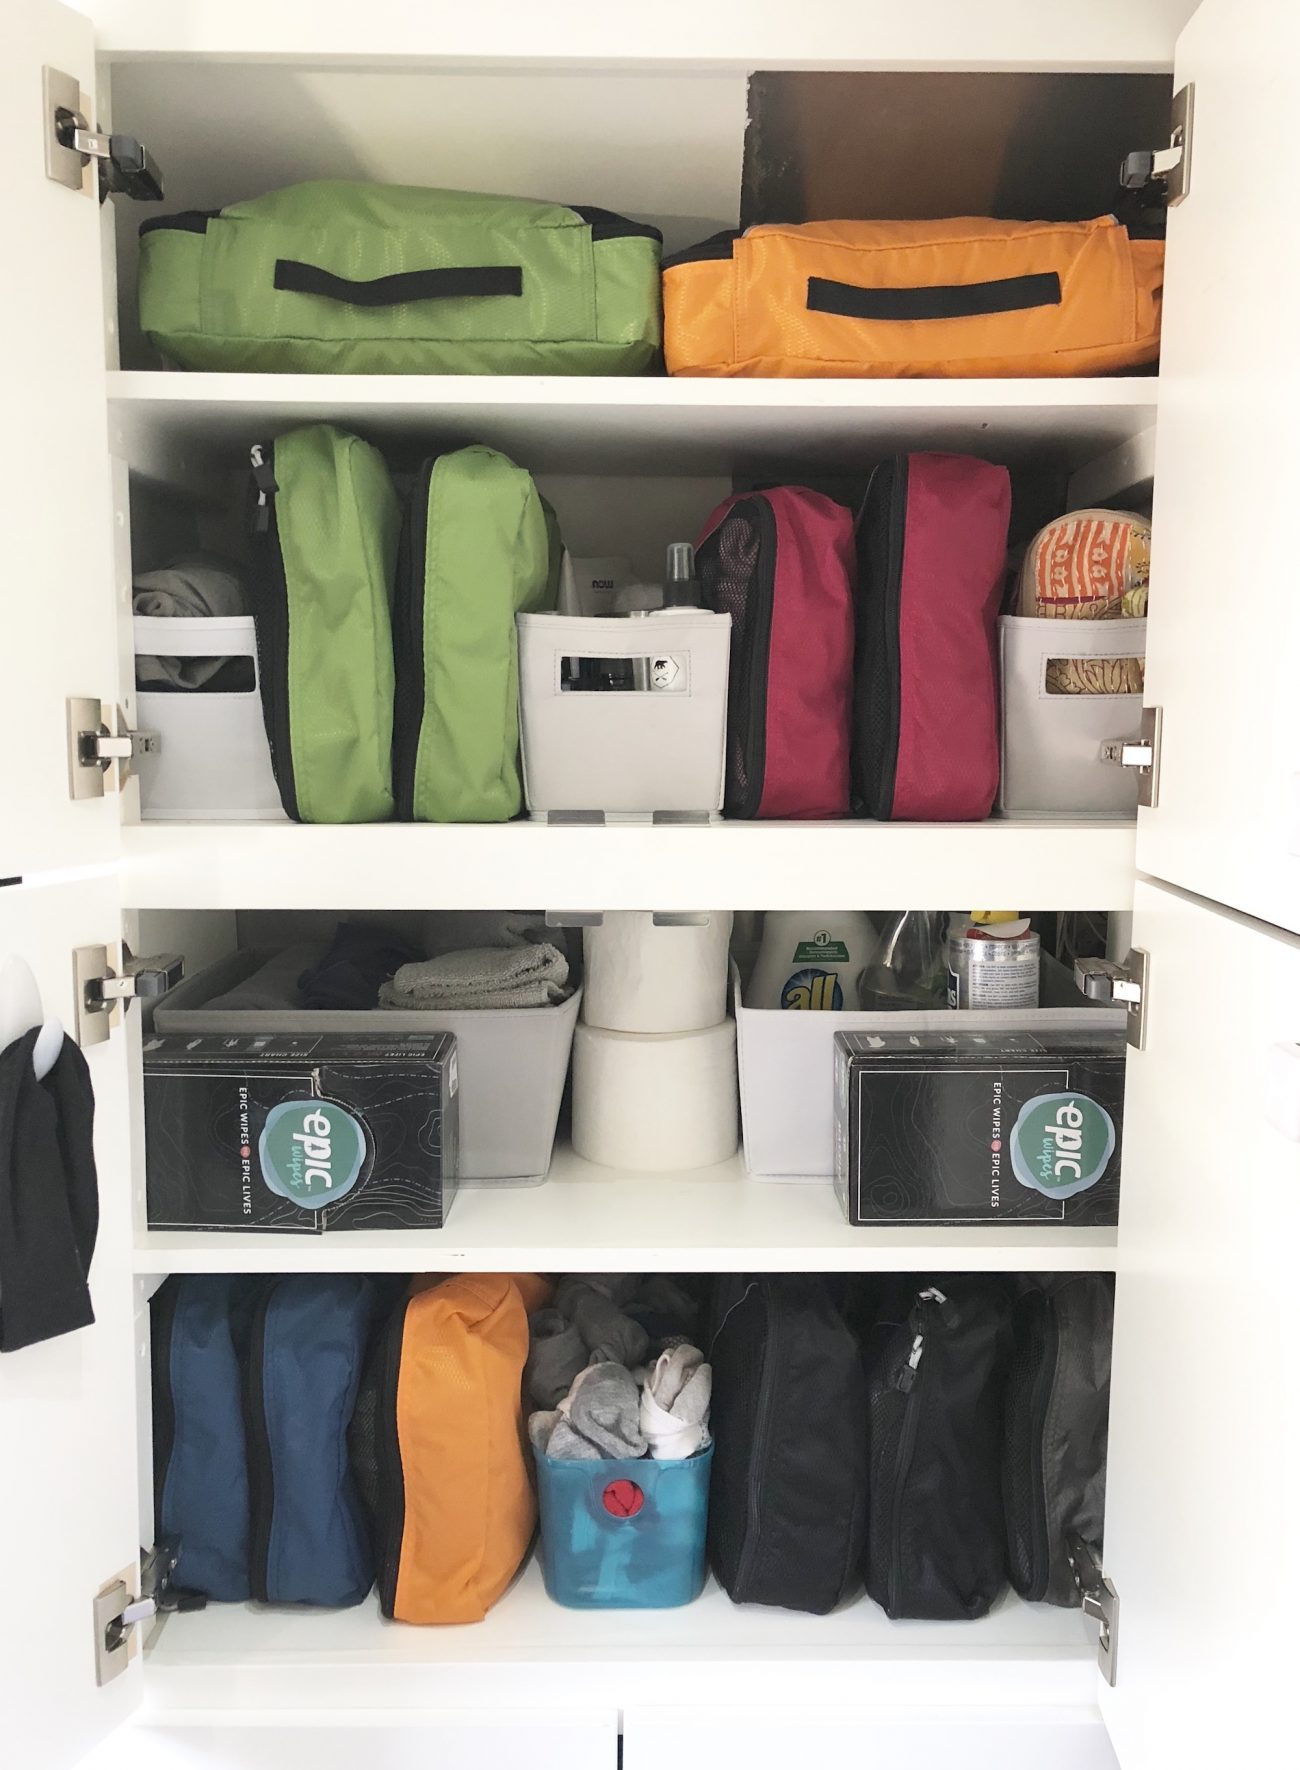
In front of the window is our vanity. It’s tiny, but we spruced it up with the same countertop we used in the kitchen, a basin sink and modern faucet. Underneath, Dad made some custom shelves to go around the plumbing and we can keep our cleaning supplies there as well as storing some coco coir for our composting toilet.
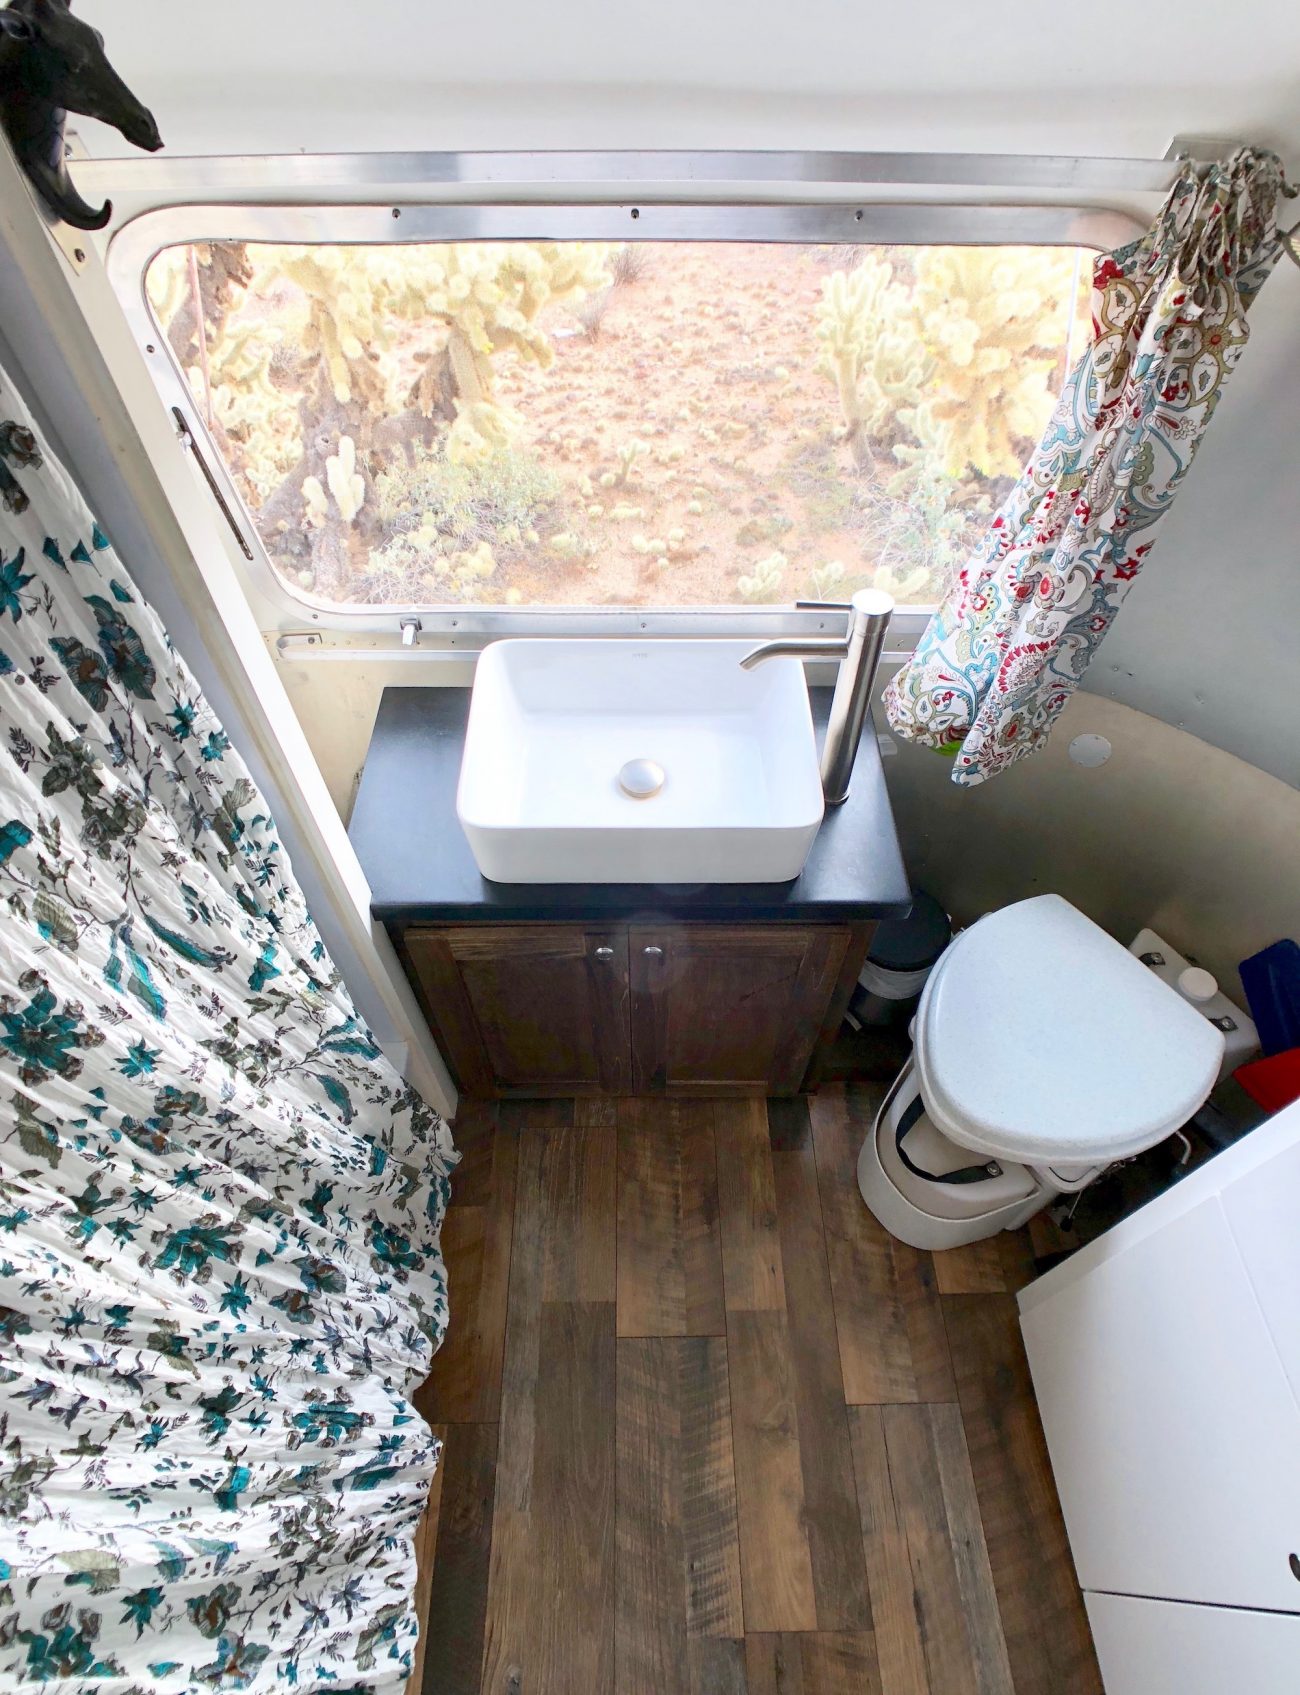
To the left of the vanity is our shower. We went super practical on this. We didn’t want to spend the money or time fabricating some tiled masterpiece that would require the entire bathroom to get wet anytime anyone took a shower. We knew we could have done it and made it look amazing, but when it comes down to it, the functionality wins over being super pretty and impractical for our families needs.
Getting the shower to fit the curve in the back was kind of ridiculous, but it turned out great. We were even able to use the empty space behind the shower to hang a laundry bag so all our dirty laundry is out of sight.
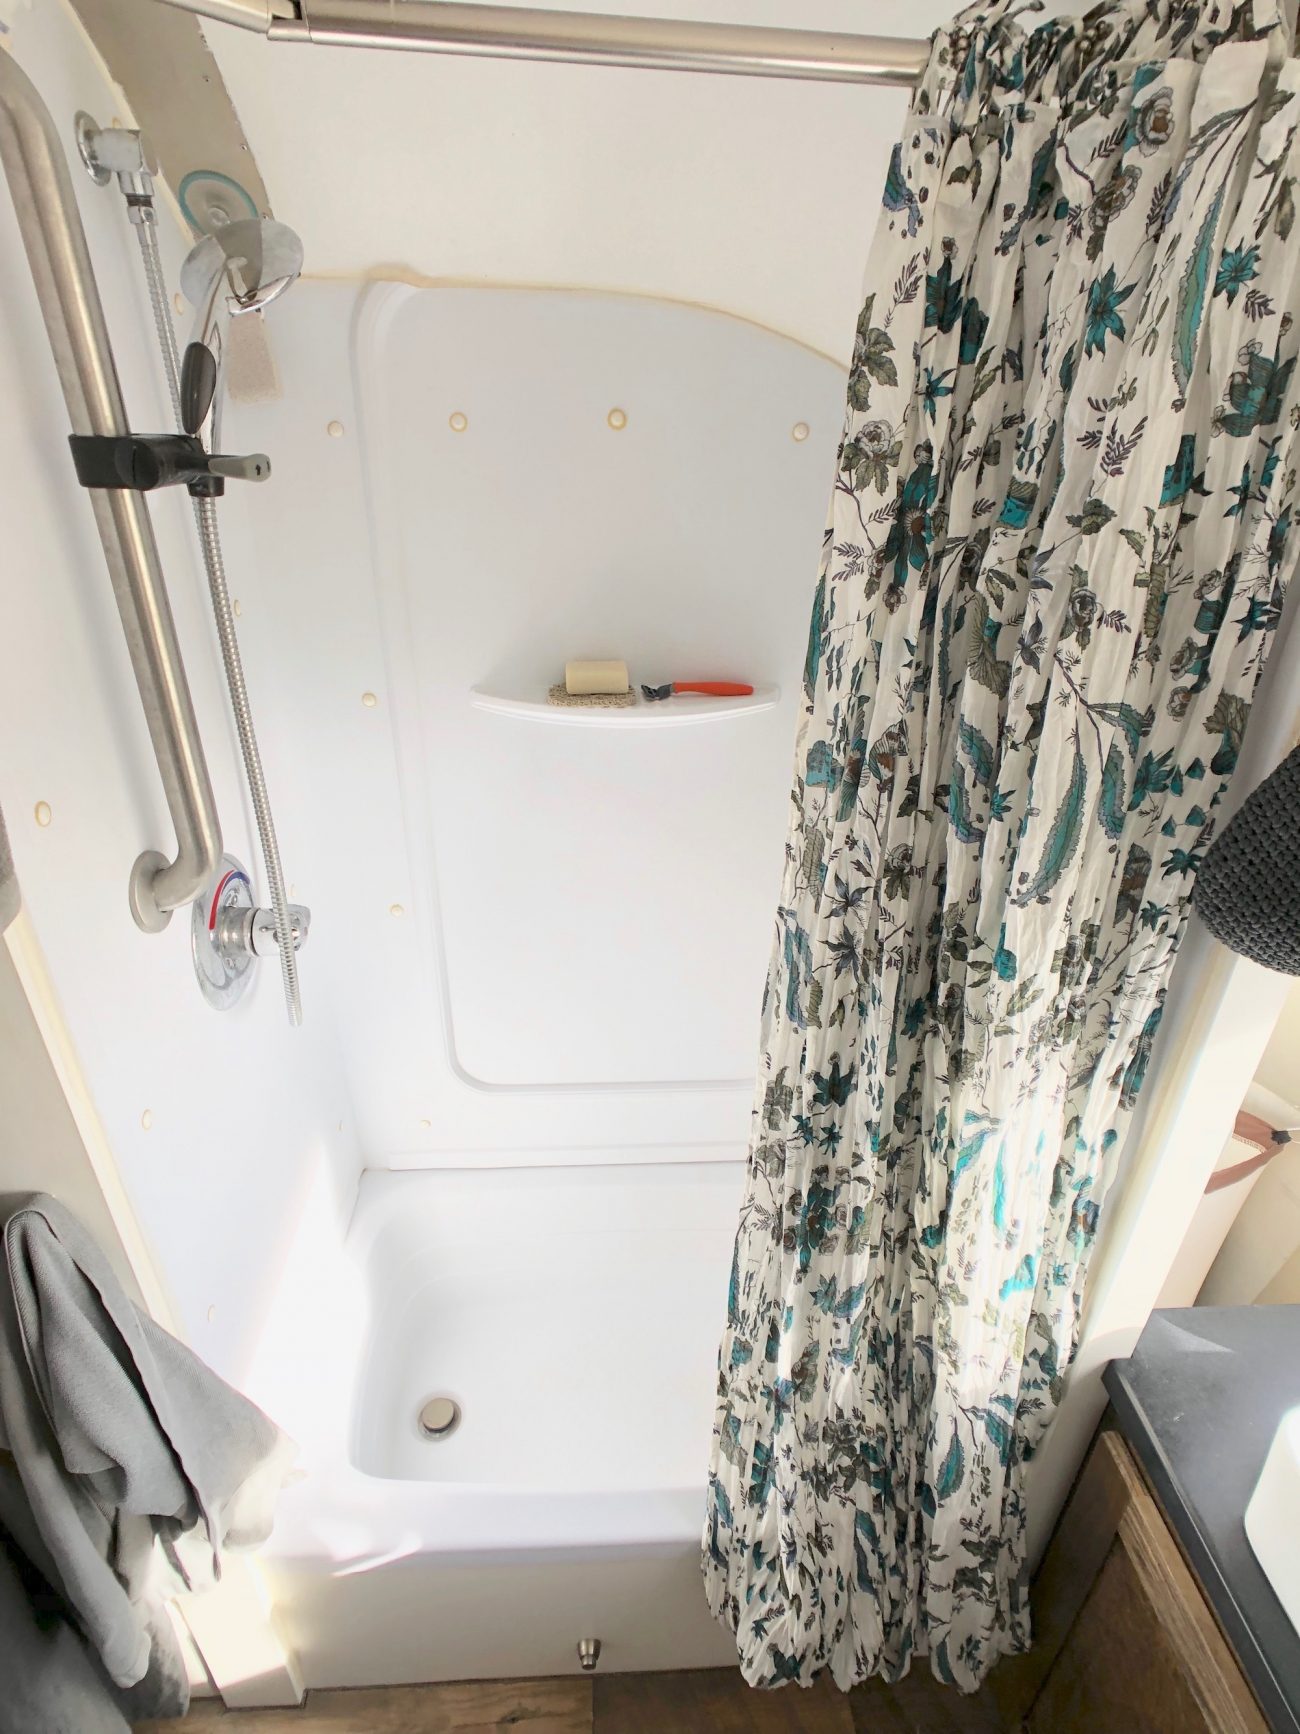
Having this shower curtain rod really helps in the tiny space as well. We are able to pull out the bar when we are showering so that we can have a bit more elbow room to wash our crazy hair...I mean, have you seen this family’s hair? Out of control!
The hardest part for me in the bathroom is that we didn’t really have a place to hang towels that wouldn’t be visible. I agonized over it for a few days until I just gave up and we put hooks in the only places we had. 6 people, 6 hooks plus one awesome giraffe hook for our hand towel at the sink.
Being that the door is transparent, we added a little curtain that can be put up for changing. I think the kids appreciate that!
And of course we had to bring along our measuring ruler! I made this when the kids were little and it has all their heights marked on it. Literally the only space this would fit is on this bathroom wall. We had to cut a bit of it off, but it works!

It may not be the most beautiful bathroom renovation, but it’s functional and I love it.
Oh! I almost forgot to tell you about our toilet! I’m sure you’re dying to know. We choose to go with a composting toilet because we mostly want to camp off grid, PLUS we didn’t want to have to deal with a black tank ever again! We had to deal with the stinky slinky in our 5th wheel and we knew we didn’t want to do that with our Airstream.
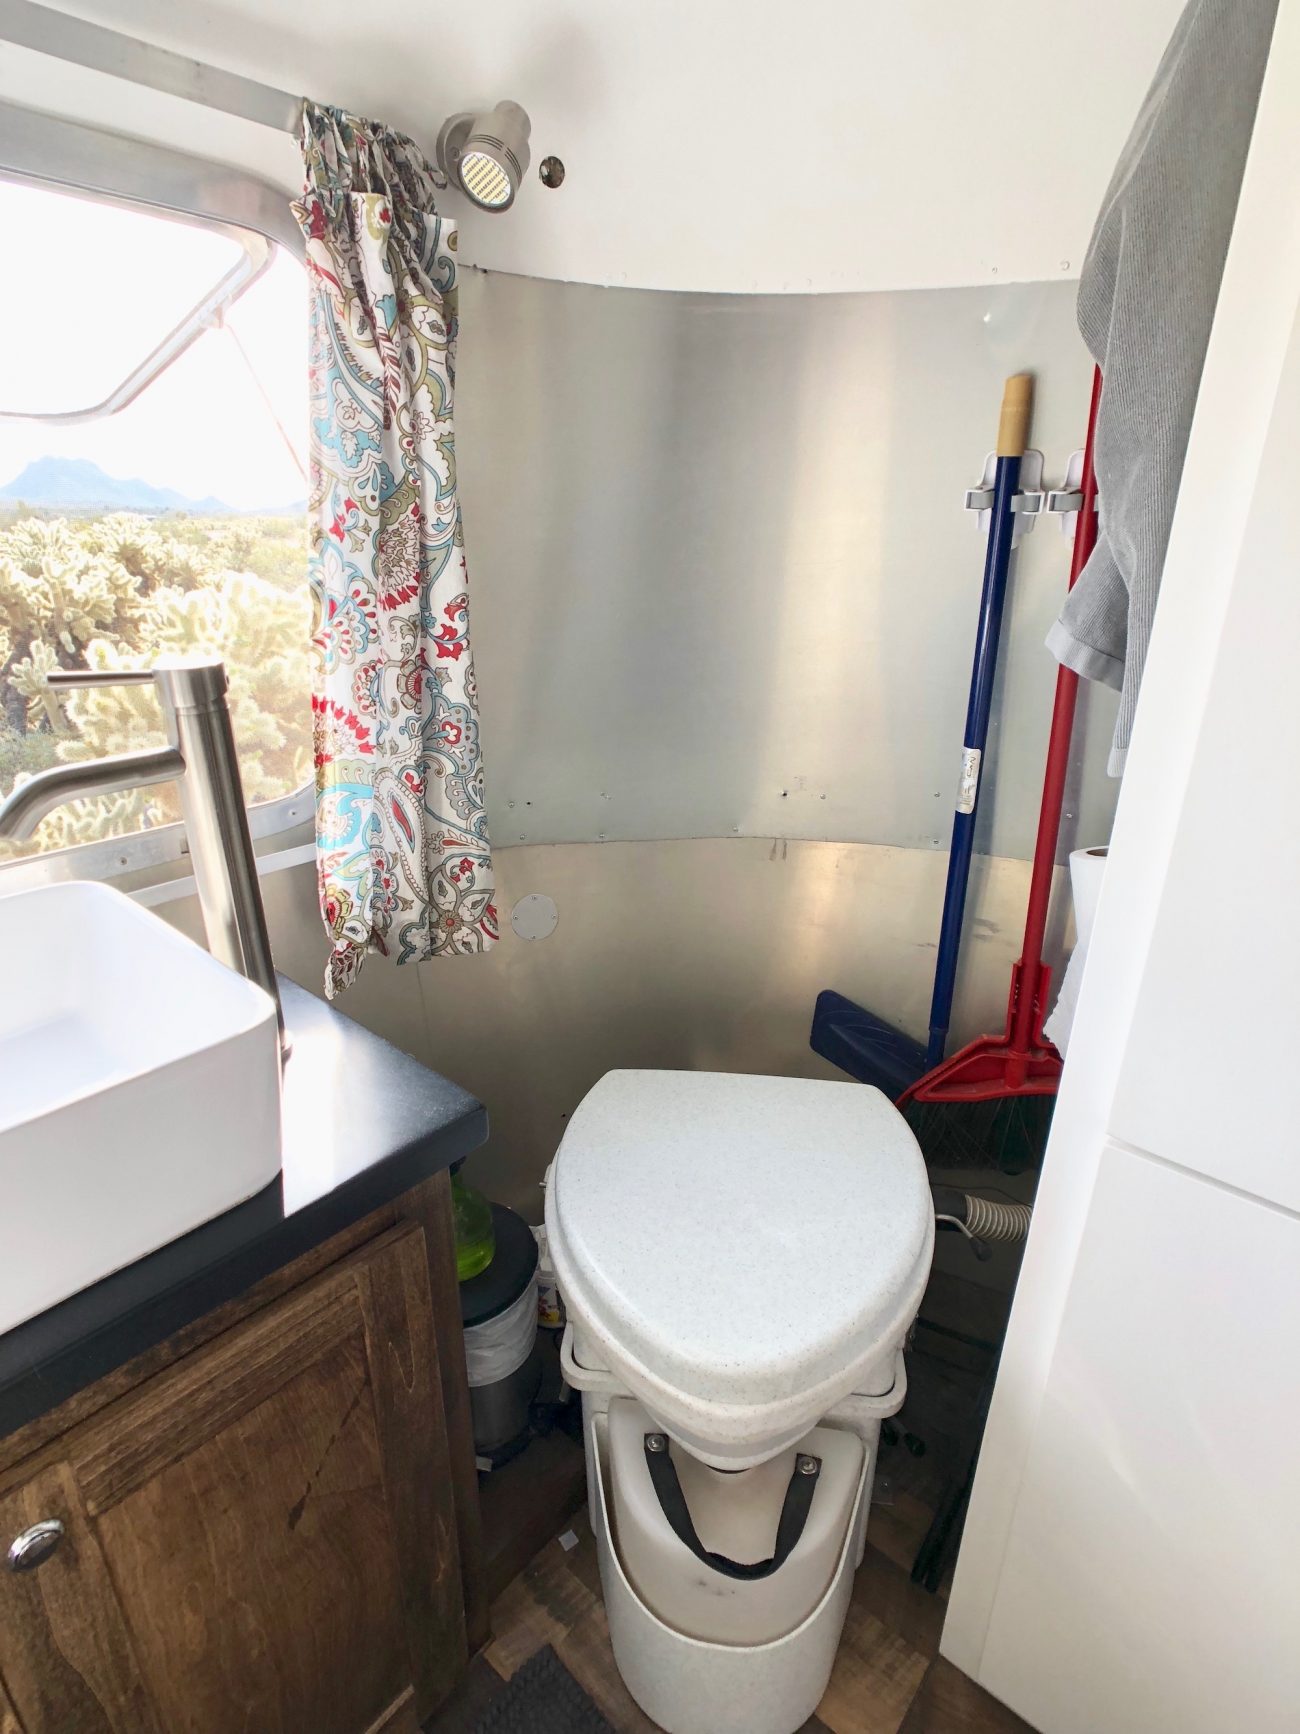
Going with our composting toilet allowed us to turn our existing black tank into a gray tank (yes, we got new tanks). We also added a second gray tank thus doubling our storage. With nearly 40 gallons of gray tank storage we can be out in the wild for quite a while before needing to dump! We have been using our composting toilet for a little over a month now and we can say that it is much better than dealing with a black tank. Thanks for a great product, Nature’s Head!
**UPDATE** It's been over two years using the composting toilet now and we LOVE IT, just wish we would have plumbed the urine diverter to go straight into the gray tank.**
--
Be sure to check out the video at the top of the page for a full walk through of our renovation!
See you down the road!
Our Top 10 Boondocking Locations
Get access to exclusive info about our favorite boondocking spots. Each location covers GPS coordinates, road conditions, locations for water/waste/supplies, things to do, & the even downsides.
These private articles are chock full of beautiful photos and links to spots we don't post about publicly. Enjoy!
Get Access for FreeApparel
Grab a fun, comfy t-shirt & help support our family.


About the Author
Ashley Longnecker is the fiercely independent tattooed and dreaded half of Tiny Shiny Home. She's a woodworker, photographer and maker of delicious baked goods. She loathes schedules and makes every day an adventure.
comments powered by Disqus